Quantcast
Channel: Photography Life
Viewing all 46 articles
Browse latest View live

Macro Photography Lighting Tutorial

$
0
0

For our readers in the Northern Hemisphere, it’s that time of year again — days are hotter, nights are shorter, and the air is stuffier. With the changes in weather, two different creatures are beginning to emerge from their deep winter slumbers: the insect and the macro photographer. As macro photography grows more popular, a key question arises: what is the best way to light a bug’s picture?

Handstand

Nikon D800e + 105mm f/2.8 @ 105mm, ISO 1600, 1/320, f/8.0
Captured with a ring light.

Several different lighting techniques exist for macro photography, with each method having its own rewards and drawbacks. The best lighting method for one situation may not work at all in another, and some common lighting techniques for macro photography aren’t as helpful as they appear.

The most simple lighting method, of course, is to use natural light exclusively, without any flashes or ring lights. On the plus side, natural lighting in macro photography tends to look nicer than artificial light, and, at the right times of day, it can be simply beautiful. However, with the small apertures and fast shutter speeds required for sharp macro photos, natural light sometimes just isn’t bright enough.

On Green

Nikon D7000 + 105mm f/2.8 @ 105mm, ISO 1250, 1/100, f/3.5
Captured in natural light.

To fix this inherent problem, two main solutions exist: ring lights and flashes. Ring lights tend to be cheaper, but they are significantly less powerful. Some argue that they produce flat and unnatural lighting, too. On the other hand, flashes are more versatile (including double and singe flash options), but they are also much harsher and more expensive than ring lights.

Before I continue with the tutorial, I should point out that bugs are bugs, and spring is mating season — now you know.

The post Macro Photography Lighting Tutorial appeared first on Photography Life.


Focal Length in Reverse Lens Macro Technique

$
0
0

Macro, Landscapes and Seascapes are my favorite genres in photography, but as I don’t travel much, I tend to shoot more macro in my backyard. Last time, I wrote an article on high magnification macro photography on a budget, where I pointed out the fact that I use the reverse lens technique in order to achieve high magnification macro shots. The technique really works great if you give it a try and the good news is that you do not need expensive gear to yield beautiful macro shots – a cheap kit lens will do wonders!

Reverse Lens Macro Technique #1

But have you ever thought about why reverse-mounting a lens onto your camera body makes it act like a macro lens? Actually, the truth behind it is that flipping a lens around by itself doesn’t automatically mean converting it to a macro lens. Basically, reverse mounting a lens moves the lens farther away from the camera, giving it the ability to focus at closer distances, which has a similar effect as using a set of extension tubes. Both ends of the lens are not made equally. For an ideal lens, flipping it would make no difference. However, in real lenses, real compromises have to be made. The back part of the lens is typically designed so that it will project the image on a flat plane close to the lens. This allows for certain optimizations in the lens design. Since the front part of the lens is meant to focus on more distant objects, different optimizations can be made there. Simply put, a lens is normally made to take certain field-of-view and project it onto a sensor, which is relatively much smaller when compared to the entire scene. Hence, by reverse mounting a lens onto your camera body, you are simply getting the opposite projection by taking a small scene and projecting it much larger.

Reverse Lens Macro Technique #2

Focal Length

With the reverse lens macro technique, focal length is going to behave in a different manner. While in the case of a real macro lens you need a longer focal length to increase the effective focal length, thus enabling you to focus progressively closer, when using the reverse lens technique, zooming in triggers the opposite reaction: it reduces the effective focal length from your lens to the sensor. This means that a shorter focal length in the reverse lens technique would result in much higher magnification, allowing you to focus much closer to your subject, while a longer focal length would result in reduced magnification. To explain this more clearly, I have captured a couple of macro shots at different focal lengths:

55mm 45mm 35mm
24mm 18mm

From the above shots, you can see how focal length acts in an opposite manner to magnification in our reverse lens macro setup (focal length is inversely proportional to the magnification).

But have you noticed something strange in the above pictures? As my focal length decreases, resulting in greater magnification, my image gradually gets darker and darker, despite the fact that I shot all images at exactly the same exposure settings. Why is that? The reason behind it, is that the lens’ effective f-stop increases, including an increase in depth-of-field, resulting in darker images. I will talk about this in detail in my next article and for now, I hope you found the above information useful!

Reverse Lens Macro Technique #3

The post Focal Length in Reverse Lens Macro Technique appeared first on Photography Life.

Bolt VM-110 Ring Light Review

$
0
0

When I wrote my Macro Photography Lighting Tutorial, I had the opportunity to test a fairly popular product for my section on ring lights: the Bolt VM-110. I was happy with the quality of light from the VM-110 ring light, but I was unimpressed with its low strength. Since ring lights are so commonly-used for macro photography, I decided that it would be worthwhile to review the VM-110 and share some of my thoughts about how well it works for macro photography.

Bolt VM-110 Review 3

1) Specifications

  • Guide Number: 15 feet (4.5 meters) at ISO 100 and 50mm equivalent
  • Effective Range: 5 feet (1.5 meters)
  • Exposure Modes: Manual only, with seven brightness levels
  • Supported Filter Thread Sizes: 49-77mm
  • Number of LEDs: 48
  • Estimated LED Lifetime: 50,000 hours
  • Ring Dimensions (WxHxD): 4.5 x 4.3 x 0.8 inches (114 x 109 x 20 mm)
  • Body Dimensions (WxHxD): 4.5 x 2.8 x 1.4 inches (114 x 71 x 36 mm) 
  • Weight: 7.1 ounces (200g) 

2) Construction

The body of the Bolt VM-110 is made of cheap-feeling plastic, which is attached to a ring of LED lights via a spiral cord. To attach the flash to your lens, the VM-110 comes with adapters ranging in size from 49mm to 77mm. These adapters fit between your lens and the LED ring, securing the VM-110 in place. The body of the VM-110 attaches to your camera using the hotshoe.

The VM-110 comes with a few additional light modifiers, as well: a white ring diffuser that covers the LEDs, as well as similar attachments in blue and orange. The VM-110 is quite a weak flash, though, rendering these modifiers all but useless — you don’t want to lose any light through diffusion.

Bolt VM-110 Review

Nikon D800e + 105mm f/2.8 @ 105mm, ISO 800, 1/250, f/11.0

3) Operation

The VM-110 is quite simple to operate. Aside from the on/off button and the pilot light (which fires a test flash), the only options for the flash are its mode — flash or continuous light — and the strength of the LEDs. You can also set the flash to output on just half of the LEDs at a time, but I have yet to do so in real-world use.

The VM-110 takes four AA batteries, and it lasts for about 400 photos with the flash (less if you are on continuous lighting mode). The battery performance is adequate, but it’s not stellar.

Bolt VM-110 Review 2

4) Usability

The quality of the light from the VM-110 is good — the lighting is very even, although shadows are a bit flat. This is typical of a ring light. However, the strength of the flash leaves quite a bit to be desired.

Even at its absolute strongest, the VM-110 is not bright enough to allow you to shoot at apertures of f/16 to f/22, unless you raise your ISO to 1600 or higher. The VM-110’s guide number is rated at a measly fifteen feet (4.5 meters) at ISO 100 — for comparison, the guide number of the Nikon D3300’s on-camera flash is rated at forty feet.

It gets worse, though. The VM-110 has two options: flash and continuous lighting. The duration of the flash, though, is about half of a second!

This means that you can’t rely on the flash to freeze motion — instead, you need to adjust your shutter speed to compensate. And the faster your shutter speed, of course, the less of the flash’s light that you receive.

In other words, there is little benefit to using the flash instead of the continuous light. The only real reason to do so is to gain some extra battery life — a bit deceptive, in my opinion.

The main use I see for this flash would be night-time macro photography. You can leave the flash on its continuous mode, which works as a flashlight for nocturnal bugs. Although I certainly would prefer it to be brighter, having a continuous light is the only feasible way to take macro images at night. If the VM-110 has a strong point, night photography is it.

Bolt VM-110 Review 5

Nikon D800e + 105mm f/2.8 @ 105mm, ISO 800, 1/200, f/11.0

4) Compared

Ring lights are extremely popular, and there is no shortage of options on the market. However, even the most powerful options suffer somewhat in the strength of their light, especially when compare to traditional flashes.

One of the best ring flashes in terms of output is the VM-110’s older brother: the VM-160. This ring light is almost identical, but its guide number is 70 feet (21 meters) rather than fifteen. This is quite a large improvement, although this flash retains some of the VM-110’s other issues (for example, the duration of the flash also is too long to freeze motion). The VM-160 costs $109 from B&H.

Another ring light worth considering is the Phoenix SmartFlash RF-46N ring light, which has an automatic exposure mode (unlike both the Bolt flashes). However, the RF-46N also is a fairly weak light — its guide number is rated at 46 feet (14 meters) at ISO 100. The Phoenix SmartFlash RF-46N is available for $87 from B&H.

Bolt VM-110 Review 4

Nikon D800e + 105mm f/2.8 @ 105mm, ISO 1600, 1/320, f/14.0

5) Value

Although the Bolt VM-110 has significant issues, at least it isn’t priced as a particularly high-end product. Coming in at $79, it is less expensive than most of its counterparts, although not vastly so.

For what it’s worth, I wouldn’t buy the VM-110 for the flash mode — I would buy a traditional off-camera flash for that purpose instead — but you could make a case to buy it if you need a continuous ring light.

If you are doing macro video, for example, a constant light is almost a necessity. Also, as I mentioned above, you will want a continuous light at night-time so that you can focus on your subject. Still, if your needs are that specialized, you probably wouldn’t mind paying another $30 to get the VM-160 for its extra power. I just don’t see many scenarios where the VM-110 is the best light for the job, even taking price into account.

If you would like to purchase the Bolt VM-110 ring light, visit the link below:

The post Bolt VM-110 Ring Light Review appeared first on Photography Life.

Visualization and Film Photography: Part V

$
0
0

In this final installment to this series, I have chosen to discuss one of my favorite topics in photography: close-ups. My goals with this article are to provide a basic understanding of light and exposure when photographing a subject at close range, the rationale for exposure loss during magnification, and guidance on how to correct for this exposure loss. To illustrate these principles, I will share my own empiric observations, review the pertinent calculations that govern magnification and exposure loss compensation, and discuss select photographs that I have made at close range. Hopefully, this article will help beginning and advanced photographers grasp the physics of light at close range and take command and control of magnification and exposure compensation. Although I crafted this article from the framework of a photographer using traditional close-up and macro equipment (i.e., bellows, extension tubes), the use of an external light meter (i.e., non-TTL metering), and continuous lighting (e.g., natural light, lamps), the tenets and technical considerations for close-up exposure compensation are still relevant to those photographers who prefer automation, TTL metering, and electronic flash. Finally, I will wrap up the discussion by sharing some thoughts on the use of film as a tool for learning the visualization process.

Although a full discussion of close-up and macro photography is far beyond the scope of this article, at the end of this article I have provided references for excellent books that provide comprehensive treatments of close-up photography. Of note, Photography Life contributor Spencer Cox has previously provided excellent articles on close-up and macro photography, Macro Photography Tutorial and Macro Photography Lighting Tutorial, which I highly recommend.

The optics and exposure considerations at very close and macro range are a very interesting subject. Much has already been written on this topic over the decades. Understandably, a discussion of the relevant principles can come across to the beginner as dry, cumbersome, and technically heavy-handed. Fortunately, a beginning or an advanced photographer need not understand all the technical details, since a fair amount of it has no bearing on making a real photograph in real life.

I have read three different textbooks on close-up and macro photography (published in the 1970s, 1980s, and mid-2000s). While each provides a superb and comprehensive treatment of this topic, I have found that the discussion of the rationale for exposure loss at the image plane to be incomplete. Finding reliable literature on the internet on exposure compensation at close subject range can be disappointing, some of which is fraught with deficiencies, and quite frankly, incorrect interpretations. To date, one of the best books on macro photography that I have read that not only covers the problem of exposure loss at the film plane but also the approach to magnification, depth of field, and lighting is Lester Lefkowitz’s “The Manual of Close-Up Photography”, which I highly recommend.

“Don’t be creative when you should be mechanical, and don’t be mechanical when you should be creative.” – Fred Picker

The Problem

If there is one salient challenge in learning and experimenting with close-up and macro photography, it would be net exposure loss at the film plane. This phenomenon determines everything from the choice of subjects to the choice of tools (e.g., the format, camera, lens, film, lighting, outdoor/indoor setting). Exposure loss during the magnification of a subject at close range is inevitable and is based on time honored laws of optics and physics. So, the beginning photographer might ask: *why* is there net exposure loss at the image plane in close-up and macro photography? Well, I am glad that you asked!

Let’s consider two simplified scenarios. First, the time honored overhead transparency projector. Have you ever noticed that by pulling the projector (if situated atop a rolling stand) away from the projecting screen causes the transparency to be magnified on the screen, dims the brightness on the screen, and causes the transparency to blur? And have you ever noticed that after moving the projector away that by turning that big plastic knob to lower the lens causes the projected, dimmed, and magnified image to come into focus? Well, those observations epitomize the behavior of light and exposure in close-up and macro photography. Secondly, consider a basic SLR camera with an attached macro lens. No doubt, a photographer will have noticed that as he/she rotates the lens ring to set a higher magnification, the viewfinder becomes progressively dim. And if that camera happens to be an advanced model with TTL metering, the astute photographer will also have observed that the LED light meter read-out (or analog meter needle in older models) in the viewfinder indicates a progressively longer exposure (i.e., a longer shutter speed) at the given aperture and ISO under the same lighting conditions. Hmm … why a longer exposure?

From a conceptual and technical standpoint, the answer to *why* is straightforward and predicated on two competing physical properties: (1) light *loss* due to the magnification effect and (2) light *gain* due to the close focusing effect. Both effects are governed by the Inverse Square Law, which is the classic law of physics that holds that the intensity of light (energy per unit area) emanating from a point light source is inversely proportional to the square of the distance from the light source at that point in space and time. For example, if you double the distance of a point from the light source, the light intensity at that point drops by one-fourth; conversely, if you halve the distance to the light source, the light intensity at that point quadruples. Pure and simple.

PNG 01

Figure 1: The Inverse Square Law

How is an object magnified in the first place? In order to magnify an object at the film plane, the lens plane must be moved away from the film plane. This is where it all starts. Intuitively, based on the physics of the Inverse Square Law, it should make sense that if light is allowed to travel farther from the lens (i.e., extension) to form the image circle, the size of the image circle should enlarge accompanied by a proportional enlargement of the projected subject at a given plane. It follows that with greater distance between the lens and the film plane, the same amount of light that reflects off the subject and enters the aperture of the lens is now spread out over a larger image circle because the light has traveled farther to reach the film plane. Assuming that the aperture remains constant, since the same amount of light now illuminates a larger image circle, the intensity of light (energy per unit area) on the plane that forms the magnified image is diminished. Furthermore, once the subject is magnified, in order to maintain focus on the subject and thus obey the thin lens equation (more on this later),the lens must be moved toward the subject. Intuitively, based on the physics of the Inverse Square Law, it should also make sense that if the lens is moved closer to the light source (i.e., the subject), the intensity of light reflecting off the subject and entering the aperture of the lens is now greater due to the decreased distance to the lens. Thus, the intensity of light that is destined to expose the film has increased.

In terms of creating the exposure density on the film, the next obvious question becomes: which exposure effect reigns supreme – magnification or close-focusing? It turns out (both experimentally and mathematically) that the loss of light intensity at the film plane due to magnification *exceeds* the gain of light intensity due to close focusing, resulting in a net loss of light at the film plane. For the photographer, this means that magnification automatically results in *underexposure* at the film plane. Pure and simple. If there is one take-away message from this entire article, this is it! Obviously, the ramification is enormous. If the photographer (using traditional manual equipment) does not take action to nullify this light loss, then the result is disastrous: a guaranteed underexposed negative or transparency (gasp!) and a potentially ruined photograph. For those photographers who use automated cameras with TTL metering, this exposure loss is never a concern, because the camera’s light meter will automatically adjust for the exposure loss and render the correct shutter speed based on the set aperture and ISO. But for photographers using cameras with non-automated extension tubes or bellows (or both) where TTL metering is not possible, he/she must use an external light meter and apply an appropriate exposure adjustment in order to properly expose the film.

With this physical rationale set forth for the net exposure loss due to magnification, the immediate practical questions become (1) how much exposure is lost and (2) how does the photographer compensate for it?

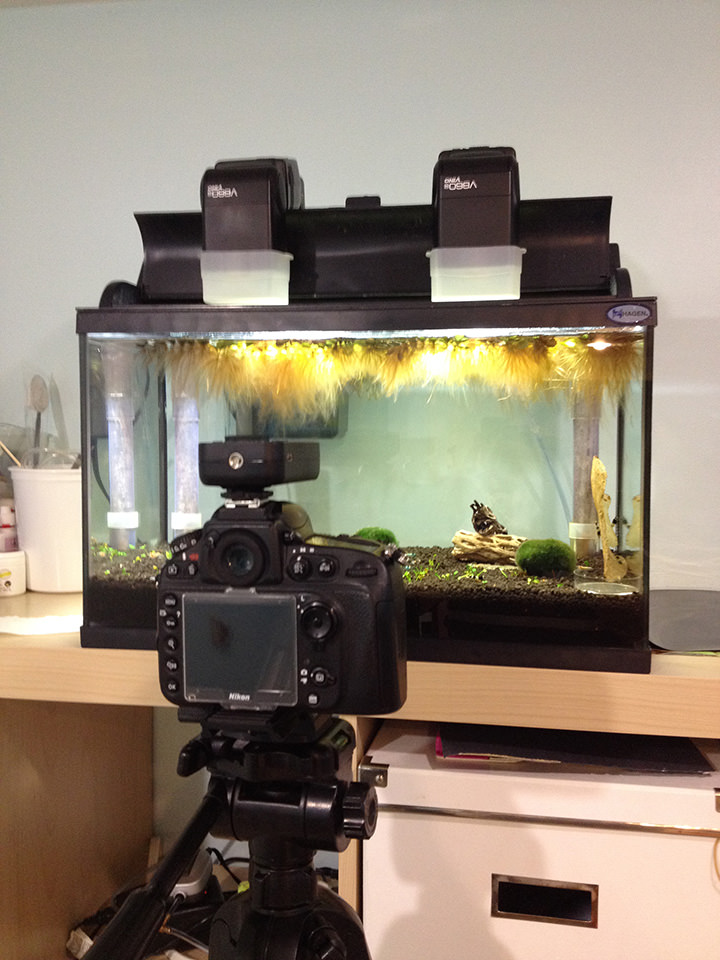
Consider the following demonstration that is not unlike the transparency projector analogy above. Using a large format view camera, I made a series of test exposures under controlled conditions (Figure 2). I manually extended the bellows of the camera to progressively increasing lengths, adjusted the focus on the subject, made test exposures under identical conditions, and qualitatively compared the exposures.

I used an 8×10 field camera mounted with a Schneider G-Claron 150 mm f/9 lens. At infinity focus, this lens only covers the 4×5 format; it will heavily vignette when used with larger formats if it is focused at infinity. I chose this lens by design, for reasons that will be apparent. For my test subject, I used a paper template of a circle (16 cm diameter) affixed to a wall.

Image 01

Test Subject: 16 cm Diameter Circle

I made all exposures using the same light intensity on the wall (EV 11) provided by dual and symmetrical photoflood lamps; the same film (Kodak Ektascan BR/A); the same camera and lens at the same aperture (f/9); and the same shutter speed (¼ second). I exposed the center of the brightly lit circle on Zone VIII for all exposures. I developed all four negatives under the same conditions (“normal” development, 7 minute base).

Image 02

Figure 2: All four negatives viewed together on the light box

  • Figure 2A: Exposure made with the lens focused at infinity (i.e., bellows extended to 150 mm in length) with a subject distance of approximately 5 feet (10x the focal length).
  • Figure 2B: Exposure made with the lens moved away from the film plane from infinity (bellows extended to 170 mm length) followed by moving the camera toward the subject to achieve focus.
  • Figure 2C: Exposure made with the lens moved farther from the film plane from infinity (bellows extended to 225 mm in length) followed by moving the camera more toward the subject to achieve focus.
  • Figure 2D: Exposure made with the lens moved even farther from the film plane from infinity (bellows extended to 300 mm in length) followed by moving the camera even closer to the subject to achieve focus.

Qualitatively, as I extended the bellows to achieve magnification, the brightness of the focusing screen (i.e., the ground glass) progressively dimmed. As you closely study all four negatives displayed together on the light box, what do you notice? Here is what has happened: as the lens is progressively moved away from the film plane by extending the bellows, (1) there is less vignetting; (2) the subject enlarges; and (3) the exposure density on the negative spreads out and markedly diminishes. This rough experiment demonstrates that as the lens is extended from the film plane to magnify the subject (followed by moving the camera toward the subject to achieve focus), the image circle enlarges, the subject is magnified, and there is net light loss at the film plane.

Furthermore, Figure 2 demonstrates that as the lens is extended, there comes a point where the exposure density (i.e., the image circle) covers the entire rectangular image plane. An interesting (and practical) corollary is that a lens that does not have sufficient coverage for a given format at infinity may actually cover the format at very close range (more on this later).

Next, I took the above experiment a step further in an attempt to quantitate the exposure loss. Just before I made the above exposures, I had taken spot light meter readings from the center of the ground glass focusing screen (the exact plane where the film will be exposed) for each lens extension with the focus adjusted (i.e., the lens-subject distance). The results, including the magnification for each lens extension, are summarized in Table 1:

FigureBellows Extension (mm)Subject DistanceGround Glass Center Light Intensity (EV)Magnification
Table 1: Light Intensity at Ground Glass With Lens Extended *and* Subject Focused
2A150 (infinity)5.0 feet6.10
2B1704.2 feet5.213% (1:7.5)
2C2251.48 feet (450mm)5.150% (1:2)
2D30011.8 inches (300mm)4.1100% (1:1)

Based on this experiment, the Inverse Square Law’s net effect from extension of the lens from the film plane (magnification) and moving the lens toward the subject (close focusing) is dramatic: substantial exposure loss at the image plane.

But wait… we can draw more conclusions! In the special case of going from zero magnification (i.e., subject focused at infinity) to 1:1 magnification, we see that (1) the requisite bellows extension (i.e., the extension past infinity focus plus the focal length) equals the subject distance; (2) the requisite bellows extension is equal to twice the focal length; and (3) the net exposure loss appears to be equal to a whopping two stops. The plot thickens…

With these empiric observations in hand, can these results and conclusions be proven mathematically? I am thrilled that you asked that question! The quantity of light lost at the film plane – and thus that which must be compensated during the exposure – and the interrelationships between magnification, lens extension, and focal length can all be elegantly derived from the Inverse Square Law, the time honored lens schematic, the thin lens equation, and basic geometric and algebraic manipulations. The net Exposure Factor is simply the product of the two opposing factors – magnification and close focusing – that result in light loss and light gain, respectively, at the film plane. The Exposure Factor correction can be derived in a few different ways, depending on how one draws the lens diagram, the lens extensions, and whether one chooses to draw similar triangles or circles of illumination. In the interest of brevity (and sanity), you can view the derivation here. The end result is shown in Equation 1:

Untitled70

Eq 1

where M is the magnification. For those photographers who use bellows as their extension devices, in particular within the large format community, this exposure factor is also referred to as the “bellows factor”. As this relationship shows, even a small increase in magnification results in an significant loss of exposure at the film plane. In the special case of a life size magnification (1:1), the Exposure Factor becomes 4x, or two stops of light. Intuitively, this means that since the exposure at 1:1 drops by ¼, the covered image area at 1:1 must be … 4 times bigger than it is at infinity … and the diameter of the image circle at 1:1 must be … twice than it is at infinity … Hmm … This equation is valid for any and all camera formats (e.g., film, digital, 35mm, medium format, large format) using any and all types of extension devices. From a practical standpoint, when the photographer wishes to achieve 1:1 magnification, the shutter speed indicated by the external light meter must be multiplied by a factor of four to obtain the corrected shutter speed that will compensate for the exposure loss at the image plane. Alternatively, the photographer may wish to convert this Exposure Factor into stops of light (see below) and then apply this conversion to the external light meter by adjusting the ISO dial downward (I usually do this) to indicate additional exposure, not unlike how a photographer compensates for lens filter factors by adjusting the ISO dial downward.

Untitled2

It should be noted that there a few additional formulas that are instrumental to the close-up photographer using traditional macro equipment and an external light meter. The derivations may be viewed here. Expressed in terms of the Extension of the lens (already focused at infinity) from the film plane, the formula for magnification becomes:

Untitled1

Eq 2

where EXT is the length that the lens is extended from infinity focus and f is the focal length of the lens. Thus, these are the only two variables that dictate magnification: the amount of available lens extension and the focal length in use. Intuitively, what this expression tells us is that by allowing the light to travel farther between the lens and the image plane, the projected image circle, and thus the  projected subject, will enlarge. In practice, this extension may be achieved with the use of extension tubes, bellows, or a combination thereof. In the case of a camera using solely a bellows attachment directly between the film plane and the lens, we already know that when the lens is focused at infinity, by definition the bellows length equals the focal length. Subsequently, when the lens is extended from infinity to magnify, the bellows length is the sum of the focal length and the extension of the lens past infinity focus (B = EXT + f). With additional algebra, the magnification becomes:

Untitled3Eq 3

In the special case of a life size magnification (1:1), Equations 2 and 3 give us the following practical corollaries, as suggested by the above experiments. The lens (which is already focused at infinity) must be extended from the film plane by a distance that is equal to the focal length. And for photographers using bellows alone, this is equivalent to extending the lens by a bellows length that is equal to twice the focal length.

Expressed In terms of the bellows length, with more algebraic manipulations the Exposure Factor correction becomes:

Untitled6

Intuitively, what this expression tells us is that by allowing the light to travel farther between the lens and the image plane to magnify, the exposure loss to be compensated  varies with the square of that distance (i.e., the extension). The Inverse Square Law!

Finally, for those photographers who prefer to use stops of light when compensating for exposure loss, the Exposure Factor can readily be converted as follows:

Untitled7

To summarize, a photographer needs only one (or two) variables to calculate the Exposure Factor: the desired magnification using Equation 1, or the lens extension available and the focal length using Equation 2 or Equation 3. Ordinarily, a close-up photographer (especially in the field) does not need to calculate a precise magnification. I usually don’t, unless in the special case where I wish to make a 1:1 photograph. If there is one salient take home message from both the empiric observations above and these formulas, it is that lens extension (away from the film plane) is responsible for both magnification and exposure loss and that the physical rationale for these phenomena is based on the Inverse Square Law.

In numerous other publications on exposure compensation in close-up photography, you will invariably come across a discussion of this problem conceptualized and mathematically expressed in terms of the “effective aperture”, “effective f-stop”, and “effective focal length” followed by a rather boring discussion of pupillary magnification. What these discussions refer to is that due to the loss of exposure at the film plane, the actual physical lens aperture behaves “as if” it has a smaller working aperture, “allowing less light” to expose the film. Of course, the physical size of the aperture does *NOT* change (although the calculated effective f-stop does), and the amount of light passing through the aperture is constant (unless the photographer physically changes the aperture or the intensity of the light source). If the photographer prefers this approach, then he/she may calculate the “effective f-stop” (see derivation and sample calculation here) and use that value to set the external light meter to obtain the corrected shutter speed for the exposure.

Although the concept of “effective aperture” can be (somewhat) helpful for rationalizing exposure loss at the film plane, potentially it may lead to confusion in understanding the true rationale for exposure loss (it’s the Inverse Square Law!) as well as a pointless fixation on aperture “equivalencies” and is best avoided, in my humble opinion. Remember: the reasons for the exposure loss are that light must travel farther to the image plane and the light intensity falls off precipitously with the square of the lens extension, not because the aperture physically gets smaller. Furthermore, if for some reason the photographer intends to use the Exposure Factor to calculate a new working aperture to compensate for the light loss (i.e., physically opening up the aperture in direct proportion to the Exposure Factor), then two problems readily occur: loss of depth of field with a wider aperture (which is already a problem as it is in close-ups) and complicating the problem of compensating for reciprocity departure for a long exposure. To simplify the conceptualization and approach to compensating for the exposure loss, I would recommend to avoid the “effective f-stop” in the Exposure Factor calculation and stick to the lens extension/bellows or magnification – real physical properties that are based on the Inverse Square Law – to obtain the corrected shutter speed.

The mathematical formulas for exposure correction and magnification notwithstanding, an additional practical consideration is to know in advance the subject-lens distance threshold for which exposure compensation must be given. The practical “rule of thumb” is that for subject distances that are greater than nine times the focal length of the lens, no exposure compensation is needed. For subject distances that are at, or less, than this threshold distance, exposure compensation must be applied. You can view the mathematical derivation of this rule here. Essentially, this rule is based on the need to compensate for at least +⅓ stop additional exposure due to light loss from magnification and corresponds approximately to a minimum magnification of 12.5%, or a 1:8 reproduction ratio. The renowned and highly accomplished photographer, and one of the contemporary greats, Howard Bond, refers to this threshold distance as the “close-up triggering difference” in his article, “Exposure Corrections for Close-Ups”. Personally, I keep a check-list on hand of these threshold distances for all of my macro lenses for reference. When I am at, or within, this threshold distance, I automatically grab my tape ruler to measure the bellows length to calculate the exposure compensation.

There are a few other interesting (and practical) corollaries that are beyond the scope of this article but are worthwhile to mention briefly. Based on the thin lens equations for magnification and on real life photography, the choice of focal length can exert a powerful influence on how a photographer can achieve magnification based on his/her working restrictions and available tools on hand. For example, if the photographer prefers to operate at a set “working distance” (closely approximated by the subject-lens distance) and does not wish to compromise this distance for technical or aesthetic reasons, then more magnification can be attained by simply using a lens of a longer focal length, provided of course, the photographer has the means to increase the lens extension. Alternatively, if the photographer has a limited amount of lens extension with which to work but does not care about the working distance, then increasing magnification can be achieved by using a lens of a shorter focal length, but this of course would necessitate moving the lens even closer to the subject. For those interested, you can see a mathematical rationale here. Furthermore, although depth of field in close-up and macro photography merits an article in its own right, many beginning close-up photographers may be surprised to learn that at the same magnification and at the same aperture, depth of field is independent of the focal length. That is, at the same magnification and aperture, a long focal length lens and a short focal length lens have the same depth of field. For real (and superb) examples of these interesting scenarios, I would recommend reading Lester Lefkowitz’s aforementioned text.

“Don’t be creative when you should be mechanical, and don’t be mechanical when you should be creative.”

Ok, enough of the empiric and theoretical discussion, let’s turn to a few examples of exposure compensation in close-up photography. In the iPhone scout shot below, I chose this fern to study and photograph at close range. What garnered my attention with this subject were the structure of its leaves, its soft shadows, and the potential for capturing fine detail at close range. This garden was enclosed within a shaded area. Under mostly clear skies in the afternoon, the scene was receiving a good amount of reflected light off concrete walls around the enclosure. The low-moderate contrast light lent itself well to capturing the lovely tonality and textures on the leaves.

Image 03

iPhone 4S @ 4.28mm, ISO 50, 1/20, f/2.4

In order to strengthen the contrast between the fern and the background soil, I sought to reduce the detail in the soil and darken it and simultaneously to lighten the tones of the fern leaves. To these ends, I used a relatively mild black and white contrast filter, the yellow Wratten #8. As discussed in Part II, a given color contrast filter strongly passes light whose wavelength lies adjacent to the color of the filter on the “color wheel”, thus allowing more exposure of that wavelength on the film. The yellow filter will pass a fair amount of yellow and green light to the film plane; if the exposure is sufficient, this passage can lighten the tones of the fern leaves. In general, out of all the wavelengths of light, many panchromatic black and white films are least sensitive to green light; if the objective is to lighten green foliage with a yellow filter, then the photographer would be wise to allow for ample exposure under the given lighting conditions. As discussed in Part IV, since yellow filters block a fair amount blue light, which is responsible for illuminating shadows via skylight, they can be used to darken, or close, shadows. The use of a stronger filter, such an orange or a red filter, would have been too harsh; although either would have blocked substantially more blue light and closed the shadow detail in the background soil to a much greater degree, each would have darkened the green values – not lightened them – due of the position of red and orange on the color wheel.

PNG 02

Wratten #8 Yellow filter

For my camera and lens, I chose the Cambo SC 4×5 monorail view camera and my “go-to” lens, the Fujinon-A 240mm f/9, which is a compact, versatile, and sharp lens that can be used as a long-normal lens in the 4×5 format, a wide angle lens in the 8×10 format, and as a macro lens in either format. For film, I chose Ilford Delta 100 panchromatic black and white film.

As I do with all of my photographs, I used a composing card to study and select a composition. After I composed the subject to my liking, the framing suggested a magnification between 1:1 and 1:2 (a precise magnification was not necessary for this shot). To control depth of field, I closed the aperture to f/16⅓.

For metering, I again heavily relied on the Zone System. I spot metered one of the leaves on Zone V. Even though the long exposure would have automatically increased contrast by virtue of the high values receiving more exposure than the low values, I pre-visualized more contrast on the negative. Thus, in order to boost the high values on the leaves to expand the contrast range (i.e., negative expansion), I requested extended development of the film (N+1) from my lab technician.

Based on the subject-lens distance, I was well within nine focal lengths of my lens, meaning that I would need to compensate for exposure loss due to magnification. The bellows extension measured 41 cm, which gave me an Exposure Factor correction of 2.91x, which when converted to stops of light (and slightly rounded up to the nearest one-third stop) gave me approximately +1⅔ additional stops of light loss at the film plane for which to compensate. As a reminder, because negative film has a wide positive exposure latitude, slightly rounding up to the next one-third stop will have no adverse impact whatsoever on the exposure. Incidentally, the magnification was approximately 70%, or a 1 to 1.41 image scale, but I did not need to know this in advance.

With a chosen a film exposure index of 80 and the +⅓ stop filter factor for the Wratten #8, I dialed in these factors into the ISO dial of my spot light meter. The metered spot gave a shutter speed of 2 seconds at f/16⅓. Applying the Exposure Factor of +1⅔ stops to the metered shutter speed gives a corrected shutter speed of 6 seconds. Finally, accounting for the film reciprocity departure, the final shutter speed was 7 seconds (≈ +⅓ additional stop).

Upon studying the negative on the light box, the negative yielded good contrast, adequate sharpness, and good resolution. I personally scanned the negative on the Epson V850 and cropped the image to a 7:5 aspect ratio. The final image yielded exactly what I had visualized in my mind, visualized though my composing card, visualized on the ground glass, and finally on the negative: a pleasant tonal range with interesting structure and fine detail to explore.

Image 04

Cambo SC 4×5, Fujinon-A 240mm f/9, Ilford Delta 100
1:1.41, Wratten #8 filter, N+1 development

For this next close-up example, I chose this palm tree to study and photograph. At first glance, I thought the subject might be too prosaic to explore, but as I studied it with my composing card, I found that the back-lighting to the right of the tree was creating alluring contrast and revealing interesting textures on the bark, all of which made this scene too good to pass up.

06

iPhone 4S @ 4.28mm, ISO 50, 1/192, f/2.4

First, I used an SLR camera to make a photo at a conventional range (1:10 image scale) in order to capture more of the length of the subject in a natural perspective. At a 1:10 reproduction ratio, which corresponds to a subject-lens distance of 11x the focal length, the exposure loss at the film plane is negligible and thus no exposure compensation is needed.

Image 06

Mamiya 645AF, 120mm f/4 AM, Kodak Tri-X
1:10, No filter, Normal development

For the next photograph, I used a view camera to make a magnified image of the same palm tree. Here, I used the Ikeda Anba 4×5, the Schneider G-Claron 150mm f/9, and a macro focusing rail, which can be an instrumental tool when adjusting fine focus at close-range. After setting up the tripod at the approximate subject distance, selecting a composition on the composing card and refining it on the ground glass, and using the focusing rail to adjust the focus, I selected a metering, exposure, and development strategy to give me that which I visualized on the final image: moderate contrast and tonality, fine detail and texture, and conveyed with an overall sense of abstraction.

I closed the aperture to f/22 to control depth of field. I metered the low values indicated by the “red circle” in the iPhone scout shot above and placed those on Zone III. The highest exposure value, indicated by the “white circle”, fell roughly in Zone VI. I desired to expand the contrast range of the scene from Zone III-Zone VI in the actual scene to Zone III-Zone VII on the negative, so I extended the development of the film by N+1.

The subject distance of 2 feet was well within nine focal lengths. The lens extension (bellows length) was 19 cm. The Exposure Factor was 1.6x, or approximately +⅔ stops. Instead of metering first and then applying the Exposure Factor to the shutter speed as I did in the previous example, I decided to dial in this factor into the ISO dial and then meter the scene. I used no filters. The metered spot gave a shutter speed of ⅓ seconds. At this shutter speed, film reciprocity departure is not applicable. I personally scanned the negative, made just a slight adjustment to the contrast in Photoshop, and cropped the image to a 5:4 aspect ratio.

Image 07

Ikeda Anba 4×5, Schneider G-Claron 150mm f/9, Ilford HP5 Plus 400
1:3.75, No filter, N+1 development

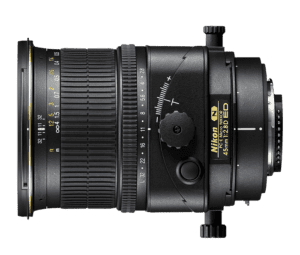
For this next close-up photograph, I chose a handful of rock salt to photograph at 1:1. Here, I chose a much smaller format, a 645 SLR camera, Kodak Tri-X panchromatic black and white film, and a dedicated macro lens. Like many modern SLR macro lenses, this particular lens has engraved magnification ratios on the barrel that allow the photographer to quickly and accurately set a specific magnification. Although this automated camera has TTL metering, I never use it. As I do with all of my cameras, whether manual or automated, I use an external hand held light meter for precise command and control of metering. For the lighting, I used a one photoflood lamp to the left and a silver reflector to the right for modest fill. With the lens barrel extended to 1:1, the focus adjusted with the macro rail, and the lighting set, I applied a two-stop exposure factor correction to my spot light meter, metered the scene, and then adjusted the shutter speed for reciprocity departure.

Image 08

Mamiya 645AF, 120mm f/4 AM, Kodak Tri-X
1:1, No filter, Normal development

For this next photo, I chose to make a table top close-up of a bouquet of flowers. I chose an 8×10 format with Ilford Delta 100 panchromatic black and white film. As I had demonstrated and briefly discussed earlier (see Figure 2A), the macro lens that I used for this photo, the G-Claron Schneider 150mm f/9, covers the 4×5 format at infinity (format diameter 165 mm, image circle 189 mm at infinity) but does not have enough coverage for the 8×10 format (format diameter 325 mm). However, as discussed above in the empiric and mathematical analyses, as the lens is extended to magnify, the image circle of the lens significantly enlarges. As I alluded to earlier, by definition, at 1:1 the image circle that the lens normally covers at infinity *doubles* in diameter. (See derivation here). Thus, at 1:1 the 150mm G-Claron has an image circle of 378 mm, enough to cover 8×10. For lighting, I used three photoflood lamps and two silver reflectors for fill (soft light from hard light!). Even though my magnification for this particular photograph was only 1:2, the lens still had enough covering power to make the photo, albeit with a tiny amount of vignetting at the corners, which was negligible and easily cropped off (see Figure 2C). Now, whether a given lens can perform well at both infinity and close range is another matter entirely. It just so happens that the G-Claron series represents a lens line-up that is optimized for 1:5 to 5:1, but they can also cover very well at infinity. And as this photo illustrates, the resolution and sharpness of this tiny lens at close range are quite good.

Image 09

Tachihara 8×10, Schneider G-Claron 150mm f/9, Ilford Delta 100
1:2, no filter, N-1 development

Finally, for this table top photograph of sunflowers, I again chose a smaller format, a 645 SLR camera, to make a modest 1:8 reproduction. At a subject distance of 9x the focal length, the exposure compensation for magnification was +⅓ stop. For the lighting, I used two photoflood tungsten lamps along with two silver reflectors for fill and strategically positioned them to deliberately create high contrast with deep shadows. Even at such a modest close range, what I enjoyed about this image was the strong contrast from this particular light set-up and the fine detail on the leaves and stems. Incidentally, the Mamiya 120mm f/4 AM manual focus lens is a *wickedly sharp* and contrasty macro lens that I highly recommend for medium format users.

Image 10

Mamiya 645AF, 120mm f/4 AM, Ilford Delta 100
1:8, No filter, N-1 development

Conclusions

The approach to compensating for exposure loss at the image plane due to magnification of a close subject is straightforward and is based on time honored and well understood principles of physics and optics. Magnifying a subject at close range requires extending the lens from the film plane. Increasing magnification, and thus with increasing lens extension, brings a predictable loss of exposure at the image plane. Both the loss of exposure density (light intensity per unit area) and the increase in magnification with greater distance between the lens and the film are based on the fundamental principle of light fall off due to the Inverse Square Law. Due to the exposure loss, in order to achieve a normal density on the film the photographer using manual non-automated equipment must compensate for it by applying an equal amount of additional exposure to that indicated by a light meter. The exposure correction is directly proportional to the square of the lens extension in use and directly proportional to the square of the magnification. That “square” is there for a reason . . .

Regarding the use of film as a tool in learning to visualize and make a good photograph, well, an entire article can surely be dedicated to this. Here are my thoughts. There are a plethora of aesthetic and technical reasons why a photographer would choose film as a tool and artistic medium. Many film photographers cite the emotion that film evokes, the look and feel of film, its color, quality, resolution, the wide variety of tools and formats from which to choose, the unique qualities of film stocks, and so forth, as to why they gravitate toward it. I actually share all of those sentiments, but those are not the reasons why I use film as a canvas for my own style of visualization. If there is one common denominator, one attribute, that epitomizes the beauty of film in visualization, it would be the *process*. As I hope this series of articles illustrated, the process of using film to learn and master visualization encompasses many considerations and behaviors that lend themselves well to constructing a photograph. Chief among these behaviors, shooting film makes the photographer slow down in just about every aspect of making a photograph, from visualizing the image in the mind, to exploring and waiting for the right light and emotion to materialize, to crafting the composition, to making the exposure, to developing the film, and to making a print. Every step along this aesthetic and technical journey involves, if not demands, some degree of forethought. In other words, film hones the photographer to systematically take command and control of every step. Period. I would argue that a more deliberate and contemplative approach to visualization should lead to the creation of stronger and more compelling photographs. Indeed, the contemplative film photographer makes fewer photographs, but those fewer attempts have more purpose in them. Being slow and deliberate is a positive thing for growth as a photographer and as an artist. Why the rush?

Further, in an uncanny manner the closing of the shutter and the wait to see the results immediately divorce the film photographer from the emotion, maybe the bias, of the moment so that when the time arrives for viewing the results on the light table, the photographer should have a clearer mindset to be a more objective critic of his/her work. That delay in seeing the end product is invaluable. The fun, the joy, and the triumphs of shooting film notwithstanding, the mistakes made in shooting film can be humbling, but those, too, are a good thing in the learning process. The permanence of the format, the ability to hold it in your hands and view both the triumphs and flaws in your decisions and technique, exert a powerful impact on this process. Since I started film photography 4 years ago this month, I have shot dozens of rolls and sheets of film and have kept every single negative and transparency – both the good and the bad. I am not ashamed to admit that I have made a plethora of bad exposures on film – bad light, bad composition, and bad technique. Yet, I am resolute in turning my poor decisions to my advantage. I can make this happen because I never discard my film; and I never discard my bad photographs. The film, as a record, is always there with the photographer. There is no hiding from the truth . . . Periodically, as an exercise in humility and in the spirit of honing my skill in visualization, I force myself to study my bad negatives all over again to review my mistakes and to refine my process of making a good photograph. Trust me, studying a bad photograph well after the fact – dissecting what was weak about it, questioning what I was feeling and seeing at the time – can be a humbling, unforgiving, and worthwhile experience all in one. More importantly, whether the exposure was good or bad, viewing it after being separated in space and time from the exposure can provide more motivation to ponder the meaning of the photograph and why the photographer made it. And that is what film ultimately does in this whole process: it keeps the photographer honest with himself.

Certainly, as a tool film is not well suited to every photographer’s style, comfort level, patience, or skill set; yet for the photographer who relishes the contemplative and deliberate thought process of constructing a photograph, I believe it is a tool that is worth exploring at least once in his/her life.

I hope you have enjoyed this series on film photography and visualization. Special thanks once again to Northcoast Photographic Services for providing the film development for these images. Great job, Scott! In future contributions to Photography Life in 2016, I envision sharing more experiences with light, composition, and various tools used in general photography (including travel photo essays from Southern California and specific film reviews) to help my colleagues out there, whether novice or advanced, young or old, to learn the art of this wonderful craft.

References

  1. The Manual of Close-Up Photography”. Lester Lefkowitz.
  2. Close-Ups in Nature”. John Shaw.
  3. Close-Ups and Macro”. Robert Thompson.
  4. Black and White Reciprocity Departure Revisited”. Howard Bond. Photo Techniques Magazine.
  5. The Negative: The Ansel Adams Photography Series 2”. Ansel Adams.
  6. The The Zone System Revisted Part I”. Popular Photography Magazine. Ansel Adams.
  7. The Zone System Revisted Part II”. Popular Photography Magazine. Ansel Adams.
  8. Gimme A Break”. Popular Photography Magazine. Russel Hart.
  9. Zone VI Workshop”. Fred Picker.
  10. Beyond The Zone System”. Phil Davis.
  11. Scanning Tips”. Kenneth Lee Gallery
  12. View Camera Magazine
  13. Principles of View Camera Focus”. Harold Merklinger.
  14. View Camera Focus and Depth of Field: Part I”. Harold Merklinger.
  15. Technical Books on Photography”. Harold Merklinger.
  16. Check List for View Camera Users”. Howard Bond.

The post Visualization and Film Photography: Part V appeared first on Photography Life.

Looking Through Your Archives

$
0
0

As a photographer, it is easy to feel excited about the newest images that you take. After returning from an amazing shoot, there is nothing more fun than loading your photos and sorting through them for the first time. This initial thrill, though, doesn’t always last. If you took hundreds – or even thousands – of photos at a time, sorting through your work can become a tedious task. Sometimes, too, you just aren’t in the right frame of mind to be looking through photos; perhaps you are distracted or simply tired. Whatever the reason, it is deceptively easy to overlook a high-quality photograph if you aren’t paying enough attention – I speak from experience! The only way to fix the problem is to look through the old photos that you have taken. In this article, I will discuss some of the important reasons to revisit your archives from time to time. Along the way, you may find beautiful shots that you never noticed before.

Sky Point

NIKON D800E + 24mm f/1.4 @ 24mm, ISO 100, 1/8, f/16.0

1) Photos You Overlooked

Some of the best photographs in your archives may be the ones you never considered in the first place. On more than one occasion, I have taken hundreds of photographs during an incredible sunrise or sunset, and I decided to load them into Lightroom immediately after the shoot. If I am short on time, I find myself scanning through the photos without giving each one its due consideration. In such cases, it is quite easy to overlook some of the better shots.

No matter how carefully you sort your photographs, you are almost certain to miss some of the good ones along the way – especially as you take more and more images each year. For me, this is especially true with macro photography; sometimes, I take hundreds of macro images in just a single shoot. When I sort through this many photos at a time, it is remarkably difficult to give each shot the attention that I should.

Blade

NIKON D800E + 105mm f/2.8 @ 105mm, ISO 1000, 1/320, f/3.2

The photo above, for example, went unnoticed for almost a year in my archives. Indeed, I had taken almost four hundred images from the same morning; my only interaction with this shot would have lasted a couple seconds. It is not one of my all-time best macro photos, but I think it is a perfectly worthwhile shot. Certainly, it shouldn’t have been left in an obscure corner of my Lightroom catalog.

Like many photographers, I believe, I also have a habit of seeing my images comparatively rather than objectively; if a good photo is near a great one, it is easy to overlook the first. (At the same time, this means that I sometimes feel pressured to love at least one photograph from every shoot, even if none of them are any good.) So, on the rare occasion that I see a truly incredible sight, I find myself dismissing more of the resulting photos than I should.

Volcanic

NIKON D800E + 105mm f/2.8 @ 105mm, ISO 100, 1/8, f/16.0

The photograph above is the perfect example. I actually think that this is one of my better photographs from Iceland, but I didn’t notice it at first – because, just a few minutes later, I took one that I like even more. Although the subjects of the two photos were completely different, the simple fact that I took them so close to one another made me biased against this first image. By looking back from a later date, though, I had a better perspective on the photos I took that day; ultimately, it was clear that this shot was almost as worthy as the second.

All of this is to highlight the importance of revisiting your older images. As you become a better photographer over the years, your good-but-unnoticed images will stick out more strongly than they did before. Plus, you will see your old photos with a new eye; you no longer have the emotional biases – positive or negative – that you did before. No matter how closely you consider your photos, there are bound to be some good images that you didn’t notice at first.

2) Forgotten, High-Quality Images

By the same token – although, in some ways, even more frustrating – are the photos you did recognize the first time, but then forgot to label as such. This is more likely to happen if you use a haphazard organizational structure; at the same time, though, there is no foolproof system.

Personally, to mark my better photographs, I star my images as they import to Lightroom. Then, I move the four- and five-star images into a separate collection to review later. Although this system is generally successful, it doesn’t always work. Sometimes, for instance, I hit the wrong key, or I don’t place an image in the proper collection. These are simple mistakes, but they sometimes go unnoticed; as a result, I lose track of some images that I liked.

I remember one instance in particular: a leaf photograph that I actually printed, then forgot to move to any of my Lightroom collections. I completely forgot about the photo until I found the print in an old folder! Even though I clearly liked this shot, it had gotten buried under the weight of all my new images.

Neon Leaf

NIKON D7000 + 24mm f/1.4 @ 24mm, ISO 100, 1/8, f/16.0

I didn’t have the best file structure at the time I took this photo, which is the main reason why I lost it so easily. This is not an unusual situation for other photographers, either. Even if you have a top-quality organization system right now, has that alway been the case? Some of your oldest photographs may not have been sorted in any coherent, logical way. This is why it pays to look through your archives! You may have taken great images a few years ago – and even known it at the time – but simply forgotten to move them somewhere that you can find today.

3) Making New Edits

If you spend enough effort over time, your post-processing skills are certain to improve. Perhaps you learn new tips and tricks in your editing program, or you may become better at judging how much saturation an image needs. Is it not possible, then, to edit some of your old photographs again, knowing everything that you do now? For me, in more than one case, I have taken years-old work and processed it into something far better – a photo worth displaying, rather than a throwaway snapshot. Take the image below, for example:

Old Woods 2

NIKON D7000 + 17-55mm f/2.8 @ 17mm, ISO 100, 6/10, f/8.0

This is one of my better photos from a trip to California, but it didn’t start that way. Take a look at the original version below:

Old Woods

NIKON D7000 + 17-55mm f/2.8 @ 17mm, ISO 100, 6/10, f/8.0

It is easy to see the changes I made to this photograph. I cropped to the left-hand side, for one, and I converted the image to black and white. I also made some shadow and contrast adjustments, although those were more minor edits. With my current post-processing knowledge, it wasn’t hard to get the finalized version; back when I took the image, though, I was lost.

At the time, I found it hard to look at a photograph in Lightroom and see the possibilities that it held. For this photograph, I couldn’t think beyond the literal, uncropped, full-color version. It wasn’t that I had glossed over this photograph at first; I simply didn’t realize that it held any potential. As my post-processing skills grew, though, it became easier to see how I could make this photo much better without too much effort.

It is rare, perhaps, that a good image can be coaxed out of a mediocre original. But if you shoot thousands of photographs each year, it is bound to happen more than once. Start by looking at your old, mid-level images – photos that already had potential, but perhaps ones that you didn’t edit to perfection. See if you can crop or otherwise adjust those old shots in ways that you hadn’t considered before.

I also have found it valuable to look back at your old, high-quality photographs just to make sure that they are edited to their best. Ask yourself, would you process this photo exactly the same today? If not, what would you do differently? By editing your old photos – even ones that were never lost, per se – you can help your portfolio maintain a modern, cohesive appearance.

Conclusion

In the end, for almost every photographer, looking through your old images is completely invaluable. While writing this article, even, I found more than a dozen photos in my archives that I had forgotten over recent years; now, I have more material for my website and other articles. No matter how good you are at recognizing high-quality images, nobody is perfect. Over time, you are certain to overlook a handful of the photos you take. By going through your archives, though, you can see the photos that slipped through the cracks. In doing so, you may discover a wonderful image that you never noticed before.

The post Looking Through Your Archives appeared first on Photography Life.

Tamron SP 90mm f/2.8 Di VC USD Macro Announcement

$
0
0

Along with the SP 85mm f/1.8 Di VC USD, Tamron also released the SP 90mm f/2.8 Di VC USD Macro lens. Unlike the newly designed 85mm f/1.8, this one is an update to the existing 90mm f/2.8 Macro lens that has been manufactured for a number of years now.

Tamron SP 90mm f2.8 Di VC USD Macro

While the lens has not gone through any serious optical changes, Tamron completely changed the exterior shell of the lens to match with the new SP line and updated its electronics in order to make it compatible with the new Tamron USB dock. In addition, the filter thread of the lens has been changed from 58mm to 62mm.

To see additional information about this lens, check out the Tamron SP 90mm f/2.8 Di VC USD Macro page of our lens database.

Official Press-Release

Here is the official press-release from Tamron:

February 22, 2016, Commack, New York – Tamron, a leading manufacturer of optics for diverse applications, announces the launch of the SP 90mm F/2.8 Di VC USD 1:1 MACRO (Model F017). The new 90mm macro has been enhanced with advanced features and builds upon a legacy of superior optical performance. XY-Shift compensation has been newly added to reinforce VC functionality, further improving image stabilization from infinity to macro. Advancements in USD control software have also increased AF focusing speed, and optimally fine-tuned for various framing conditions. In addition, a high standard of Moisture-Proof and Dust-Resistant Construction has been added to prevent intrusion of dust or moisture, and a highly durable Fluorine Coating has been applied to the top element surface to prevent condensation and repel smudge-causing substances. The lens will be on sale in the U.S. starting in March 2016 in Canon and Nikon mounts (the Sony mount to be launched at a later date). The on-sale date in the USA is February 25, 2016 at an approximate price of $649.

PRODUCT HIGHLIGHTS
1. Built upon the outstanding optical performance of the legendary Tamron 90mm Macro

Inheriting the optical design of the previous 90mm Macro lens (Model F004), the new Model F017 delivers the same excellent resolving power and remarkably soft background blur effects (bokeh). The advanced construction includes one LD (Low Dispersion) specialized glass element that maximally limits the dispersion properties of light and two XLD (eXtra Low Dispersion) glass elements that correct dispersion properties to an even greater extent. The special elements optimally compensate for on-axis and lateral chromatic aberrations from macro shooting range to infinity. Furthermore, the design ensures the best imaging performance at any range by adopting the Floating System that shifts the location of a group of elements to the best possible position as the focusing group travels relative to shooting distances. From 1:1, life-size close-ups to the most distant horizon, this new 90mm Macro lens achieves outstanding image quality.

2. Optimized for spectacular background blur effects (bokeh)

Earlier models of Tamron’s 90mm macro lens received high acclaim for their spectacular blur effects, and the new 90mm macro builds upon this legacy. To continue this commitment, thorough optical simulations were conducted. Careful examinations were performed to minimize any blurring with a doubled image appearing for a single line because that phenomenon has a considerably negative impact on background image quality. As a result, the lens achieves both sharp, vivid images and spectacular background blur effects. This combination is highly prized by portrait photographers.

3. VC enhanced with shift compensation

An accelerometer has been integrated into Tamron’s highly accredited VC (Vibration Compensation) to compensate for shakes on the x-y plane. In unison with a gyro sensor, the accelerometer detects and enables motion compensation for camera shake, providing maximum efficiency in image stabilization optimized for all distance ranges from infinity to macro.

4. USD actuator maximized for macro photography is fast, accurate and quiet

The control software program for the USD (Ultrasonic Silent Drive) actuator has been revised to provide substantially improved focusing speed and accuracy when using AF. The USD quickly addresses any out-of-focus condition caused by back-and-forth camera movement (which commonly occurs during macro photography) ensuring better results when shooting at close range.

5. Moisture-Proof and Dust-Resistant Construction

Special seals protect areas of possible ingress surrounding switches, and the boundary between the focus ring and the lens barrel. These provide stronger protection against the intrusion of dirt, dust and moisture compared to the Moisture-Resistant Construction used previously. This additional protection assures even more wide-ranging opportunities for using this lens.

6. A durable Fluorine Coating on the front element repels water and fingerprints

The water and oil repellant coating applied to the front element surface allows instant removal of dirt or smudges with ease. The coating also provides a reasonable level of durability, and will sustain its effectiveness for years. The Fluorine Coating technology that Tamron developed for use in industrial optics applications was first used on the SP 15-30mm that was introduced in 2014.

7. Advanced coating technology reduces flare and ghosting

Two advanced coating technologies, both providing outstanding anti-reflection performance, are applied to critical element surfaces for maximum light transmission. eBAND (Extended Bandwidth & Angular-Dependency) Coating boasts outstanding anti-reflection performance across nearly the entire range of visible rays, and BBAR (Broad-Band Anti-Reflection) Coating utilizes traditional multi-layered, anti-reflection technology. This combination virtually eliminates extraneous reflections and substantially reduces ghosting and flare which enables the lens to achieve flawless, crystal clear images.

8. Use of circular aperture to achieve beautiful, rounded blur effects (bokeh)

When shooting a scene that includes a point-source of light in the subject background, marvelously tuned blur (bokeh) can be obtained without generating undesirable polygonal shapes of aperture patterns thanks to the circular aperture. The 9-blade diaphragm retains a nearly perfect circular opening even when stopped down by two stops.

9. Focusing options perfectly suited to a macro lens

The new 90mm macro has a focus limiter that makes it possible to shorten the time for accurately focusing on a subject when the working range is known. The lens also features an Internal Focusing system, so the overall length of the lens never changes, not even when focusing. As a result, the user is assured of a comfortable working distance of at least 139 mm (5.5 in.) from the front of the lens. In addition, the lens is equipped with a Full-time Manual Focus override mechanism that makes it possible to flexibly choose focal points. Even with the AF driving system in action, it is possible to instantaneously override it to make manual fine focusing adjustments without switching the AF-MF mode back and forth.

10. Compatibility with TAMRON TAP-in Console™

Always as new as tomorrow: You can update firmware, customize autofocus positions and adjust the mechanical setup and preferences of the 90mm lens by simply attaching it to the TAMRON TAP-in Console™ and connecting it via USB to a personal computer. (The TAP-in Console™ is an optional accessory that will be released in March.)

11. Digital image editing software optimized for Tamron lenses

Included in the new 90mm macro package is SILKYPIX Developer Studio, a popular RAW conversion and editing program preloaded with correction menus for various aberrations based on the optical data that pertains exclusively to Tamron’s SP Series lenses. In addition, lens profile information has been supplied to Adobe Systems, Inc. to facilitate selecting the precise lens data required for more sophisticated adjustments in RAW processing when using Adobe Photoshop and Lightroom.

Tamron and the history of its macro lenses
The history of Tamron’s macro lenses began with the SP AF90mm F/2.5 (Model 52B) in 1979. The general impression of a macro lens in those days was that it was mainly useful for academic purposes—such as reproducing documentary records and scientific minutiae—and not suitable for photographing ordinary subjects. Against this backdrop, Tamron’s first-generation 90mm macro lens succeeded in creating new value for the modern macro lens that has both refined image quality worthy of recording photographic scenes and remarkably beautiful background blur effects (bokeh). As a result, the lens was highly valued by professional and amateur photographers alike as a lens with wide-ranging uses. It created new categories of applications that previously had been unimaginable because of the common uses of macro lenses at the time. The lens became popular among nature photographers to shoot close-ups of flowers. Furthermore, using Tamron’s 90mm macro lens for portrait photography gained particular popularity, with the expression “portrait macro lens” coming to be widely recognized over time. With the model renewal in this latest generation achieving further performance improvements, SP 90mm F/2.8 Di MACRO 1:1 VC USD (Model F017) is opening a new chapter in the history of Tamron’s 90mm macro lenses.

Design Concept
Beginning with the SP 35mm F/1.8 Di VC USD (Model F012) and SP 45mm F/1.8 Di VC USD (Model F013), Tamron has utilized a new design concept to enhance the outstanding performance provided by the SP Series. Our attention to every engineering detail has resulted in the most advanced optical and electro-mechanical designs being incorporated in SP Series, creating a new benchmark for high performance and visual elegance. The design philosophy embraces the importance of comfortable, ergonomic operation and positive tactile feedback, crucial factors in all types of photography. The newly designed all-metallic barrel features an embedded concave ring at the base of the lens—for a firm hold and comfort necessary for a steady shot. Switches are larger and reconfigured for smoother function and the typeface has been redesigned for intuitive legibility. The Tamron SP Series is the superlative example of the Lensmaker’s art.

Pre-Order Options

You can pre-order the lens from our friends at B&H Photo Video and Adorama:

The post Tamron SP 90mm f/2.8 Di VC USD Macro Announcement appeared first on Photography Life.

Flowers up close and personal

$
0
0

My wife wanted to go out today to buy a few annuals for some of the flower gardens around the house. Naturally I thought this would be a great opportunity to capture some quick images of flowers and I volunteered to go with her. I know…I know…typical husband with an ulterior motive! I grabbed one of my Nikon 1 J5’s, popped on a 21mm MOVO extension tube and the 1 Nikon 30-110mm f/3.8-5.6 lens, and we headed out to a few of the area nurseries.

flowers up close 1

NIKON 1 J5 + 30-110mm f/3.8-5.6 @ 69mm, ISO 720, 1/125, f/5.6

This combination of gear is my absolute favourite when it comes to taking macro-type images of flowers and insects. As regular readers know, I only use a tripod or monopod when I absolutely have to as I much prefer shooting hand-held. The small size, light weight, and accurate focusing of the J5/21mm MOVO tube/30-110mm lens set-up makes for a killer combination.

flowers up close 2

NIKON 1 J5 + 30-110mm f/3.8-5.6 @ 47.5mm, ISO 400, 1/250, f/5.0

I’ve always loved the speed and accuracy of the auto-focusing system on my Nikon 1 V2’s with their 135 individual AF points. The J5 has increased this up to 171 AF points which allows for even more precise focusing for this kind of photography. When capturing images of flowers this allows a single AF point to be placed precisely on a specific part of the flower.

flowers up close 3

NIKON 1 J5 + 30-110mm f/3.8-5.6 @ 69mm, ISO 160, 1/250, f/5.0

Going to a nursery is to be overwhelmed with flowers. The sheer number and variety of specimens available to photograph calls for some discernment. While I did shoot a number of flowers head on, I looked for more interesting angles where I could place the main subject in less obvious portions of the frame. Amid all of the clutter caused by the flowers being crowded together on display shelves I tried to find unobstructed backgrounds where possible.

flowers up close 4

NIKON 1 J5 + 30-110mm f/3.8-5.6 @ 57.2mm, ISO 160, 1/400, f/5.0

I’ve only had my Nikon 1 J5 for a couple of weeks and I’m still getting used to the nuances of the camera. The fact that the J5 doesn’t have an EVF is a non-issue for flower photography as I always composed images of this subject matter using the rear screen with my V2’s in the past.

flowers up close 5

NIKON 1 J5 + 30-110mm f/3.8-5.6 @ 45.9mm, ISO 800, 1/60, f/5.6

The tilt rear screen on the Nikon 1 j5 comes in very handy when shooting in bright conditions as it can be angled to help reduce glare.

flowers up close 6

NIKON 1 J5 + 30-110mm f/3.8-5.6 @ 53.1mm, ISO 400, 1/200, f/5.6

There were a few occasions when I couldn’t see quite as well as I would have liked when trying to frame a particular image. This is to be expected when one buys a camera without an EVF. Overall, I was able to get the exact framing that I wanted most of the time and the majority of images in this article have not been cropped at all.

flowers up close 7

NIKON 1 J5 + 30-110mm f/3.8-5.6 @ 77.1mm, ISO 360, 1/500, f/5.6

Using extension tubes with Nikon 1 gear is pretty simple. I use the lens zoom control to get my subject in basic focus, position a single AF point precisely where I want it on the subject, then let the J5’s auto-focusing zero right in on it for me as I depress the shutter.

flowers up close 8

NIKON 1 J5 + 30-110mm f/3.8-5.6 @ 80.1mm, ISO 800, 1/80, f/11.0

I decided to commit a bit of heresy today by using f8 and even f/11 for some of my image captures, risking some diffraction with the small CX sensor in the J5 in order to get the desired depth of field.

flowers up close 9

NIKON 1 J5 + 30-110mm f/3.8-5.6 @ 61.6mm, ISO 800, 1/15, f/11.0

While the images in this article would only be considered as ‘fun’ photographs they do demonstrate that folks don’t have to spend an arm and a leg on camera gear to get some decent flower images when shooting hand-held under available light.

flowers up close 10

NIKON 1 J5 + 30-110mm f/3.8-5.6 @ 57.2mm, ISO 400, 1/200, f/5.0

In the USA my Nikon 1 J5 (with a 10-30mm PD kit lens) sells for about $500. The 1 Nikon 30-110mm f/3.8-5.6 VR lens is about $250, and a set of 3 MOVO extension tubes is about $50. In total not an inconsequential amount of money for many folks, but still reasonably affordable.

flowers up close 11

NIKON 1 J5 + 30-110mm f/3.8-5.6 @ 69mm, ISO 1000, 1/60, f/11.0

Small, lightweight, fun and pretty affordable works for me. I’ve been enjoying shooting with my new Nikon 1 J5 so much that I bought a second one last week. The pair of J5’s will be my main cameras for landscape photography as well as for other still photography subject matter like flowers, architecture, and general travel. My trio of Nikon 1 V2’s will still be the workhorses of my video business, and will also be my ‘go to’ cameras for any kind of action photography since they have EVF’s.

flowers up close 12

NIKON 1 J5 + 30-110mm f/3.8-5.6 @ 55.1mm, ISO 400, 1/125, f/5.6

Technical Note: All of the images in this article were captured hand-held in available light using a Nikon 1 J5, a 21mm MOVO extension tube, and 1 Nikon 30-110mm f/3.8-5.6 zoom lens. All images were produced from RAW files using my standard workflow of DxO OpticsPro 10, CS6 and Nik Suite.

Article and all images are Copyright 2016 Thomas Stirr. All rights reserved. No use, adaptation, or reproduction of any kind is allowed without written consent. Photography Life is the only approved user of this article and if you see it reproduced anywhere else it is an unauthorized and illegal use.

The post Flowers up close and personal appeared first on Photography Life.

After the Rain

$
0
0

One of my favourite times to photograph garden plants and flowers is first thing in the morning after a fresh rain. All of the colours and textures seem richer after the rain dapples them with water droplets.

after the rain 1

NIKON 1 J5 + 10-100mm f/4-5.6 @ 100mm, ISO 640, 1/500, f/5.6

Even the smallest and simplest of flowers take on a new look as they wear rain drops like small jewels.

after the rain 2

NIKON 1 J5 + 10-100mm f/4-5.6 @ 100mm, ISO 360, 1/500, f/5.6

The overcast conditions allow the flowers to proudly display their rich colours.

after the rain 3

NIKON 1 J5 + 10-100mm f/4-5.6 @ 72.2mm, ISO 200, 1/250, f/5.6

It always fascinates me to observe where the rain drops congregate, sometimes seeming to defy gravity by stopping on the slope of a leaf or petal.

after the rain 4

NIKON 1 J5 + 10-100mm f/4-5.6 @ 100mm, ISO 800, 1/320, f/8.0

I like how many plants take on a freshly scrubbed look, glistening even when the sun is still hidden behind clouds.

after the rain 5

NIKON 1 J5 + 10-100mm f/4-5.6 @ 91.5mm, ISO 800, 1/320, f/5.6

Some flowers take on more delicate shapes and details after a morning rain.

after the rain 6

NIKON 1 J5 + 10-100mm f/4-5.6 @ 77.8mm, ISO 720, 1/500, f/5.6

My eye is always attracted to angles and I enjoy finding them when framing a plant image, and using them as corner exits.

after the rain 7

NIKON 1 J5 + 10-100mm f/4-5.6 @ 100mm, ISO 800, 1/320, f/8.0

I set up both of my Nikon 1 J5s when I went out to capture these images this morning. One was fitted with the 1 Nikon 10-100mm f/4-5.6 zoom lens, the other with the 1 Nikon 30-110mm f/3.8-5.6 zoom along with a 21mm MOVO extension tube.

after the rain 8

NIKON 1 J5 + 30-110mm f/3.8-5.6 @ 61.6mm, ISO 1600, 1/500, f/8.0

I captured the image above and the one that follows with the help of the 21mm MOVO extension tube.

after the rain 9

NIKON 1 J5 + 30-110mm f/3.8-5.6 @ 55.1mm, ISO 1600, 1/250, f/8.0

I also used this combination to photograph the bud in the next image.

after the rain 10

NIKON 1 J5 + 30-110mm f/3.8-5.6 @ 51.2mm, ISO 1600, 1/250, f/8.0

I often look for image opportunities with the leaves of plants, finding cascading water droplets especially appealing.

after the rain 11

NIKON 1 J5 + 10-100mm f/4-5.6 @ 100mm, ISO 800, 1/320, f/5.6

Sometimes using an extension tube with a larger flower can yield an interesting combination of petal twists and curls.

after the rain 12

NIKON 1 J5 + 30-110mm f/3.8-5.6 @ 51.2mm, ISO 1600, 1/320, f/9.0

I also enjoy highlighting water droplets on leaves by creating very simple compositions that also have a feeling of flow to them.

after the rain 13

NIKON 1 J5 + 10-100mm f/4-5.6 @ 100mm, ISO 560, 1/500, f/5.6

A very special treasure is finding an intricate flower dappled with a multitude of water droplets.

after the rain 14

NIKON 1 J5 + 10-100mm f/4-5.6 @ 65.9mm, ISO 220, 1/250, f/5.6

The best thing about photographing ‘after the rain’ is that all many of us have to do is simply go out outside in our own yards.

Technical Note:
All images were captured hand-held with a Nikon 1 J5 and either a 1 Nikon 10-100mm f/4-5.6 zoom lens, or a 1 Nikon 30-110mm f/3.8-5.6 with a 21mm MOVO extension tube. All images in this article were processed from RAW files using my standard process of OpticsPro 11, CS6 and Nik.

Article and all images are Copyright 2016 Thomas Stirr. All rights reserved. No use, adaption, or reproduction of any kind is allowed without written consent. Photography Life is the only approved user of this article. If you see it reproduced anywhere else it is an unauthorized and illegal use.

The post After the Rain appeared first on Photography Life.


And a Few More Flowers

$
0
0

I know flower posts have been submitted here before and I surely have nothing original to offer but they do make a versatile subject, allowing an appreciation of colour, texture, form and placement. These were all taken inside the Walled Garden at the stunning Wimpole Estate in Cambridgeshire just before my Eastern/Central/Somewhere In Europe trip. The vivid specimens are a fitting testament to the diligence and vision of the team of gardeners there who braved the heat to maintain the beautiful flowerbeds.

1

The images can also be a tribute (at least in my humble opinion) to the macro lens I used to shoot them, the Olympus 60mm f/2.8. A dinky little number which, unlike most hefty macro lenses, is small enough to fit into my coffee mug (the sunglasses are meant to give scale to the mug – after all it could be any size really, couldn’t it?).

1a

Yes, a full frame sensor will give a shallower depth of field than the micro four thirds sensor (far from a necessity for macro work) of my E-M5 but the bokeh on this thing is pretty good and I imagine it would double up as a decent portrait lens for this format too. Most macro lenses that I have historically used with my old DSLRs have also been slow to focus, but this little guy is reasonably quick and sharp and thus I have always included it in my light travel kit as a mini-telephoto lens. Not to oversell it but it’s great to walk around (especially in hot weather) with a lens and camera so light I can barely feel them.

3

Right, enough about gear (sorry!) and back to the flowers. I don’t have a green thumb but I love beautiful gardens and can certainly appreciate the effort that goes into them. Flowers are always an enjoyable photographic challenge that offers almost unlimited compositional potential.

4

One can focus solely on details, turning tiny petals or stamens into an entire landscape upon which the eye can travel.

18

20

Or it may simply be the way they stand in the light, the sunlight glowing gently through their translucent petals.

9

8

Maybe it’s their texture and the patterns that define their individuality, reminding us that we in the animal kingdom are not so unique in exhibiting so much variety.

12

2

Your composition may consider how a flower fits against the background of its brethren or surroundings; it does not always have to be isolated.

5

21

Of course flowers do not have to be shot from side on or above. Try shooting them from underneath (it helps if you have a flip-out touchscreen – I rarely use a viewfinder anymore), or turn the camera so that your frame lines up with the direction of the flower.

19

14

One of the bonuses of flowers is that they attract all kinds of beautiful creatures amongst their midst.

6

13

Ultimately, it may simply be about making a straightforward portrait of a flower.

10

7

17

These were all processed in Lightroom, again to my personal taste and style, mainly contrast and some selective dodging and burning. And as much as I love vivid colour I actually had to de-saturate many of these from their original appearance. Shot handheld using the touchscreen to focus where I wanted, mainly between f/2.8 and f/4 in aperture priority at ISO 200 with the camera choosing the shutter speed.

15

Well, that’s me. Now it’s your turn to go out and shoot some flowers and show me how it’s really done. Best of luck!

The post And a Few More Flowers appeared first on Photography Life.

Wildlife Photography at Your Doorstep

$
0
0

I am an amateur photographer and have had a DSLR for approximately 10 years. It is only in the last 2 years that I have started to get seriously interested in wildlife photography. I feel like I am in the early days of building a portfolio of images. Living in the middle of a small UK town, like most urban locations, there is a surprising amount of wildlife around. Unfortunately, with a full time job and a small baby I found I had limited time to get to know the animals in my neighbourhood let alone the local nature spots. So when we moved house 3 years ago and were discussing what to do with the derelict patch of land out front and the idea of turning it into a wild flower garden was discussed, I thought it might be a great way to learn some macro techniques.

So I set about clearing what was a small 10 metre square patch of land, clearing it of stones and planting seed for the wild flowers. It has taken two years for the meadow to mature, but the wildlife and especially the insects have certainly moved in. The following pictures are a small selection of some the images I have taken in our front garden along with descriptions of the techniques I used to take them. I hope they give fellow beginners ideas for creating their own photographs in their gardens.

First up is a flower shot, what macro article would be complete without one. This is a Common Knapweed flower. I like doing macro work handheld if possible as it allows me to work quickly. I used an SB-800 flash mounted a tripod with a shoot through umbrella acting as a diffuser. The flash was triggered by the on-board flash on my Nikon D7000, manually set to the lowest setting so it didn’t add much light. There was a reasonable amount of ambient light so to get flower isolated on a black background I pegged the black jumper I was wearing to the hedge behind the flower. I used a Tokina 100mm macro lens at f/16 and on manual focus to get the front half of the flower in focus. Beyond f/16 the lens starts to lose sharpness due to diffraction.

Common-Knapweed

Common Knapweed
Nikon D7000 + Tokina 100mm f/2.8 macro @ ISO 250, 1/60, f/16 with off camera SB800 flash

This one breaks all sorts of rules, which is one of the reasons I like it. The image is of a solitary bee holed up in the bug hotel we made to put in the flower meadow. The holes we drilled are 5mm so this is getting pretty close up. Taking the image was helped immensely by the fact the bug hotel is a solid wood construction that is probably more stable that my camera tripod. I again used the Tokina 100mm macro but this time with a Nikon TC-16A teleconverter and a Sigma +1.6 diopter achromatic close up lens. A tripod goes without saying for this much magnification but I also shot the image using a wired remote trigger and mirror lockup to minimise camera movement. To get the exposure of the bee right I used spot metering and centred the camera on his head. He was a few mm back in the hole so not lit directly by the sunlight falling on the rest of the wood.

Solitary-Bee

Solitary Bee

Nikon D7000 + Tokina 100mm f/2.8 macro + Nikon TC-16A + Sigma +1.6 diopter @ ISO 250, 1/60, f/16

Everybody loves ladybirds, don’t they? A Change of tactic here as I had just started experimenting with using telephoto lenses for macro work. This was taken hand held under ambient light late in the evening. the ISO level is really pushing the D7000 here, especially the reds on the ladybird. It also stretched my Photoshop skills to get the noise down within this image.

Ladybird

Ladybird

Nikon D7000 + 70-200 f/2.8 + TC-17 E II @ 330mm, ISO 1250, 1/50, f/7.1

Another bee in this shot, this time on the same common sorrel but this time in flower. Very similar setup to the 1st flower picture, only difference being I decided not to isolate against a black backdrop giving the image a little more depth. I just about got away with using the lens at f/20.

Bee-on-Flowering-Sorrel

Bee on Flowering Sorrel

Nikon D7000 + Tokina 100mm f/2.8 macro @ ISO 320, 1/125, f/20 with off camera SB800 flash

I saved my favourite till last, this image best represents where my skills have go me to. I am no longer content with just getting the image of a particular specimen or insect. I am now able to use my improved skills to try and strive for something a bit more creative. This image was taken on a chilly summer evening just before sunset. The cooler temperature meant this common blue damselfly didn’t fly off as I manoeuvred my lens towards him, in fact he posed just where I wanted him. Trusty Tokina lens again with the sigma close up filter, tripod and wired remote trigger.

Bug-Eyed-Damselfly

Bug Eyed Damselfly

Nikon D7000 + Tokina 100mm f/2.8 macro + Sigma +1.6 diopter @ ISO 500, 1/6, f/16

Next on my list of macro skills are focus stacking and replacing the teleconverters with extension tubes. Oh and we are planning to squeeze a pond into our tiny front garden, so fingers crossed we can attract a little more diversity in. My current passion is wildlife photography and my growing portfolio and blog can be seen at my website.


This guest post was contributed by Dave Faulkner. Please visit his website at the above URL to see more of his work.

The post Wildlife Photography at Your Doorstep appeared first on Photography Life.

Using Extension Tubes in Strong Wind

$
0
0

As photographers we often try to anticipate the weather when planning to capture specific images. Sometimes Mother Nature cooperates, and sometimes not. I was out today using some extension tubes to capture a few images of insects and flowers. Ideally I would have preferred a nice calm day, rather than the strong winds I faced today.

tubes wind 1

NIKON 1 J5 + 30-110mm f/3.8-5.6 @ 77.1mm, ISO 800, 1/1250, f/5.6, MOVO extension tubes

When dealing with windy conditions obviously one of the most important factors to consider when using extension tubes is your shutter speed, increasing it with the strength of the wind.

tubes wind 2

NIKON 1 J5 + 30-110mm f/3.8-5.6 @ 71.6mm, ISO 1600, 1/3200, f/5.6, MOVO extension tubes

As a part of the exposure triangle, our shutter speed is only one consideration. We have to balance that with the creative aspects of our intended image in terms of our aperture setting and related depth-of-field, as well as how much noise and image degradation we are willing to tolerate in terms of the ISO we are using (dynamic range and colour depth are both reduced as higher ISOs are used).

tubes wind 3

NIKON 1 J5 + 30-110mm f/3.8-5.6 @ 53.1mm, ISO 3200, 1/2000, f/8.0, MOVO extension tubes

I was out shooting in a public garden today in Dundas Ontario. Much of it was in very bright sunlight. Other areas were in light to medium shade. The wind was also quite variable with some of the more open areas subject to strong winds on a fairly consistent basis. Other areas were somewhat protected and the wind wasn’t quite as significant a factor.

tubes wind 4

NIKON 1 J5 + 30-110mm f/3.8-5.6 @ 57.2mm, ISO 3200, 1/1600, f/8.0, MOVO extension tubes

While I had gone to this location to photograph butterflies, there were very few to be found. I ended up focusing on bees and wasps, along with a few other critters.

tubes wind 5

NIKON 1 J5 + 30-110mm f/3.8-5.6 @ 59.4mm, ISO 3200, 1/800, f/8.0, MOVO extension tubes

I often shoot in Manual and let my ISO ‘float’ by using an auto setting…when photographing birds in flight for example. Today I decided that I wanted a bit more control of my ISO and I chose to shoot in Aperture priority, setting my ISO, and letting my shutter speed adjust as necessary. I kept an eye on my shutter speed of course, and if anything I likely used some speeds faster than I needed for some images. When using extension tubes in windy conditions it is always better to be too fast, than too slow.

tubes wind 6

NIKON 1 J5 + 30-110mm f/3.8-5.6 @ 53.1mm, ISO 3200, 1/2000, f/8.0, MOVO extension tubes

I knew from doing post processing of Nikon 1 J5 images in the past that I was quite comfortable going as high as ISO-3200 for casual images. Experience also indicated that I’d use an aperture of either f/5.6 or f/8 depending on the subject matter when shooting with my MOVO extension tubes.

tubes wind 7

NIKON 1 J5 + 30-110mm f/3.8-5.6 @ 66.4mm, ISO 3200, 1/1250, f/8.0, MOVO extension tubes

Using an aperture of f/8 does risk a bit of diffraction when using a smaller sensor camera, but for many of the images I was trying to capture I decided that a bit more depth-of-field was more important and I was willing to accept the trade-off.

tubes wind 8

NIKON 1 J5 + 30-110mm f/3.8-5.6 @ 77.1mm, ISO 3200, 1/800, f/8.0, MOVO extension tubes

I started my visit shooting at ISO-800 as this yielded a sufficiently fast shutter speed. A few minutes later the wind picked up, causing me to move to ISO-1600. After I added a second MOVO extension tube to my rig (I used a 21mm and a 16mm) I chose to move my ISO up even further to ISO-3200 as there is a loss of light penalty to be paid when using extension tubes.

tubes wind 9

NIKON 1 J5 + 30-110mm f/3.8-5.6 @ 64mm, ISO 3200, 1/1600, f/8.0, MOVO extension tubes

It was a bit of a challenge to capture some images as the plants were thrashing about in the wind which also caused the bees, wasps and other insects to move more readily from flower to flower. In some cases I had to wait for the flower or stem to slow down its movement a bit before I could attempt to frame my photograph, acquire focus and capture my image. Throughout the day I had to coordinate the timing of my shutter release with the bobbing motion of the plants.

tubes wind 10

NIKON 1 J5 + 30-110mm f/3.8-5.6 @ 110mm, ISO 3200, 1/250, f/8.0, MOVO extension tubes

Additionally, in many cases I only had a second or two to frame and focus my image before the insect would move on to another flower or leaf.

tubes wind 11

NIKON 1 J5 + 30-110mm f/3.8-5.6 @ 77.1mm, ISO 3200, 1/3200, f/8.0, MOVO extension tubes

I shot all of the images in this article hand-held using AF-S single auto focus and using Single Point AF. By anticipating my shots and presetting the location of my Single Point AF on the rear screen of my Nikon 1 J5 I was able to speed up my image capturing technique quite a bit and adjust to the windy conditions. While I would typically shoot at f/5.6 and place my single AF point on the head/eye of the subject insect, the strong winds and constant motion of the flowers and plants did not allow for the precise focusing I prefer.

tubes wind 12

NIKON 1 J5 + 30-110mm f/3.8-5.6 @ 77.1mm, ISO 3200, 1/1250, f/8.0, MOVO extension tubes

I decided to switch to f/8 and do my best to get my single AF point at least on the body of the insect while it bobbed about in the wind. I still missed some shots but the added depth-of-field did help to compensate for the breezy conditions and helped to yield some acceptable images.

tubes wind 13

NIKON 1 J5 + 30-110mm f/3.8-5.6 @ 59.4mm, ISO 1600, 1/400, f/5.6, MOVO extension tubes

As you can imagine trying to frame images from the rear screen of my J5 in very bright sunlight can be a bit challenging at times. This has necessitated an adjustment in my technique. In the past I have used my wide-brimmed hat to help shade the rear screen while I’m composing images. This does take some extra time…a luxury I didn’t have today. By presetting my Single Point AF and using other reference points in my image as general composition guides I could get the approximate framing I needed to capture my shots even if I only had limited visibility on the rear screen of my J5. As a result I found that I didn’t have to use my hat as a camera sunshade at all during my visit.

tubes wind 14

NIKON 1 J5 + 30-110mm f/3.8-5.6 @ 83.2mm, ISO 3200, 1/2000, f/8.0, MOVO extension tubes

Even though I was probably breaking some ‘rules’ by shooting my Nikon 1 J5 at f/8 with an ISO of 3200 for the majority of my photographs I came back from my outing with some usable images. Today was a good reminder that photography is often about making appropriate compromises based on the subject(s) we are photographing, the conditions we face, and the gear we are using.

Article and all images are Copyright 2016 Thomas Stirr. All rights reserved. No use, adaptation or reproduction of any kind is allowed without written consent. Photography Life is the only approved user of this article. If you see it reproduced anywhere else it is an unauthorized and illegal use.

The post Using Extension Tubes in Strong Wind appeared first on Photography Life.

Aquarium Macro Photography of Ornamental Shrimp

$
0
0

“There’s such a thing as ornamental shrimp?” This is the typical response of family and friends when I speak to them about my recent hobby of keeping ornamental shrimp. Believe it or not, there is growing interest around the world about breeding and keeping these little freshwater critters as pets. In some countries, their popularity even rival traditional fish keeping! What once used to be considered another algae eater in tanks has quickly become an object of interest for aquarium enthusiasts, given their behavior, varieties, and breeding possibilities. They are marvelous to look at, and as such are wonderful subjects to photograph.

Shrimp Macro-13

NIKON D800E + TAMRON SP 90mm F2.8 Di VC USD Macro @ 90mm, ISO 100, 1/400, f/18.0

The hobby itself is primarily based upon varieties of Neocardina davidi (cherry shrimp) or Caridina cantonensis, which has recently been further categorized as Caridina logemanni (crystal shrimp), mariae and serrata (tiger shrimp). There’s also a popular variety called Taiwan Bees, which originate from a crystal x tiger shrimp crossing, and come in a large range of colors and patterns. They grow no larger than 2 to 3 cm in length (hence the macro realm of photography), reach reproductive maturity in 3 to 5 months, and have a lifespan that can reach about two years. My own shrimp collection is comprised of blue bolts, pinto mischlings, pandas, king kongs, and tangerine tigers; I hope you enjoy looking at them as much as I do!

Shrimp Macro-5

NIKON D800E + TAMRON SP 90mm F2.8 Di VC USD Macro @ 90mm, ISO 100, 1/250, f/16.0

My inspiration to pursue shrimp photography comes from Chris Lukhaup, a famous aquascaper, professional photographer, and one of the world’s leading shrimp specialists. Search for any of his images and you will quickly see why he is always brought out to aquatic conferences and expeditions to document the discovery of new freshwater life. Learning how to capture breath taking images of ornamental shrimp like him has certainly pushed my knowledge and skills in both shrimp keeping and photography.

Shrimp Macro-21

NIKON D800E + TAMRON SP 90mm F2.8 Di VC USD Macro @ 90mm, ISO 100, 1/320, f/20.0

There is the added bonus of being able to do this sort of photography in the comfort of your own home. Photographing your own aquarium means you have all the control in lighting, staging, and specimens. As a father of a young family, nap time for the kids becomes shrimp admiring and macro photography time for me!

Shrimp Macro-10

NIKON D800E + TAMRON SP 90mm F2.8 Di VC USD Macro @ 90mm, ISO 100, 1/250, f/22.0

1) Macro Equipment and Technique Considerations

Like most specialty areas of photography, macro work will require a specific set of equipment to help you achieve the images you want. There are a variety of tools that can help you achieve greater image magnification, such as diopters, extension tubes, and macro lenses. When my brother-in-law first introduced me to his collection of shrimp, I started with a Canon 60D and a 55-250mm STM lens with a Raynox DCR-250 diopter to capture images of his shrimp. This combination allowed me to get up to 0.725x magnification, but the images were grainy since I had shot them at a high ISO with a crop sensor camera.

Shrimp Macro-28

Canon EOS 60D + EF-S 55-250mm f/4-5.6 IS STM + Raynox DCR-250 @ 113mm, ISO 1600, 1/50, f/9.0

Not to say that a crop sensor camera is inadequate! Quite the contrary, Chris Lukhaup himself shoots with a Canon 7D, and many other crop sensor shooters have fantastic shrimp images. Adequate lighting is more important to getting good quality shots after all, but more on that later!

When I started photographing my own shrimp, I had made a jump (from crop to full frame) to a Nikon D600, and now a D800E with a Tamron 90mm VC Macro lens. I also purchased Kenko AF extension tubes to go beyond 1:1 magnification. Given that the size of an adult shrimp is no more than 2 to 3 cm, using a macro lens alone at minimum focus distance (MFD) on a full frame camera generally allows an image of the entire shrimp to be captured, with room to compose the shot as well. Adding on extension tubes can get you closer shots of smaller shrimplets, or various parts of interest on the shrimp.

Shrimp Macro-1

NIKON D600 + TAMRON SP 90mm F2.8 Di VC USD Macro @ 90mm, ISO 400, 1/200, f/40.0

Shrimp Macro-8

NIKON D800E + TAMRON SP 90mm F2.8 Di VC USD Macro @ 90mm, ISO 320, 1/250, f/18.0

Macro photography provides a significant set of challenges in terms of lighting and focus. Shrimp are constantly moving, so focus stacking is generally out of the question. You need a narrow aperture to get enough of the shrimp’s eyes and body in focus, as well as a fast enough shutter speed to capture the image if the shrimp is moving. Most aquarium lights are not bright enough for such aperture and shutter speed combinations, so this means that your images will be shot at a higher ISO rating (1600 or higher). I found that the graininess of the image at such high ISO levels degrade the detail you’d be hoping to capture.

Shrimp Macro-29

NIKON D600 + TAMRON SP 90mm F2.8 Di VC USD Macro @ 90mm, ISO 4500, 1/200, f/6.3

To get the best image quality, shooting at ISO 100 to 400 will most likely require you to use a flash setup to provide additional lighting. This is where your specific aquarium location and setup may lead to some challenges. If you’re like Chris Lukhaup, he uses a soft box above a photoshoot tank to achieve his images. This would require you to have a glass lid or no lid on top of your aquarium. As my own tank is on the top of a tall shelf (I didn’t want my kids to feed my shrimp a coin or candy by accident), I was unable to place a soft box over it. Thankfully, the design of my tank lid allows me to perch one or two flashes with diffusers at various angles just above the water. These flashes are triggered with radio controllers.

Shrimp Macro-26

iPhone 4S shot of my photography setup for shrimp @ 4.28mm, ISO 200, 1/20, f/2.4

Unless your lens is right up against the glass, placing the flash at an angle in front of the aquarium may result in glare in your photo. For those of us lucky enough to have a beautiful rimless tank with no tank lid, you may want to consider investing in a boom, clamps, or clips that can be attached to the top edge of your tanks to mount your flashes. The last thing we’d want is for a flash to fall into the water…

Shrimp Macro-23

NIKON D800E + TAMRON SP 90mm F2.8 Di VC USD Macro @ 90mm, ISO 100, 1/250, f/22.0

In my earlier days of shooting shrimp, I struggled to get good captures since the depth of field was so narrow, even at an aperture of F16. To gain some confidence, I set my aperture to be as narrow as F32 to F40 to try and get more of the shrimp in focus! At these aperture levels, I noticed the effects of diffraction made the images less sharp. After a little research, I found out that my lens and camera body combination allows for sharp images to be taken up to F22 before diffraction sets in. As such, I’ve kept most of my images at F18 to F22 to get the best of image sharpness and depth of field, depending on the angle of the shot. Speaking of angles, you’ll get the least amount of distortion from the aquarium glass in your shots if you are as perpendicular and level to the subject as possible!

Shrimp Macro-4

NIKON D600 + TAMRON SP 90mm F2.8 Di VC USD Macro @ 90mm, ISO 100, 1/200, f/40.0

I have also tried a macro focusing rail for my tripod to stabilize my shots. Essentially, you leave the focus of the lens at MFD and use the dials on the macro rail to take care of focusing, much like using a microscope to focus on a glass slide. This combination did help get sharper images, but it is more cumbersome to work with. The moment you see a shrimp striking a good pose on the other side of the tank, shifting things over and getting things in focus often meant the shrimp has already gone off to graze somewhere else!

I have since resorted back to hand holding my shots, and doing my best to stabilize the camera with good technique (such as bracing in your elbows, holding your breath to steady the camera). I would move forward or backward to focus on the shrimp’s eyes while the lens is at MFD. Using my hands on the edge of the shelf and holding onto the hood also helped stabilize my shots. I did try doing the same with the camera on live view, but the image on the screen would be so dark (given the narrow aperture) that it was still a bit hit and miss, and it also drained the battery life quickly. I believe my number of keepers have improved since I purchased a DK-17M magnifying eyepiece to help see when the shrimp’s eyes are in focus. If all this doesn’t help you get sharp macro images, consider getting your lens calibrated too.

Shrimp Macro-20

NIKON D800E + TAMRON SP 90mm F2.8 Di VC USD Macro @ 90mm, ISO 100, 1/320, f/20.0

2) Aquarium Layout and Setup Considerations

For those of us who are unaware, aquariums can be purchased with different types of glass. Regular aquarium glass contains more iron, and thus naturally has a greenish tint to it. Starphire (sometimes called Starfire) glass contains less iron, and thus has a bluish tint to it. Many hobbyists will tout that looking at subjects in a more expensive starphire tank makes for a better viewing experience, but it is known to be a softer glass that may get scratches more easily. From a photography point of view, I would assume that any color changes from the aquarium glass can be easily fixed in post-processing. Thicker glass tanks can also lead to greater image distortion if you are not shooting square on the subject.

Shrimp Macro-9

NIKON D800E + TAMRON SP 90mm F2.8 Di VC USD Macro @ 90mm, ISO 100, 1/250, f/16.0

There are many interesting props that can be used for the shrimp to perch and pose on. There are a large variety of plants, leaves, cones, wood, rocks, and ceramic structures that can serve as the main stage or background for your shots. Different backgrounds for the aquarium itself can be purchased to provide the right backdrop. Shooting at a narrow aperture also means the background will appear darker, so you may consider using a backlight to fill the background. Personally, I like the low key style shots with most shrimp as it provides a nice contrast to the shrimp, and so I have a black aquarium background. Much like taking a picture of a person with dark hair with a dark background, darker shrimp may benefit from getting a kicker light or a lighter background for contrast.

Shrimp Macro-22

NIKON D800E + TAMRON SP 90mm F2.8 Di VC USD Macro @ 90mm, ISO 100, 1/250, f/18.0

For my particular lens and camera combination, the MFD is 30 cm from the sensor (as indicated with a symbol that has a line going through a circle near your eye piece). This means that I have about another 5 cm of room to work with beyond my lens with a hood (about 10 cm without the hood). When my moss balls, alder cones, and cholla wood pieces were initially placed too far from the front of the tank, I was unable to focus on a shrimp at 1:1 magnification if they were perched on these objects. I can’t recall how many times I’ve bumped into the tank as I was trying to get a shrimp in focus! As such, I moved these objects closer to the front of the tank to give me more room to work with and get 1:1 magnification. Be careful about taking images of the shrimp that are too close to your aquarium glass though, as the image will pick up scratches and imperfections in the aquarium glass if it isn’t clean.

Shrimp Macro-6

NIKON D800E + TAMRON SP 90mm F2.8 Di VC USD Macro @ 90mm, ISO 100, 1/250, f/20.0

3) Shrimp Moments: Behavior and Physiology Considerations

Ornamental shrimp are bottom feeders and scavengers with limited storage in their digestive system. As such, they are constantly moving around feeding off of algae and bacterial biofilm on the surfaces of aquarium. They can certainly be lured to new foods that you drop in, and some food are made so that each shrimp can run off with a nugget of food in their claws. This will allow you to get the shrimp to be more stationary for your shots, but it also means you’ll be getting food debris in your shot and a less natural looking image.

Shrimp Macro-2

NIKON D600 + TAMRON SP 90mm F2.8 Di VC USD Macro @ 90mm, ISO 100, 1/200, f/32.0

I recall how frustrated I was waiting for a shrimp to perch itself on a marimo ball one evening. I decided to take a pair of tongs and flipped the marimo ball over to expose a portion of it that had untouched biofilm on it. This prompted a few shrimp to come over to investigate and graze, which allowed me to get some nice shots of them on the ball of moss. Editing out the food debris was tedious in post processing, but not impossible. Speaking of foods, various foods alter the hormonal control of pigment cells in the shells of the shrimp. Healthy shrimp will give off very vibrant colors in their shells! Discoloration may indicate that the shrimp is stressed or unhealthy.

Shrimp Macro-11

NIKON D800E + TAMRON SP 90mm F2.8 Di VC USD Macro @ 90mm, ISO 100, 1/250, f/22.0

Watching shrimp molt out of their old shell is an interesting event to witness. When they have grown larger, they will burst out of their shell and leave behind a ghostly outline of their prior shape. Molting can often be witnessed after water changes are done to the aquarium, or after a low pressure weather system such as rain passes by. Don’t remove the molts though, as they provide good nutrition for other shrimp in the tank!

Shrimp Macro-18

NIKON D800E + TAMRON SP 90mm F2.8 Di VC USD Macro @ 90mm, ISO 100, 1/320, f/20.0

Shrimp Macro-19

NIKON D800E + TAMRON SP 90mm F2.8 Di VC USD Macro @ 90mm, ISO 100, 1/320, f/20.0

When a female is ready to mate, they also molt and release chemicals that attract males in the water. Females are quite timid after completing a molt that gives her tail the right shape to carry eggs, and so she tries her best to hide from males. The males swim actively all over the tank in search for the female, and many breeders call this movement of swimming “the dance”. This is a great time to get shots of “shrimp in flight”, as they actively seek all corners of the tank for the ready female.

Shrimp Macro-16

NIKON D800E + TAMRON SP 90mm F2.8 Di VC USD Macro @ 90mm, ISO 800, 1/1000, f/20.0

Shrimp Macro-12

NIKON D800E + TAMRON SP 90mm F2.8 Di VC USD Macro @ 90mm, ISO 100, 1/250, f/20.0

When female shrimp are carrying eggs, or are “berried”, they tend to be shy and hide more early on. Startling them too much with flash photography may stress them out, which may subsequently cause them to drop their eggs. Being “berried” does lead to hormonal changes that make their shells more colorful though. After carrying the eggs for about 4-5 weeks, the shrimplets hatch from below the female and get ready to brave a whole new world.

Shrimp Macro-17

NIKON D800E + TAMRON SP 90mm F2.8 Di VC USD Macro @ 90mm, ISO 100, 1/250, f/16.0

Shrimp Macro-24

NIKON D800E + TAMRON SP 90mm F2.8 Di VC USD Macro @ 90mm, ISO 100, 1/250, f/18.0

4) Conclusion

Aquarium photography at home provides a convenient opportunity to capture images of our water based pets and learn about their behavior. Many of the ideas and techniques shared here can be applied for taking pictures of crabs, snails, and fishes too. Factoring in the macro component brings an additional layer of challenges, but the rewards are in the details that are missed by the naked eye. If you want to see the best of your ornamental shrimp in a photo, consider doing the following:

  • Clean your aquarium glass before shooting (such as algae scrubbers)
  • Do a water change to get cleaner water in the tank
  • Temporarily turn off filters to avoid getting too many air bubbles in the shots
  • Feed ahead of time to boost their shell coloration and to avoid getting food particles in the shots
  • Shoot as perpendicular and as level to the shrimp as possible
  • Have ample lighting to allow you to use a lower ISO, faster shutter speed, and suitable aperture
  • Post-processing with adequate sharpening, removal of sensor dust, and tank debris
Shrimp Macro-15

NIKON D800E + TAMRON SP 90mm F2.8 Di VC USD Macro @ 90mm, ISO 400, 1/500, f/20.0

I hope that taking and sharing inspiring photos of your aquatic pets will promote further understanding and growth in those hobbyist areas. If you are interested in shrimp keeping and breeding, I highly recommend searching for and connecting with international and local communities online to learn more about the hobby.


This guest post was submitted by Steven Chan, a father, science teacher, and photographer from Toronto, Canada. Besides taking photographs of his family, he loves shooting pictures of wildlife and macros of his shrimp. You can see some of his work here, and specific shrimp photography here. He also thanks Nasim, Thomas, and Spencer for their informative articles and gear reviews that were referenced. They have been instrumental in his learning and purchases, and they have taught him how to be a better and more mindful photographer overall. Thank you!

The post Aquarium Macro Photography of Ornamental Shrimp appeared first on Photography Life.

Senior Perspectives on Photography

$
0
0
PL senior 15

It has been a few years now that I’ve qualified for a senior’s discount at various retailers. Of course the rules for such discounts do vary by store. Some start offering them at 55. Others at 60. And, at many they don’t kick in until that magic age of 65.

[Read More...]

Hand-held Close-Up Photography

$
0
0
close up 10

Many photographers enjoy exploring the world around them with macro and close-up photography. The basic difference between these similar genres of photography is the amount of magnification achieved, with a 1:1 magnification generally accepted as an example of macro photography. Images at this level of magnification also have more details than are achieved with close-up photography. The camera gear used for macro photography can be quite specialized and costly which can be a barrier for many photographers. This article features a small selection of close-up photography images all of which were shot hand-held in available light using a set-up that cost about $875 CDN including camera body, lens and extension tubes.

[Read More...]

How to Photograph Dragonflies

$
0
0
Lestes sponsa I

In this article, I would like to give you some tips on photographing dragonflies with minimal gear. I’m an amateur landscape and wildlife photographer from France. I graduated in ecology (biodiversity management and biology of conservation) last year before I decided to leave to New Zealand for a one-year trip. I discovered landscape and astrophotography in this beautiful country, but I feel like I sometimes need to get back to wildlife photography which is what I was first interested in. Because of my studies, I spent a lot of time in the field working on insects and especially dragonflies, learning how they live, observing their behavior and understanding the importance of their preservation.

[Read More...]


How to Focus in Macro Photography

$
0
0
1-1 magnification manual focus macro

If you’re trying to photograph the small world of plants and bugs, you’ll face plenty of challenges along the way. Macro photography is a difficult genre — you’re pushing up against the physical limits of depth of field, diffraction, and motion blur. Naturally, focusing in macro photography isn’t an easy task, but it’s a crucial one. How do you optimize your focusing technique for capturing small subjects? The answer depends upon exactly what you’re photographing.

[Read More...]

Everything You Need to Know About Macro Photography

$
0
0
Crab at Sunrise

Many photographers today want to know how to take macro pictures, thanks to a growing number of beautiful images online of small plants, animals, and insects. Macro photography is not always easy, especially for beginners, but it is one of the most rewarding genres of photography you can do. With the right skills, you will be able to capture amazing images even in your own backyard. To learn macro photography from start to finish, you should begin by reading the tips and techniques in this guide, taught by an award-winning macro photographer exhibited at the Smithsonian Museum of Natural History. By the end, you will know exactly how to put these recommendations into practice and capture stunning macro photographs for yourself.

The Art of Photographing Flowers

$
0
0
Orange Flower with Black Background

My favorite offshoot of landscape photography is flower photography. It is a bit easier to pursue than landscape, since you needn’t travel very far to get unique and beautiful images. All you have to do is step into your own garden or visit a public garden to find a world of beautiful flowers to photograph. But it takes skill – plus a little something extra – to be able to make really beautiful flower portraits. In this essay, I’d like to share some of my methods with those who are interested in photographing flowers.

Reverse Lens Technique for Macro Photography

$
0
0
Dandelion Diner

There aren’t a lot of things which will still work when used the wrong way ‘round. Airplanes, cutlery, and shoes, for example, all have a preferred direction of use; turning them around, and using them in reverse seldom turns out well. Photographic lenses, or at least some of them, are an exception to this rule. For macro photography, turning some lenses around will actually improve their performance. This can have important consequences for your photos, and your wallet.

Nikon 45mm f/2.8D PC-E Review

$
0
0
Nikon 45mm

This is an in-depth review of the Nikon 45mm f/2.8D PC-E, also known as PC-E Micro Nikkor 45mm f/2.8D ED, a special purpose normal-angle lens designed for architecture, commercial, macro, and nature photography. “PC” stands for “Perspective Control”, but I will refer to this type of lens as “tilt-shift” in this article.

Viewing all 46 articles
Browse latest View live