Quantcast
Channel: Photography Life
Viewing all 46 articles
Browse latest View live

What is an Extension Tube?

$
0
0

Our readers frequently ask us about extension tubes for macro photography. Since I am not much into macro myself, I have not explored this area of photography enough to qualify to write about it. While I have done some macro photography for product shots and ring shots in weddings with my Nikon 105mm f/2.8G VR lens (a very sharp lens that I absolutely love), I have not explored its full capabilities and I have not tried to use extension tubes and bellows to do crazy things that you can achieve with a true macro setup. Meanwhile, our readers have been gracious enough to fill in, and I have recently received the below post from one of our readers, Usama Nasir, who talks about what extension tubes are and how they are used in macro photography.

Extension Tubes

If you find yourself frustrated by the minimum focusing distance of your lens, if you constantly find that you’re unable to frame the shot you want, because you can’t get close enough to focus, then you may want to consider using extension tubes.

How Extension Tubes Work

An extension tube is an attachment that goes between your camera body and your lens. It’s not an optical element, so there is no glass involved. All it does, is get the lens further away from the focal plane. Now, the practical upshot of this, is that your minimum focusing distance gets smaller. So, with an extension tube, you can get closer to your subject; you can fill the frame with more of it, and still achieve focus.

Image using Extension Tubes

For example, I have the Canon 24-105mm lens, which has a minimum focus distance of 1.48 feet (0.45 meters). The above shot is as close as I can get to this flower. Nice enough, but I like to get in closer, so I’m going to add one of the extension tubes (I have three of them and we’re going talk about their differences shortly). Extension tubes simply go on your camera body like a lens. So, I’m going to take my lens off, attach the shortest extension tube on the camera body, then attach my lens to the other end of the extension tube.

The reason I’m choosing the shortest one, is I don’t want to go in real far – I just want to get a little bit of boost in magnification. With this setup, I am not able to physically get closer to my subject and photograph at a greater magnification. Now, there is a trade-off to using extension tubes – they can eat up some of the light. I may have to increase my ISO or potentially decrease my f-stop (aperture) to get a little more light. And if I use a wider aperture, then I’m going to have less depth of field to work with. So, there is this trade-off of magnification versus depth of field. But what’s nice, is that I got in closer – something that I was not able to do before with the bare lens.

Sample Image with Extension Tube

The nice thing is that I don’t have to worry about cropping my image in post-production just to try to get closer to my subject – I get to use more of the pixels in my camera. You can use extension tubes with any type of lenses: primes or zooms, portraits, or even macro! Extension tubes are an inexpensive way to get the kind of short focusing distances that you get from a dedicated and much more expensive macro lens.

Extension Tube Sizes

Extension tubes come in different sizes. I have a set of three Kenko Extension Tubes (here is the Nikon version). I have one that is 12mm; a longer 20mm one; and the longest one is 36mm. I can also stack these together. As I stack them, they obviously get longer. And, as they get longer, I get more extension, which means more magnification power. Once I attach this setup on my camera, I’m going to be able to get all the way into the full macro range, which is going to open up all of the macro concerns and practices that I’m going to have to think about as I’m shooting that close.

The effectiveness of extension tubes decreases as focal length increases. In other words, you’re going to see more of a change sticking this stack onto a 50mm lens, than you will when you put it on a 300mm lens. You also need to be careful when working with extreme wide-angle lenses. If I put the 68mm stack of tubes on a 20mm lens, I won’t be able to focus at all, because my minimum focusing distance will be pulled back into the inside of the lens. So, one other very important thing to understand about extension tubes is that some of them have electrical contacts that allow your camera to communicate with your lens, and some don’t (the above linked versions do).

If you get tubes that don’t, then you won’t have autofocus capability or aperture control. Now, Canon and Nikon both make sets of active extension tubes with full electronic contacts. While they work great, they are obviously very expensive. Kenko extension tubes that I personally use are much cheaper than brand versions and you could even get cheaper ones from other third party brands like Vello. My extension tubes have the much-needed electronic contacts, giving me full autofocus capability, and yet they cost much less than the Canon tubes.

Extension tubes are a very affordable way to start getting into macro photography. What’s more is that they are small, lightweight, and easy to carry around. If you are worried about whether you should invest in extension tubes, or go ahead and invest in a true macro lens, bear in mind that sometimes you’ll need to get a macro lens closer to your subject, so you’ll continue to use extension tubes, even if you eventually buy a macro lens. In the meantime, they’re a great way to start experimenting with close magnifications using your regular lenses in your arsenal.

Other Means to Get Closer

Extension tubes are not the only way to get closer to your subject. You can also purchase close-up filters, dedicated macro bellows that have much more flexibility than extension tubes and can potentially be used to move your plane of focus like tilt/shift lenses do (can get quite expensive) and you can also utilize adapters to use normal lenses in reverse position (which basically converts normal lenses into macro lenses). There are also other types of cheap DYI solutions that can effectively achieve the same results as using extension tubes or bellows. I would encourage Photography Life readers to dig into this subject more, because there is so much to explore in the world of macro photography.

The post What is an Extension Tube? appeared first on Photography Life.


Linhof 3D Micro Review

$
0
0

This is an in-depth review of the Linhof 3D Micro Leveling Head with dovetail track, a high-end precision geared tripod head specifically designed for handling medium to large format cameras and other specialized rails for macro and architectural photography. Fitted with an Arca-Swiss compatible screw-knob clamp, this specific version is designed to fit any kind of Arca-Swiss plate or rail (there is also another version of the same head, but with a quick-release “Quickfix” adapter that can be mounted directly to a camera).

After testing out the Manfrotto 405 Pro geared head, I realized that I needed something more precise and stable with no “play” whatsoever. Unfortunately, when it comes to professional gear heads, there are not that many options on the market today. Once you get into the high-end geared head territory, there are only three products on the market – the Arca-Swiss C1 Cube, the Photo Clam Multiflex (which is basically a Korean copy of the Cube) and the Linhof 3D Micro. When I pointed out that I was planning to review the Arca-Swiss C1 Cube and see if it would be suitable for my needs, one of our readers sent me some information about the Linhof 3D Micro and pointed out the fact that it uses an Arca-Swiss compatible screw-knob clamp. This immediately caught my attention, because the C1 Cube has been known to have an odd quick-release clamp that went through several revisions. I always prefer to use screw-knob clamps instead of quick-release versions, because some manufacturers like Really Right Stuff deviate from the original standard, which can create problems. As a result, I decided to test out both the C1 Cube and the Linhof 3D Micro to see which one would best suit my needs.

In this review, I will summarize my findings from about a month of use of both heads and discuss pros and cons of the Linhof 3D Micro, particularly when compared to the Arca-Swiss C1 Cube.

Linhof 3D Micro

Let’s take a look at the Linhof 3D Micro in more detail.

1) Specifications

Here is a quick rundown of the specifications:

Maximum Camera Supported: Large format
Load Capacity: 10 kg / 22 lb
Dimensions: 121 x 104 x 101mm
Quick Release: Yes
Quick Release Type: Arca-Swiss
Level: Yes
Tension Control: No
Tilting/Leveling Rotation: 12 degrees
Panning Rotation: 360 degrees
Tripod Mount Thread Size: 3/8″-16
Weight: 985g

With an impressive load capacity of 10 kg, the Linhof 3D Micro will support pretty much anything you throw at it, including large full format cameras.

2) Build Quality and Packaging

Without a doubt, the Linhof 3D Micro is a very fine instrument that is made to last for ages. At close to a kilo in weight, the all-metal head is built like a tank. The integrated Arca-Swiss compatible clamp is easy to operate and has a large mounting base for maximum stability and security. There is a small safety pin on the clamp to prevent compatible plates from sliding out completely when working at angles. The metal finish is smooth, but mine had a little bit of texture to it in some areas (and very light surface scratches), while other areas were covered with a little bit of grease – not something I expected from such a high-end head. After mounting a couple of quick release plates, I could see some surface paint coming off, which is again something that I normally do not expect to see early on.

There are a total of 5 knobs on the head. The knobs are also made of metal and seem to be pretty sturdy. However, I do have a couple of negative observations here. First of all, three of the five screw-knobs can be fully removed from the head, as can be seen from the below image:

Linhof 3D Micro Removable Bolts

Not sure why Linhof designed it this way, but I definitely prefer to see non-removable knobs instead (RRS, Kirk and others often use non-removable knobs) – less risk of potentially losing parts. In addition, the center of each knob is wrapped in rubber, which does not look very convincing quality-wise. Take a look at the two knobs from the above image:

Linhof 3D Micro Bolts

You can clearly see extra rubber parts sticking out, which just does not look good for such an expensive head. Another negative point is the fact that the rubber does not appear to be securely glued to the metal. So if you tighten the knob enough, the rubber part will continue to rotate. Because of this, I prefer to use all-metal knobs that have built-in textured resistance as seen on RRS, Kirk and Hejnar Photo clamps.

The Linhof 3D Micro comes in a relatively small box that contains the head, a small booklet (same as this PDF file) and an extra screw:

Linhof 3D Micro with Manual

3) Operation and Adjustments

When it comes to basic operation, the smaller bottom knob controls the panning motion on the base, which moves smoothly once loosened. The second larger knob from the base allows for side to side tilting motion up to 12 degrees each way and the third larger knob controls tilting front to back (depending on the position of the head), also up to 12 degrees. The two large knobs require a lot of movement to change angles – a full 360 degree rotation moves the head by approximately 1 degree, so you would need to turn the knobs quite a bit to get to each end. This is both good and bad. Good, because there is a lot of precision here and you can apply very fine adjustments. Bad, because it takes a lot of work to get the head to tilt, requiring a lot more time when working in the field. The fourth smaller knob from the bottom serves the same purpose as the one on the base – to provide panning motion. This way, you can tilt and pan the head in any direction, independent from the base.

Two bubble levels are provided for each side for proper leveling. I measured the precision of the bubble levels against the ones on my RRS rails and they seem to be quite accurate.

When working with the head, I had four important requirements:

  1. Allow for precise adjustments for both tilting and panning
  2. Handle heavy loads on either side of the head when tilted, since I use a specialized macro rail setup and can potentially move the camera side to side or front to back
  3. Have zero “play”, no matter how much it is tilted or panned
  4. Allow for secure locking/tightening to prevent potential tilting/panning

While the Linhof 3D Micro did an excellent job with the first three, I had a hard time with fully tightening the panning knobs. It seemed like no matter how much I tightened the screws, the head would still allow for panning motion. Although I was probably applying more power than needed/practical with my long rails, the C1 Cube that I compare the Linhof 3D Micro to below tightens very securely and stays that way. Not sure what the differences are – perhaps the switch-type knobs on the C1 are more effective for better tightening of the panning base.

4) Weight and Size

The Linhof 3D Micro is a pretty heavy geared head. Measuring 985g on the scale, it is a tad lighter than the C1 Cube and the RRS BH-55 ballhead that I frequently rely on. Size-wise, it is smaller in both width and height than the C1 cube (as pictured below in the comparison section), and shorter than many high-end full-size ballheads. It is obviously much smaller and lighter than the Manfrotto 405 Pro (which is a beast at 1.6 kg). If you align the knobs, the head should fit in most camera bags, although the larger knobs might be somewhat painful to deal with.

5) Linhof 3D Micro vs Arca-Swiss C1 Cube

When compared to its direct competitor, the Arca-Swiss C1 Cube, the Linhof 3D Micro has a few major weaknesses:

  1. The Linhof 3D Micro only allows up to 12 degrees of tilting and lateral leveling, while the C1 Cube is much more flexible and versatile, allowing for up to 30 degrees movement.
  2. Build quality of the C1 Cube is superior, with smooth finish and no cheap rubber parts.
  3. The Linhof 3D Micro requires a special “angled device” adapter plate in order to switch to vertical mode. The C1 Cube, on the other hand, has a special base that can be unlocked, allowing the head to be tilted to vertical position.
  4. The Arca-Swiss C1 Cube has a tension adjustment dial (+ and -) on both axes, while the Linhof 3D Micro does not.
  5. The Linhof 3D Micro is much slower than the C1 Cube, because it requires 1 full 360 degree turn to move by 1 degree. The C1 Cube moves to about 8 degrees with a similar 360 degree turn.
  6. The Arca-Swiss C1 Cube is significantly cheaper in the US compared to the Linhof 3D Micro ($1,572 vs $2,160), a difference of almost $600.

The only drawback of the C1 Cube pictured below is the flip-lock quick release clamp, which Arca-Swiss has been gluing to their heads to prevent people from using third party clamps. However, you can now buy a screw-knob Arca-Swiss version of the C1 Cube, so it is no longer an issue. Still, even the flip-lock clamp on the C1 Cube worked well for me and I had no problems using specialized RRS / Hejnar Photo plates and rails – all of them fit just fine.

Here is a side by side comparison between the two:

Linhof 3D Micro vs Arca-Swiss C1 Cube

As you can see, the Arca-Swiss C1 Cube is wider and longer than the Linhof 3D Micro. But more importantly, look how much more the C1 Cube can tilt – and that’s in both axes!

6) Summary

While the Linhof 3D Micro is certainly a nice head, I struggle to see much value in it when compared to the legendary Arca-Swiss C1 Cube. As pointed out above, the head has limited ability to tilt – only 12 degrees compared to the impressive 30 degree tilt of the C1 Cube. In addition, it requires another heavy and expensive adapter to be able to go vertical, while that capability is built into the C1 Cube. So if you compare all the features, build quality and versatility of the two, the C1 Cube is clearly superior in every way. On top of that, there is a significant difference in pricing between the two in the US – a $600 delta, which could cover the cost of tripod legs or a top-of-the-line BH-55 ballhead from RRS. I have already made my mind on what I will be using for my lab, and unfortunately, it will not be the Linhof 3D Micro. Stay tuned for a detailed review of the Arca-Swiss C1 Cube!

7) Where to Buy

The Linhof 3D Micro Leveling Head can be purchased from our partner, B&H Photo Video for $2,160 (as of 03/01/2014).

The post Linhof 3D Micro Review appeared first on Photography Life.

Arca-Swiss C1 Cube Review

$
0
0

In this review, I will talk about my experience and impressions with using perhaps the finest tripod head I have seen to date, the Arca-Swiss C1 Cube. Targeted specifically at macro, architecture and landscape photographers that need ultra high precision, with the ability to handle large and heavy cameras, the “Cube” is a very specialized, high-end tool. It has been on the market for a few years and went through several changes. The version I tested is the most current model and this particular review is for the Flip-Lock quick release type head – the one that had the most problems (more on this below). As of today, Arca-Swiss manufactures two types of the Cube: one with the the “Flip-Lock” clamp and one with a “Classic” screw-knob clamp, both of which are capable of securely attaching Arca-Swiss compatible plates, rails and other accessories.

Arca-Swiss C1 Cube

For the past few months, I have been on a long quest to find the perfect tool for my lens testing lab. After building a custom rig with sliding rails for focus bracketing and test chart alignment needs, I realized that I needed a very precise setup that would allow me to tilt the whole rig without having to constantly fiddle with making adjustments. I love my Really Right Stuff BH-55 ballhead, but for my particular situation, I found it to be a nuisance to use when small adjustments are needed. After reading good things about the Manfrotto 405 Pro geared head, I bought it and tried it out, only to discover that it had a little bit of “play” that was unacceptable for my lens testing needs. I then understood that my only option was to go premium and buy something that would give me fine precision and stability. In a short period of time, I discovered that there are very few options available on the market when shopping for geared heads. Aside from the Arca-Swiss C1 Cube, the Photo Clam Multiflex (which is basically a Korean copy of the Cube) and the Linhof 3D Micro, there is literally nothing else available. I could not obtain the Photo Clam Multiflex, but I was able to get a hold of the Linhof 3D Micro and Arca-Swiss C1 Cube. Both turned out to be very fine heads, but as I pointed out in my review, the Linhof 3D Micro disappointed me in a couple of areas like build quality and limitations, which made the C1 Cube stand out.

Let’s take a look at the Arca-Swiss C1 Cube in more detail.

1) Specifications

Here is a quick rundown of the specifications:

Maximum Camera Supported: Large format up to 8×10
Load Capacity: N/A
Dimensions: 110 x 84 x 84mm (without knobs, approx 110 x 110 x 110mm with knobs)
Quick Release: Yes
Quick Release Type: Arca-Swiss
Lock-Type: Flip-Lock
Level: Yes
Tension Control: Yes
Tilting/Leveling Rotation: 30 degrees
Panning Rotation: 360 degrees
Tripod Mount Thread Size: 3/8″-16
Weight: 1032g

Interestingly, Arca-Swiss does not specify anywhere what the maximum load capacity is. Some websites list a load capacity of 100 kg, which is insane! I am sure the Cube can take a lot of load – more than you would probably ever need, but the 100 kg claim sounds a little over the top. I have tried out my Nikon 200-400mm f/4G VR on it (coupled with the Nikon D800E) and I did not see any issues with stability / handling, even at extreme angles.

2) Build Quality and Packaging

As expected from Arca-Swiss products, the build quality of the C1 Cube is top notch. I have owned a number of Arca-Swiss products in the past, including the popular Monoball Z1 head (which I still use after 6 years) and I can certainly vouch for the quality of their products – simply outstanding. To appreciate how well the C1 Cube is made, just compare it to anything else on the market and you will quickly realize that the C1 almost belongs to a different class of its own. The finish is smooth and polished all around, with no sharp corners or edges. Each knob is made consistently, with securely attached rubber grips for enhanced handling. To me, the Arca-Swiss C1 Cube can be best described as work of art and engineering excellence. Just by holding and feeling it in your hands, you could tell that it probably took a team of incredibly talented individuals to craft such a fine tool.

The only thing Arca-Swiss often cheap-outs on is the manual – my C1 Cube came with literally two pages of paper manual stapled together and folded. Along with a warranty card and a small red notice that warns about use of third party non-compatible plates, everything was put in a Ziploc bag. Arca-Swiss could have designed a better manual with some marketing material and illustrations to make it a little more appealing. At the same time, I do not particularly care for packaging and product manuals, as long as the product itself is solid, which it certainly is!

3) Operation and Adjustments

Operating the Cube is certainly easier than it might appear when looking at the product image. There are four knobs that control tilt and leveling movements (two per axis). The knobs are interconnected on each side, so you could use one or both for adjustments. Knob rotation is very smooth, but it does not mean that the head is loose in any way – there is a bit of tension on the knobs to allow for finer adjustments. And if you want to go slower, there are two tension control dials on each axis that can be moved from minus (-) to plus (+) in order to tighten the movements even more:

Arca-Swiss C1 Cube Tension Dial

If you keep the dial on the minus (-) side, the head loosens up and if you move it towards the plus (+), the knob gets harder to turn. If you apply some force on the dial and move it as far to the plus (+) sign as possible, the knobs get extremely hard to move.

There is one additional knob on the bottom of the Cube that allows opening it up to use in vertical mode, which is great – it makes the Cube much more versatile when compared to the Linhof 3D Micro. Another huge plus to the Cube is the fact that it rotates up to 30% on each axis, which is far more than what the Linhof 3D Micro can accomplish (limited to just 12 degrees each way). Take a look at the below image that clearly demonstrates how much more the Arca-Swiss C1 Cube can tilt in comparison:

Linhof 3D Micro vs Arca-Swiss C1 Cube

In addition, the Cube does not require making a lot of turns on the knobs to move it. Adjustments can be done much faster when compared to the Linhof 3D Micro, which is good when needing to make bigger tilt changes – you won’t get as frustrated. Similar to the Linhof 3D Micro, there are two bubble levels for each side. I compared the bubble levels to the ones that sit on my macro rails and they appeared to be accurate.

There are two panning bases for capturing panoramas: one on the base for panning the whole head and one right under the clamp. So it is definitely a “panorama-friendly” head.

When working with the head, I had four important requirements:

  1. Allow for precise adjustments for both tilting and panning
  2. Handle heavy loads on either side of the head when tilted, since I use a specialized macro rail setup and can potentially move the camera side to side or front to back
  3. Have zero “play”, no matter how much it is tilted or panned
  4. Allow for secure locking/tightening to prevent potential tilting/panning

I am happy to say that the Cube met all of my requirements. After I locked my rails on the head, I tried to move the setup in different directions – there was no play whatsoever. And once I tightened everything up (including the top and bottom panning bases), the rails would not move at all, even after applying some force. In comparison, I could not get Linhof 3D Micro to tighten fully no matter how much force I applied when tightening the panning base.

4) Flip-Lock Clamp

The original version of the Arca-Swiss C1 Cube was shipped with a flip-lock clamp that was heavily criticized by many. First of all, it did not properly fit many plates and rails made by US manufacturers like RRS and Kirk – unlocking the flip-lock could fully detach the plate (imagine dropping camera gear as a result). Second, the flip-lock was too small and rather painful to use, especially with gloves. And lastly, the base of the clamp was rather small for the size of the Cube.

Arca-Swiss has made improvements to the flip-lock clamp and I am happy to say that the important problems have been addressed. First of all, the flip-lock clamp that came with my Cube fit all of my plates perfectly. I have tried RRS, Kirk, Hejnar Photo and other third party plates / rails and all of them securely fit the clamp. When the clamp was in fully open position, I could drop any of the plates that I have (not fully straight, needed a little bit of a side angle to drop). Bringing the flip-lock to the half position already tightened the plates pretty well and pushing it all the way to the closed position fully locked the plates in, dead on. I am not sure if Arca-Swiss has been making slight changes in locking size for the US market, but that’s how my sample was. The flip-lock is still somewhat painful to use though. It took me a little to figure out how to unlock the flip-lock – you have to push the small silver pin outwards and then it unlocks. Once it is in the half open position at 90 degrees, you then have to push the small silver screw inside towards you, which then allows to fully open the lock. If you have thick gloves, it would be very difficult to unlock it, so I am definitely not a big fan of this design. Take a look at how the flip-lock design works:

Arca-Swiss C1 Flip-Lock Operation

That’s why I have never been a fan of flip-lock quick release clamps!

The base of the clamp is still rather small, so I would love to be able to swap it out to a better clamp from RRS or Hejnar Photo. The bad news is, due to the number of repairs Arca-Swiss USA had to perform on these heads (due to wrong screw sizes that damaged the threads), the clamp is no longer easily detachable – Arca-Swiss now glues the clamp to the head. The good news is, Arca-Swiss finally realized that people might not like their flip-lock clamp design, so they are now offering heads with a classic screw-knob clamp. While I initially thought that I could get used to the flip-lock version of the head, I realized that it was just not for me, so I returned this one and ordered the screw-knob version instead. I don’t think I will be attempting to replace the screw-knob clamp with a third party clamp – too risky to potentially damage the Cube.

5) Weight and Size

At over a kilo of weight, the Cube weighs approximately the same as my full-size RRS BH-55 ballhead with a panning clamp. If you take into account all the knobs, it is also similar in width and height. It is a solid chunk of metal, although Arca-Swiss did a good job with minimizing its weight by shaving off some parts of the Cube, particularly along the axes and the base. When compared to the Linhof 3D Micro (as seen in the comparison image below), it is wider, a little taller and heavier.

6) Arca-Swiss C1 Cube vs Linhof 3D Micro

When compared to its direct competitor, the Linhof 3D Micro, the Cube has a few major advantages:

  1. The Linhof 3D Micro only allows up to 12 degrees of tilting and lateral leveling, while the C1 Cube is much more flexible and versatile, allowing for up to 30 degrees movement.
  2. Build quality of the C1 Cube is superior, with smooth finish and no cheap rubber parts.
  3. The Linhof 3D Micro requires a special “angled device” adapter plate in order to switch to vertical mode. The C1 Cube, on the other hand, has a base that can be unlocked, allowing the head to be tilted to vertical position.
  4. The Arca-Swiss C1 Cube has a tension adjustment dial (+ and -) on both axes, while the Linhof 3D Micro does not.
  5. The Linhof 3D Micro is much slower than the C1 Cube, because it requires 1 full 360 degree turn to move by 1 degree. The C1 Cube moves to about 8 degrees with a similar 360 degree turn.
  6. The Arca-Swiss C1 Cube is significantly cheaper in the US compared to the Linhof 3D Micro ($1,572 vs $2,160), a difference of almost $600.

Here is a side by side comparison between the two:

Arca-Swiss C1 Cube vs Linhof 3D Micro

7) Summary

Without a doubt, the Arca-Swiss C1 Cube is the finest tripod head I have used to date. When you factor in its features, ultra-high precision design and versatility, it is an engineering marvel and a work of art. For a number of years I have been wanting to try out the Cube, but I struggled to justify its high price and simply did not understand how it could be better than a solid ballhead. But after spending many hours in a lab testing lenses, I realized that a ballhead simply did not cut it for making fine adjustments, so I started looking at different solutions. After testing out several products, including the Manfrotto 405 Pro Geared Head and the Linhof 3D Micro, I realized that the Arca-Swiss C1 Cube stands above its competition and represents exactly the head that I have been looking for. Having spent over $10K on gear, charts and software for testing lenses, I am sure the Cube will be another good investment that will serve me well for years to come. It definitely deserves all the praises that it has been getting for years from working professionals and I am happy to join this list.

7) Where to Buy

The Arca-Swiss C1 Cube can be purchased from our partner, B&H Photo Video for $1,572. The Flip-Lock version of the head is also available for $1,699 (as of 03/07/2014).

The post Arca-Swiss C1 Cube Review appeared first on Photography Life.

Shooting Flowers and Foliage with Telephoto Lenses

$
0
0

My wife is an avid gardener and for more years than I can remember, I have accompanied her on a wide range of garden tours and other such outings. While gardening is of little interest to me per se, I do find some enjoyment in capturing images of flowers and foliage. And, on the odd occasion I have shot videos of private and public gardens.

Thomas Stirr Flower Photography (1)

From a still photography standpoint my technique is rather simple. I shoot handheld with a telephoto lens, most often my Nikkor 70-200 f/4 VR with my D800, sometimes even adding my TC-17E II teleconverter for extra reach when needed. If I am out with my Nikon 1 V2, I usually use the 1 Nikon 30-110 f/3.8-5.6.

Thomas Stirr Flower Photography (2)

I always try and shoot with white balance set for direct sunlight, cloudy, or shade depending on the individual conditions. I never use a flash or drag a tripod around with me. I also never manually adjust the position of any flowers or plants, trying instead to find the exact right viewing angle, background and lighting conditions that appeal to my sense of color and balance. I prefer using my D800, because of its incredible resolving power and good low-light capability, as it is often difficult to shoot at low ISOs. That’s not to say that one should never use a tripod and a proper macro setup – ideally, that’s what you want to use to get the best results.

Thomas Stirr Flower Photography (3)

My setup works for me, because it gives me flexibility to move around and change angles very quickly – crouching, lying on my belly, and sometimes putting myself in contortionist-like positions are often required in order for me to get the shot I want. Also, since I am often on private property during a garden tour, it is inappropriate to bring a tripod, blocking pathways, and otherwise inconveniencing homeowners and other visitors to their gardens.

Thomas Stirr Flower Photography (4)

One of my favorite times to do this type of photography is right after a light rain when colors can be very intense and the plants still have water droplets on them to add some additional interest. Partially cloudy or overcast days are much preferred over bright, sunny ones.

Thomas Stirr Flower Photography (5)

I find using a long telephoto lens helps me better isolate individual flowers that may be buried towards the back of a flower bed or in a similarly awkward position, which makes them inaccessible to photograph with a shorter lens. Using a telephoto lens makes this type of photography faster to do, and much more discreet. Image stabilization / vibration reduction obviously helps a great deal when shooting hand-held.

Thomas Stirr Flower Photography (6)

As we are getting into much warmer temperatures in the northern hemisphere, I would encourage our readers to experiment with some flower photography using telephoto lenses. It will teach you a great deal about distance, depth of field and subject isolation capabilities of your setup. Start out with a very basic setup – it does not have to be expensive. A 55-200mm or a 70-300mm lens would be very suitable for this type of photography. Lenses with a short “minimum focus distance” are ideal, because they allow you to get very close, while still maintaining the ability to focus.

Thomas Stirr Flower Photography (7)

Get close to the flower you are about to photograph, set the focal length of the lens as long as possible for shallow depth of field. Next, set your camera to Aperture Priority mode with the lens aperture set to the smallest f number like f/3.5 (might be f/5.6 at long focal lengths), turn Auto ISO on, turn on Image Stabilization / Vibration Reduction and you should be ready to go!

Thomas Stirr Flower Photography (8)

At very close distances and long focal lengths, you might find large apertures to create very shallow depth of field, which might only bring a very small portion of the flower in focus. If you want more in focus while still keeping the background blurry and smooth, make sure that the background is clear of other flowers / objects, or they are in the distance. Next, start increasing your f number (say from f/5.6 to f/11) and that should do the trick. If you are very close at “macro” distances, you might need to increase the f number even more!

Thomas Stirr Flower Photography (9)

Thomas Stirr Flower Photography (10)

Thomas Stirr Flower Photography (11)

If you have experimented with photographing flowers before, please feel free to share a link to your gallery or photos below!

Article and all images are Copyright Thomas Stirr. All rights reserved, no use, reproduction or duplication including electronic is allowed without written consent.

The post Shooting Flowers and Foliage with Telephoto Lenses appeared first on Photography Life.

Macro Image Comparison: Nikon D800 vs Nikon 1 V2

$
0
0

Since buying my first Nikon 1 V2 in August of last year I’ve been having some fun trying to push the limits of this little, mirrorless camera and its small CX sensor to see what it is capable of producing. On the surface doing a macro image comparison between a Nikon D800 and a Nikon 1 V2 may seem like a David and Goliath match-up.

Nikon D800 Nikon 1 V2

After all, one would expect the 36MP full frame sensor of the D800 to outperform the small 14MP CX sensor in the Nikon 1 V2, especially when stopped down to small apertures like f/22 and f/32 where diffraction can really punish image quality. Before I show you some images, let me introduce the subject of this image test: a pewter pig.

Pewter Pig in Palm of Hand

This article shows three exposures taken with each camera at f/5.6, f/11 and f/32. You can view the YouTube video to see the entire spread of aperture exposures:

All of the images that you’ll see in this article were taken with the cameras mounted on the same tripod and pistol grip, and using a 2-second (V2) or 3-second (D800) shutter delay. A Nikkor 105mm Micro f/2.8 VR lens was used for all of the images. I did exposures from f/5.6 all the way up to f/32 with both cameras. Focusing was done manually and concentrated on the left edge of the pig’s nose.

I moved the cameras in as close as I could to still achieve focus. After the initial manual focusing was done on the first image of each set, I only adjusted the aperture between shots (cameras were both set for aperture priority). None of the images in this article have been cropped at all. All images were shot at ISO-400. Here are the D800 images:

Nikon D800 f/5.6

Nikon D800 f/11

Nikon D800 f/32

RAW files from both cameras were processed through DxO OpticsPro 8 with standard default settings and two presets (sharpen fine details, HDR realistic). Viveza 2 was used to add +20 on Structure and 4 on Contrast for all images. CS6 was used to take the brightness on the V2 images to +20 so they matched the D800 files a bit better.

Since the Nikon 1 V2 has a 2.7X crop factor it produces a very narrow field of view and creates a more ‘magnified’ macro effect.

Nikon 1 V2 f/5.6 Small 1

Nikon 1 V2 f/11 Small 1

Nikon 1 V2 f/32 Small 1

To try and get some subject images somewhat similar in size to those captured by the D800, I did a third set of exposures and re-composed some V2 images by pulling the camera back away from the subject.

Nikon 1 V2 f/5.6 Small 2

Nikon 1 V2 f/11 Small 2

Nikon 1 V2 f/32 Small 2

Overall, I was quite surprised with how well both cameras held onto image detail as the Nikkor 105 f/2.8 lens was stopped down. I think this macro image comparison demonstrates that the Nikon 1 V2 is a pretty capable performer when paired with a good quality macro lens like the Nikkor 105 f/2.8, and its 2.7X crop factor adds another ‘fun’ dimension to macro photography.

Once I get my Nikon 1 V3 I’ll be doing another macro comparison to see what kind of impact its increased 18.4 MP resolution and lack of an optical low-pass filter has on macro image performance.

Article and all images Copyright 2014, Thomas Stirr. All rights reserved. No use, reproduction or duplication including electronic is allowed without written consent.

The post Macro Image Comparison: Nikon D800 vs Nikon 1 V2 appeared first on Photography Life.

Vello Auto Extension Tube Set for Nikon Review

$
0
0

Many years ago I bought a Nikon 55mm macro lens. This was an older, manual focus lens. It came with an older extension tube that did not communicate with the camera, meaning that any lens that was attached to it lost all communication with the camera, meaning it also became a manual focus lens. Worse yet, newer Nikon AF-S lenses that do not have an aperture ring weren’t usable at any aperture besides completely stopped down.

I really liked the idea of having an extension tube for more regular use, so I was always interested in trying extension tubes that would communicate with my camera and that I could use with all of my lenses. When I came across this set, they seemed like exactly what I was looking for. Will they find a permanent home in my camera bag or will they have a place in storage gathering dust next to my old extension tube?

Vello Auto Extension Tube for Nikon

1) Product Specifications

Includes
– 3 tubes: 12mm, 20mm, 36mm
– 2 caps

Details
– Shortens minimum focusing distance of lens for macro photography
– Extension tubes of 12mm, 20mm, and 36mm lengths can be used individually or in any combination of the three for greater magnification
– Full autofocus and exposure compatibility
– Lightweight design with metal mounts
– Alignment markers make placement on lenses and cameras easy
– Fits Nikon DSLR cameras and all F-mount lenses

2) Field Use

Let me start out by saying this: using these extension tubes is as easy as putting a lens on your camera. And really, that’s all there is to it. Simply put whichever tube you’d like to use on your camera body, attach your lens as normal and you’re ready to shoot. All of your lens functions (aperture control and autofocus) are available, as well as in-camera metering.

Vello Auto Extension Tube for Nikon

So, what does an extension tube do and why would you want to use one? An extension tube is essentially a hollow tube that moves the lens farther from the camera’s sensor, thus changing the focusing distance of the lens and allowing for closer focusing than without the extension tube. Theoretically, extension tubes can turn any lens into a macro lens with 1:1 reproduction capabilities.

There are a few benefits to using an extension tube in place of a macro lens. First, it’s a lot cheaper than a macro lens. Second, it’s a lot smaller and lighter than a macro lens. Third, you can use it with any lens you currently own without a decrease in optical performance (like you might experience with a close up filter).

Vello Auto Extension Tube for Nikon

As for the actual use of these tubes, my experience was overall positive. I found that my lenses tended to hunt a bit more than usual. I also found that shooting at f/1.4 with an extension tube doesn’t produce the best results. The depth of field is just too shallow, so plan on shooting at higher apertures. I was very happy with the different focusing distances I was able to achieve with varying combinations of tubes.

Vello Auto Extension Tube for Nikon

I was initially a little concerned when I put the tube/lens combo on my camera body. It doesn’t fit perfectly tight like just a lens does, so there’s a bit of play between the tube and the body. It’s not enough to cause a light leak and fortunately doesn’t affect focus, but does make the whole setup feel a little cheap. Also, the rear cap does not fit tightly and falls off. I even switched out the supplied cap with a Nikon cap and had the same results. I’m assuming this has something to do with why the tubes don’t fit tightly to the camera body.

3) Samples

The following image samples were taken to demonstrate the varying degrees of minimum focusing distance made possible by using extension tubes. All images are uncropped. I also left any vignetting that occurred. All were shot at f/4 with the Nikon 85mm f/1.4G AF-S lens.

Vello Auto Extension Tube for Nikon85mm lens, no extension tube

Vello Auto Extension Tube for Nikon85mm lens, 12mm extension tube

Vello Auto Extension Tube for Nikon85mm lens, 20mm extension tube

Vello Auto Extension Tube for Nikon85mm lens, 36mm extension tube

Vello Auto Extension Tube for Nikon85mm lens, 36mm extension tube + 12mm extension tube

Vello Auto Extension Tube for Nikon85mm lens, 36mm extension tube + 20mm extension tube

Vello Auto Extension Tube for Nikon85mm lens, 36mm extension tube + 20mm extension tube + 12mm extension tube

4) Summary

If you have a need for close up photos but don’t need the optical precision of a dedicated macro lens, a set of extension tubes is hard to beat. They’re small, inexpensive, easy to use and are flexible in how you use them. They can be used in any combination with any lens, giving a huge variety of applications. This set now has a permanent home in my camera bag.

5) Pricing and Where to Buy

The Vello Auto Extension Tube Set for Nikon is priced at $79.95 as of 6/21/2014 and is available at B&H Photo Video. They also make sets for Canon and Sony.

The post Vello Auto Extension Tube Set for Nikon Review appeared first on Photography Life.

What is an Extension Tube?

$
0
0

Our readers frequently ask us about extension tubes for macro photography. Since I am not much into macro myself, I have not explored this area of photography enough to qualify to write about it. While I have done some macro photography for product shots and ring shots in weddings with my Nikon 105mm f/2.8G VR lens (a very sharp lens that I absolutely love), I have not explored its full capabilities and I have not tried to use extension tubes and bellows to do crazy things that you can achieve with a true macro setup. Meanwhile, our readers have been gracious enough to fill in, and I have recently received the below post from one of our readers, Usama Nasir, who talks about what extension tubes are and how they are used in macro photography.

Extension Tubes

If you find yourself frustrated by the minimum focusing distance of your lens, if you constantly find that you’re unable to frame the shot you want, because you can’t get close enough to focus, then you may want to consider using extension tubes.

How Extension Tubes Work

An extension tube is an attachment that goes between your camera body and your lens. It’s not an optical element, so there is no glass involved. All it does, is get the lens further away from the focal plane. Now, the practical upshot of this, is that your minimum focusing distance gets smaller. So, with an extension tube, you can get closer to your subject; you can fill the frame with more of it, and still achieve focus.

Image using Extension Tubes

For example, I have the Canon 24-105mm lens, which has a minimum focus distance of 1.48 feet (0.45 meters). The above shot is as close as I can get to this flower. Nice enough, but I like to get in closer, so I’m going to add one of the extension tubes (I have three of them and we’re going talk about their differences shortly). Extension tubes simply go on your camera body like a lens. So, I’m going to take my lens off, attach the shortest extension tube on the camera body, then attach my lens to the other end of the extension tube.

The reason I’m choosing the shortest one, is I don’t want to go in real far – I just want to get a little bit of boost in magnification. With this setup, I am not able to physically get closer to my subject and photograph at a greater magnification. Now, there is a trade-off to using extension tubes – they can eat up some of the light. I may have to increase my ISO or potentially decrease my f-stop (aperture) to get a little more light. And if I use a wider aperture, then I’m going to have less depth of field to work with. So, there is this trade-off of magnification versus depth of field. But what’s nice, is that I got in closer – something that I was not able to do before with the bare lens.

Sample Image with Extension Tube

The nice thing is that I don’t have to worry about cropping my image in post-production just to try to get closer to my subject – I get to use more of the pixels in my camera. You can use extension tubes with any type of lenses: primes or zooms, portraits, or even macro! Extension tubes are an inexpensive way to get the kind of short focusing distances that you get from a dedicated and much more expensive macro lens.

Extension Tube Sizes

Extension tubes come in different sizes. I have a set of three Kenko Extension Tubes (here is the Nikon version). I have one that is 12mm; a longer 20mm one; and the longest one is 36mm. I can also stack these together. As I stack them, they obviously get longer. And, as they get longer, I get more extension, which means more magnification power. Once I attach this setup on my camera, I’m going to be able to get all the way into the full macro range, which is going to open up all of the macro concerns and practices that I’m going to have to think about as I’m shooting that close.

The effectiveness of extension tubes decreases as focal length increases. In other words, you’re going to see more of a change sticking this stack onto a 50mm lens, than you will when you put it on a 300mm lens. You also need to be careful when working with extreme wide-angle lenses. If I put the 68mm stack of tubes on a 20mm lens, I won’t be able to focus at all, because my minimum focusing distance will be pulled back into the inside of the lens. So, one other very important thing to understand about extension tubes is that some of them have electrical contacts that allow your camera to communicate with your lens, and some don’t (the above linked versions do).

If you get tubes that don’t, then you won’t have autofocus capability or aperture control. Now, Canon and Nikon both make sets of active extension tubes with full electronic contacts. While they work great, they are obviously very expensive. Kenko extension tubes that I personally use are much cheaper than brand versions and you could even get cheaper ones from other third party brands like Vello. My extension tubes have the much-needed electronic contacts, giving me full autofocus capability, and yet they cost much less than the Canon tubes.

Extension tubes are a very affordable way to start getting into macro photography. What’s more is that they are small, lightweight, and easy to carry around. If you are worried about whether you should invest in extension tubes, or go ahead and invest in a true macro lens, bear in mind that sometimes you’ll need to get a macro lens closer to your subject, so you’ll continue to use extension tubes, even if you eventually buy a macro lens. In the meantime, they’re a great way to start experimenting with close magnifications using your regular lenses in your arsenal.

Other Means to Get Closer

Extension tubes are not the only way to get closer to your subject. You can also purchase close-up filters, dedicated macro bellows that have much more flexibility than extension tubes and can potentially be used to move your plane of focus like tilt/shift lenses do (can get quite expensive) and you can also utilize adapters to use normal lenses in reverse position (which basically converts normal lenses into macro lenses). There are also other types of cheap DYI solutions that can effectively achieve the same results as using extension tubes or bellows. I would encourage Photography Life readers to dig into this subject more, because there is so much to explore in the world of macro photography.

The post What is an Extension Tube? appeared first on Photography Life.

Linhof 3D Micro Review

$
0
0

This is an in-depth review of the Linhof 3D Micro Leveling Head with dovetail track, a high-end precision geared tripod head specifically designed for handling medium to large format cameras and other specialized rails for macro and architectural photography. Fitted with an Arca-Swiss compatible screw-knob clamp, this specific version is designed to fit any kind of Arca-Swiss plate or rail (there is also another version of the same head, but with a quick-release “Quickfix” adapter that can be mounted directly to a camera).

After testing out the Manfrotto 405 Pro geared head, I realized that I needed something more precise and stable with no “play” whatsoever. Unfortunately, when it comes to professional gear heads, there are not that many options on the market today. Once you get into the high-end geared head territory, there are only three products on the market – the Arca-Swiss C1 Cube, the Photo Clam Multiflex (which is basically a Korean copy of the Cube) and the Linhof 3D Micro. When I pointed out that I was planning to review the Arca-Swiss C1 Cube and see if it would be suitable for my needs, one of our readers sent me some information about the Linhof 3D Micro and pointed out the fact that it uses an Arca-Swiss compatible screw-knob clamp. This immediately caught my attention, because the C1 Cube has been known to have an odd quick-release clamp that went through several revisions. I always prefer to use screw-knob clamps instead of quick-release versions, because some manufacturers like Really Right Stuff deviate from the original standard, which can create problems. As a result, I decided to test out both the C1 Cube and the Linhof 3D Micro to see which one would best suit my needs.

In this review, I will summarize my findings from about a month of use of both heads and discuss pros and cons of the Linhof 3D Micro, particularly when compared to the Arca-Swiss C1 Cube.

Linhof 3D Micro

Let’s take a look at the Linhof 3D Micro in more detail.

1) Specifications

Here is a quick rundown of the specifications:

Maximum Camera Supported: Large format
Load Capacity: 10 kg / 22 lb
Dimensions: 121 x 104 x 101mm
Quick Release: Yes
Quick Release Type: Arca-Swiss
Level: Yes
Tension Control: No
Tilting/Leveling Rotation: 12 degrees
Panning Rotation: 360 degrees
Tripod Mount Thread Size: 3/8″-16
Weight: 985g

With an impressive load capacity of 10 kg, the Linhof 3D Micro will support pretty much anything you throw at it, including large full format cameras.

2) Build Quality and Packaging

Without a doubt, the Linhof 3D Micro is a very fine instrument that is made to last for ages. At close to a kilo in weight, the all-metal head is built like a tank. The integrated Arca-Swiss compatible clamp is easy to operate and has a large mounting base for maximum stability and security. There is a small safety pin on the clamp to prevent compatible plates from sliding out completely when working at angles. The metal finish is smooth, but mine had a little bit of texture to it in some areas (and very light surface scratches), while other areas were covered with a little bit of grease – not something I expected from such a high-end head. After mounting a couple of quick release plates, I could see some surface paint coming off, which is again something that I normally do not expect to see early on.

There are a total of 5 knobs on the head. The knobs are also made of metal and seem to be pretty sturdy. However, I do have a couple of negative observations here. First of all, three of the five screw-knobs can be fully removed from the head, as can be seen from the below image:

Linhof 3D Micro Removable Bolts

Not sure why Linhof designed it this way, but I definitely prefer to see non-removable knobs instead (RRS, Kirk and others often use non-removable knobs) – less risk of potentially losing parts. In addition, the center of each knob is wrapped in rubber, which does not look very convincing quality-wise. Take a look at the two knobs from the above image:

Linhof 3D Micro Bolts

You can clearly see extra rubber parts sticking out, which just does not look good for such an expensive head. Another negative point is the fact that the rubber does not appear to be securely glued to the metal. So if you tighten the knob enough, the rubber part will continue to rotate. Because of this, I prefer to use all-metal knobs that have built-in textured resistance as seen on RRS, Kirk and Hejnar Photo clamps.

The Linhof 3D Micro comes in a relatively small box that contains the head, a small booklet (same as this PDF file) and an extra screw:

Linhof 3D Micro with Manual

3) Operation and Adjustments

When it comes to basic operation, the smaller bottom knob controls the panning motion on the base, which moves smoothly once loosened. The second larger knob from the base allows for side to side tilting motion up to 12 degrees each way and the third larger knob controls tilting front to back (depending on the position of the head), also up to 12 degrees. The two large knobs require a lot of movement to change angles – a full 360 degree rotation moves the head by approximately 1 degree, so you would need to turn the knobs quite a bit to get to each end. This is both good and bad. Good, because there is a lot of precision here and you can apply very fine adjustments. Bad, because it takes a lot of work to get the head to tilt, requiring a lot more time when working in the field. The fourth smaller knob from the bottom serves the same purpose as the one on the base – to provide panning motion. This way, you can tilt and pan the head in any direction, independent from the base.

Two bubble levels are provided for each side for proper leveling. I measured the precision of the bubble levels against the ones on my RRS rails and they seem to be quite accurate.

When working with the head, I had four important requirements:

  1. Allow for precise adjustments for both tilting and panning
  2. Handle heavy loads on either side of the head when tilted, since I use a specialized macro rail setup and can potentially move the camera side to side or front to back
  3. Have zero “play”, no matter how much it is tilted or panned
  4. Allow for secure locking/tightening to prevent potential tilting/panning

While the Linhof 3D Micro did an excellent job with the first three, I had a hard time with fully tightening the panning knobs. It seemed like no matter how much I tightened the screws, the head would still allow for panning motion. Although I was probably applying more power than needed/practical with my long rails, the C1 Cube that I compare the Linhof 3D Micro to below tightens very securely and stays that way. Not sure what the differences are – perhaps the switch-type knobs on the C1 are more effective for better tightening of the panning base.

4) Weight and Size

The Linhof 3D Micro is a pretty heavy geared head. Measuring 985g on the scale, it is a tad lighter than the C1 Cube and the RRS BH-55 ballhead that I frequently rely on. Size-wise, it is smaller in both width and height than the C1 cube (as pictured below in the comparison section), and shorter than many high-end full-size ballheads. It is obviously much smaller and lighter than the Manfrotto 405 Pro (which is a beast at 1.6 kg). If you align the knobs, the head should fit in most camera bags, although the larger knobs might be somewhat painful to deal with.

5) Linhof 3D Micro vs Arca-Swiss C1 Cube

When compared to its direct competitor, the Arca-Swiss C1 Cube, the Linhof 3D Micro has a few major weaknesses:

  1. The Linhof 3D Micro only allows up to 12 degrees of tilting and lateral leveling, while the C1 Cube is much more flexible and versatile, allowing for up to 30 degrees movement.
  2. Build quality of the C1 Cube is superior, with smooth finish and no cheap rubber parts.
  3. The Linhof 3D Micro requires a special “angled device” adapter plate in order to switch to vertical mode. The C1 Cube, on the other hand, has a special base that can be unlocked, allowing the head to be tilted to vertical position.
  4. The Arca-Swiss C1 Cube has a tension adjustment dial (+ and -) on both axes, while the Linhof 3D Micro does not.
  5. The Linhof 3D Micro is much slower than the C1 Cube, because it requires 1 full 360 degree turn to move by 1 degree. The C1 Cube moves to about 8 degrees with a similar 360 degree turn.
  6. The Arca-Swiss C1 Cube is significantly cheaper in the US compared to the Linhof 3D Micro ($1,572 vs $2,160), a difference of almost $600.

The only drawback of the C1 Cube pictured below is the flip-lock quick release clamp, which Arca-Swiss has been gluing to their heads to prevent people from using third party clamps. However, you can now buy a screw-knob Arca-Swiss version of the C1 Cube, so it is no longer an issue. Still, even the flip-lock clamp on the C1 Cube worked well for me and I had no problems using specialized RRS / Hejnar Photo plates and rails – all of them fit just fine.

Here is a side by side comparison between the two:

Linhof 3D Micro vs Arca-Swiss C1 Cube

As you can see, the Arca-Swiss C1 Cube is wider and longer than the Linhof 3D Micro. But more importantly, look how much more the C1 Cube can tilt – and that’s in both axes!

6) Summary

While the Linhof 3D Micro is certainly a nice head, I struggle to see much value in it when compared to the legendary Arca-Swiss C1 Cube. As pointed out above, the head has limited ability to tilt – only 12 degrees compared to the impressive 30 degree tilt of the C1 Cube. In addition, it requires another heavy and expensive adapter to be able to go vertical, while that capability is built into the C1 Cube. So if you compare all the features, build quality and versatility of the two, the C1 Cube is clearly superior in every way. On top of that, there is a significant difference in pricing between the two in the US – a $600 delta, which could cover the cost of tripod legs or a top-of-the-line BH-55 ballhead from RRS. I have already made my mind on what I will be using for my lab, and unfortunately, it will not be the Linhof 3D Micro. Stay tuned for a detailed review of the Arca-Swiss C1 Cube!

7) Where to Buy

The Linhof 3D Micro Leveling Head can be purchased from our partner, B&H Photo Video for $2,160 (as of 03/01/2014).

The post Linhof 3D Micro Review appeared first on Photography Life.


Arca-Swiss C1 Cube Review

$
0
0

In this review, I will talk about my experience and impressions with using perhaps the finest tripod head I have seen to date, the Arca-Swiss C1 Cube. Targeted specifically at macro, architecture and landscape photographers that need ultra high precision, with the ability to handle large and heavy cameras, the “Cube” is a very specialized, high-end tool. It has been on the market for a few years and went through several changes. The version I tested is the most current model and this particular review is for the Flip-Lock quick release type head – the one that had the most problems (more on this below). As of today, Arca-Swiss manufactures two types of the Cube: one with the the “Flip-Lock” clamp and one with a “Classic” screw-knob clamp, both of which are capable of securely attaching Arca-Swiss compatible plates, rails and other accessories.

Arca-Swiss C1 Cube

For the past few months, I have been on a long quest to find the perfect tool for my lens testing lab. After building a custom rig with sliding rails for focus bracketing and test chart alignment needs, I realized that I needed a very precise setup that would allow me to tilt the whole rig without having to constantly fiddle with making adjustments. I love my Really Right Stuff BH-55 ballhead, but for my particular situation, I found it to be a nuisance to use when small adjustments are needed. After reading good things about the Manfrotto 405 Pro geared head, I bought it and tried it out, only to discover that it had a little bit of “play” that was unacceptable for my lens testing needs. I then understood that my only option was to go premium and buy something that would give me fine precision and stability. In a short period of time, I discovered that there are very few options available on the market when shopping for geared heads. Aside from the Arca-Swiss C1 Cube, the Photo Clam Multiflex (which is basically a Korean copy of the Cube) and the Linhof 3D Micro, there is literally nothing else available. I could not obtain the Photo Clam Multiflex, but I was able to get a hold of the Linhof 3D Micro and Arca-Swiss C1 Cube. Both turned out to be very fine heads, but as I pointed out in my review, the Linhof 3D Micro disappointed me in a couple of areas like build quality and limitations, which made the C1 Cube stand out.

Let’s take a look at the Arca-Swiss C1 Cube in more detail.

1) Specifications

Here is a quick rundown of the specifications:

Maximum Camera Supported: Large format up to 8×10
Load Capacity: N/A
Dimensions: 110 x 84 x 84mm (without knobs, approx 110 x 110 x 110mm with knobs)
Quick Release: Yes
Quick Release Type: Arca-Swiss
Lock-Type: Flip-Lock
Level: Yes
Tension Control: Yes
Tilting/Leveling Rotation: 30 degrees
Panning Rotation: 360 degrees
Tripod Mount Thread Size: 3/8″-16
Weight: 1032g

Interestingly, Arca-Swiss does not specify anywhere what the maximum load capacity is. Some websites list a load capacity of 100 kg, which is insane! I am sure the Cube can take a lot of load – more than you would probably ever need, but the 100 kg claim sounds a little over the top. I have tried out my Nikon 200-400mm f/4G VR on it (coupled with the Nikon D800E) and I did not see any issues with stability / handling, even at extreme angles.

2) Build Quality and Packaging

As expected from Arca-Swiss products, the build quality of the C1 Cube is top notch. I have owned a number of Arca-Swiss products in the past, including the popular Monoball Z1 head (which I still use after 6 years) and I can certainly vouch for the quality of their products – simply outstanding. To appreciate how well the C1 Cube is made, just compare it to anything else on the market and you will quickly realize that the C1 almost belongs to a different class of its own. The finish is smooth and polished all around, with no sharp corners or edges. Each knob is made consistently, with securely attached rubber grips for enhanced handling. To me, the Arca-Swiss C1 Cube can be best described as work of art and engineering excellence. Just by holding and feeling it in your hands, you could tell that it probably took a team of incredibly talented individuals to craft such a fine tool.

The only thing Arca-Swiss often cheap-outs on is the manual – my C1 Cube came with literally two pages of paper manual stapled together and folded. Along with a warranty card and a small red notice that warns about use of third party non-compatible plates, everything was put in a Ziploc bag. Arca-Swiss could have designed a better manual with some marketing material and illustrations to make it a little more appealing. At the same time, I do not particularly care for packaging and product manuals, as long as the product itself is solid, which it certainly is!

3) Operation and Adjustments

Operating the Cube is certainly easier than it might appear when looking at the product image. There are four knobs that control tilt and leveling movements (two per axis). The knobs are interconnected on each side, so you could use one or both for adjustments. Knob rotation is very smooth, but it does not mean that the head is loose in any way – there is a bit of tension on the knobs to allow for finer adjustments. And if you want to go slower, there are two tension control dials on each axis that can be moved from minus (-) to plus (+) in order to tighten the movements even more:

Arca-Swiss C1 Cube Tension Dial

If you keep the dial on the minus (-) side, the head loosens up and if you move it towards the plus (+), the knob gets harder to turn. If you apply some force on the dial and move it as far to the plus (+) sign as possible, the knobs get extremely hard to move.

There is one additional knob on the bottom of the Cube that allows opening it up to use in vertical mode, which is great – it makes the Cube much more versatile when compared to the Linhof 3D Micro. Another huge plus to the Cube is the fact that it rotates up to 30% on each axis, which is far more than what the Linhof 3D Micro can accomplish (limited to just 12 degrees each way). Take a look at the below image that clearly demonstrates how much more the Arca-Swiss C1 Cube can tilt in comparison:

Linhof 3D Micro vs Arca-Swiss C1 Cube

In addition, the Cube does not require making a lot of turns on the knobs to move it. Adjustments can be done much faster when compared to the Linhof 3D Micro, which is good when needing to make bigger tilt changes – you won’t get as frustrated. Similar to the Linhof 3D Micro, there are two bubble levels for each side. I compared the bubble levels to the ones that sit on my macro rails and they appeared to be accurate.

There are two panning bases for capturing panoramas: one on the base for panning the whole head and one right under the clamp. So it is definitely a “panorama-friendly” head.

When working with the head, I had four important requirements:

  1. Allow for precise adjustments for both tilting and panning
  2. Handle heavy loads on either side of the head when tilted, since I use a specialized macro rail setup and can potentially move the camera side to side or front to back
  3. Have zero “play”, no matter how much it is tilted or panned
  4. Allow for secure locking/tightening to prevent potential tilting/panning

I am happy to say that the Cube met all of my requirements. After I locked my rails on the head, I tried to move the setup in different directions – there was no play whatsoever. And once I tightened everything up (including the top and bottom panning bases), the rails would not move at all, even after applying some force. In comparison, I could not get Linhof 3D Micro to tighten fully no matter how much force I applied when tightening the panning base.

4) Flip-Lock Clamp

The original version of the Arca-Swiss C1 Cube was shipped with a flip-lock clamp that was heavily criticized by many. First of all, it did not properly fit many plates and rails made by US manufacturers like RRS and Kirk – unlocking the flip-lock could fully detach the plate (imagine dropping camera gear as a result). Second, the flip-lock was too small and rather painful to use, especially with gloves. And lastly, the base of the clamp was rather small for the size of the Cube.

Arca-Swiss has made improvements to the flip-lock clamp and I am happy to say that the important problems have been addressed. First of all, the flip-lock clamp that came with my Cube fit all of my plates perfectly. I have tried RRS, Kirk, Hejnar Photo and other third party plates / rails and all of them securely fit the clamp. When the clamp was in fully open position, I could drop any of the plates that I have (not fully straight, needed a little bit of a side angle to drop). Bringing the flip-lock to the half position already tightened the plates pretty well and pushing it all the way to the closed position fully locked the plates in, dead on. I am not sure if Arca-Swiss has been making slight changes in locking size for the US market, but that’s how my sample was. The flip-lock is still somewhat painful to use though. It took me a little to figure out how to unlock the flip-lock – you have to push the small silver pin outwards and then it unlocks. Once it is in the half open position at 90 degrees, you then have to push the small silver screw inside towards you, which then allows to fully open the lock. If you have thick gloves, it would be very difficult to unlock it, so I am definitely not a big fan of this design. Take a look at how the flip-lock design works:

Arca-Swiss C1 Flip-Lock Operation

That’s why I have never been a fan of flip-lock quick release clamps!

The base of the clamp is still rather small, so I would love to be able to swap it out to a better clamp from RRS or Hejnar Photo. The bad news is, due to the number of repairs Arca-Swiss USA had to perform on these heads (due to wrong screw sizes that damaged the threads), the clamp is no longer easily detachable – Arca-Swiss now glues the clamp to the head. The good news is, Arca-Swiss finally realized that people might not like their flip-lock clamp design, so they are now offering heads with a classic screw-knob clamp. While I initially thought that I could get used to the flip-lock version of the head, I realized that it was just not for me, so I returned this one and ordered the screw-knob version instead. I don’t think I will be attempting to replace the screw-knob clamp with a third party clamp – too risky to potentially damage the Cube.

5) Weight and Size

At over a kilo of weight, the Cube weighs approximately the same as my full-size RRS BH-55 ballhead with a panning clamp. If you take into account all the knobs, it is also similar in width and height. It is a solid chunk of metal, although Arca-Swiss did a good job with minimizing its weight by shaving off some parts of the Cube, particularly along the axes and the base. When compared to the Linhof 3D Micro (as seen in the comparison image below), it is wider, a little taller and heavier.

6) Arca-Swiss C1 Cube vs Linhof 3D Micro

When compared to its direct competitor, the Linhof 3D Micro, the Cube has a few major advantages:

  1. The Linhof 3D Micro only allows up to 12 degrees of tilting and lateral leveling, while the C1 Cube is much more flexible and versatile, allowing for up to 30 degrees movement.
  2. Build quality of the C1 Cube is superior, with smooth finish and no cheap rubber parts.
  3. The Linhof 3D Micro requires a special “angled device” adapter plate in order to switch to vertical mode. The C1 Cube, on the other hand, has a base that can be unlocked, allowing the head to be tilted to vertical position.
  4. The Arca-Swiss C1 Cube has a tension adjustment dial (+ and -) on both axes, while the Linhof 3D Micro does not.
  5. The Linhof 3D Micro is much slower than the C1 Cube, because it requires 1 full 360 degree turn to move by 1 degree. The C1 Cube moves to about 8 degrees with a similar 360 degree turn.
  6. The Arca-Swiss C1 Cube is significantly cheaper in the US compared to the Linhof 3D Micro ($1,572 vs $2,160), a difference of almost $600.

Here is a side by side comparison between the two:

Arca-Swiss C1 Cube vs Linhof 3D Micro

7) Summary

Without a doubt, the Arca-Swiss C1 Cube is the finest tripod head I have used to date. When you factor in its features, ultra-high precision design and versatility, it is an engineering marvel and a work of art. For a number of years I have been wanting to try out the Cube, but I struggled to justify its high price and simply did not understand how it could be better than a solid ballhead. But after spending many hours in a lab testing lenses, I realized that a ballhead simply did not cut it for making fine adjustments, so I started looking at different solutions. After testing out several products, including the Manfrotto 405 Pro Geared Head and the Linhof 3D Micro, I realized that the Arca-Swiss C1 Cube stands above its competition and represents exactly the head that I have been looking for. Having spent over $10K on gear, charts and software for testing lenses, I am sure the Cube will be another good investment that will serve me well for years to come. It definitely deserves all the praises that it has been getting for years from working professionals and I am happy to join this list.

7) Where to Buy

The Arca-Swiss C1 Cube can be purchased from our partner, B&H Photo Video for $1,572. The Flip-Lock version of the head is also available for $1,699 (as of 03/07/2014).

The post Arca-Swiss C1 Cube Review appeared first on Photography Life.

Shooting Flowers and Foliage with Telephoto Lenses

$
0
0

My wife is an avid gardener and for more years than I can remember, I have accompanied her on a wide range of garden tours and other such outings. While gardening is of little interest to me per se, I do find some enjoyment in capturing images of flowers and foliage. And, on the odd occasion I have shot videos of private and public gardens.

Thomas Stirr Flower Photography (1)

From a still photography standpoint my technique is rather simple. I shoot handheld with a telephoto lens, most often my Nikkor 70-200 f/4 VR with my D800, sometimes even adding my TC-17E II teleconverter for extra reach when needed. If I am out with my Nikon 1 V2, I usually use the 1 Nikon 30-110 f/3.8-5.6.

Thomas Stirr Flower Photography (2)

I always try and shoot with white balance set for direct sunlight, cloudy, or shade depending on the individual conditions. I never use a flash or drag a tripod around with me. I also never manually adjust the position of any flowers or plants, trying instead to find the exact right viewing angle, background and lighting conditions that appeal to my sense of color and balance. I prefer using my D800, because of its incredible resolving power and good low-light capability, as it is often difficult to shoot at low ISOs. That’s not to say that one should never use a tripod and a proper macro setup – ideally, that’s what you want to use to get the best results.

Thomas Stirr Flower Photography (3)

My setup works for me, because it gives me flexibility to move around and change angles very quickly – crouching, lying on my belly, and sometimes putting myself in contortionist-like positions are often required in order for me to get the shot I want. Also, since I am often on private property during a garden tour, it is inappropriate to bring a tripod, blocking pathways, and otherwise inconveniencing homeowners and other visitors to their gardens.

Thomas Stirr Flower Photography (4)

One of my favorite times to do this type of photography is right after a light rain when colors can be very intense and the plants still have water droplets on them to add some additional interest. Partially cloudy or overcast days are much preferred over bright, sunny ones.

Thomas Stirr Flower Photography (5)

I find using a long telephoto lens helps me better isolate individual flowers that may be buried towards the back of a flower bed or in a similarly awkward position, which makes them inaccessible to photograph with a shorter lens. Using a telephoto lens makes this type of photography faster to do, and much more discreet. Image stabilization / vibration reduction obviously helps a great deal when shooting hand-held.

Thomas Stirr Flower Photography (6)

As we are getting into much warmer temperatures in the northern hemisphere, I would encourage our readers to experiment with some flower photography using telephoto lenses. It will teach you a great deal about distance, depth of field and subject isolation capabilities of your setup. Start out with a very basic setup – it does not have to be expensive. A 55-200mm or a 70-300mm lens would be very suitable for this type of photography. Lenses with a short “minimum focus distance” are ideal, because they allow you to get very close, while still maintaining the ability to focus.

Thomas Stirr Flower Photography (7)

Get close to the flower you are about to photograph, set the focal length of the lens as long as possible for shallow depth of field. Next, set your camera to Aperture Priority mode with the lens aperture set to the smallest f number like f/3.5 (might be f/5.6 at long focal lengths), turn Auto ISO on, turn on Image Stabilization / Vibration Reduction and you should be ready to go!

Thomas Stirr Flower Photography (8)

At very close distances and long focal lengths, you might find large apertures to create very shallow depth of field, which might only bring a very small portion of the flower in focus. If you want more in focus while still keeping the background blurry and smooth, make sure that the background is clear of other flowers / objects, or they are in the distance. Next, start increasing your f number (say from f/5.6 to f/11) and that should do the trick. If you are very close at “macro” distances, you might need to increase the f number even more!

Thomas Stirr Flower Photography (9)

Thomas Stirr Flower Photography (10)

Thomas Stirr Flower Photography (11)

If you have experimented with photographing flowers before, please feel free to share a link to your gallery or photos below!

Article and all images are Copyright Thomas Stirr. All rights reserved, no use, reproduction or duplication including electronic is allowed without written consent.

The post Shooting Flowers and Foliage with Telephoto Lenses appeared first on Photography Life.

Macro Image Comparison: Nikon D800 vs Nikon 1 V2

$
0
0

Since buying my first Nikon 1 V2 in August of last year I’ve been having some fun trying to push the limits of this little, mirrorless camera and its small CX sensor to see what it is capable of producing. On the surface doing a macro image comparison between a Nikon D800 and a Nikon 1 V2 may seem like a David and Goliath match-up.

Nikon D800 Nikon 1 V2

After all, one would expect the 36MP full frame sensor of the D800 to outperform the small 14MP CX sensor in the Nikon 1 V2, especially when stopped down to small apertures like f/22 and f/32 where diffraction can really punish image quality. Before I show you some images, let me introduce the subject of this image test: a pewter pig.

Pewter Pig in Palm of Hand

This article shows three exposures taken with each camera at f/5.6, f/11 and f/32. You can view the YouTube video to see the entire spread of aperture exposures:

All of the images that you’ll see in this article were taken with the cameras mounted on the same tripod and pistol grip, and using a 2-second (V2) or 3-second (D800) shutter delay. A Nikkor 105mm Micro f/2.8 VR lens was used for all of the images. I did exposures from f/5.6 all the way up to f/32 with both cameras. Focusing was done manually and concentrated on the left edge of the pig’s nose.

I moved the cameras in as close as I could to still achieve focus. After the initial manual focusing was done on the first image of each set, I only adjusted the aperture between shots (cameras were both set for aperture priority). None of the images in this article have been cropped at all. All images were shot at ISO-400. Here are the D800 images:

Nikon D800 f/5.6

Nikon D800 f/11

Nikon D800 f/32

RAW files from both cameras were processed through DxO OpticsPro 8 with standard default settings and two presets (sharpen fine details, HDR realistic). Viveza 2 was used to add +20 on Structure and 4 on Contrast for all images. CS6 was used to take the brightness on the V2 images to +20 so they matched the D800 files a bit better.

Since the Nikon 1 V2 has a 2.7X crop factor it produces a very narrow field of view and creates a more ‘magnified’ macro effect.

Nikon 1 V2 f/5.6 Small 1

Nikon 1 V2 f/11 Small 1

Nikon 1 V2 f/32 Small 1

To try and get some subject images somewhat similar in size to those captured by the D800, I did a third set of exposures and re-composed some V2 images by pulling the camera back away from the subject.

Nikon 1 V2 f/5.6 Small 2

Nikon 1 V2 f/11 Small 2

Nikon 1 V2 f/32 Small 2

Overall, I was quite surprised with how well both cameras held onto image detail as the Nikkor 105 f/2.8 lens was stopped down. I think this macro image comparison demonstrates that the Nikon 1 V2 is a pretty capable performer when paired with a good quality macro lens like the Nikkor 105 f/2.8, and its 2.7X crop factor adds another ‘fun’ dimension to macro photography.

Once I get my Nikon 1 V3 I’ll be doing another macro comparison to see what kind of impact its increased 18.4 MP resolution and lack of an optical low-pass filter has on macro image performance.

Article and all images Copyright 2014, Thomas Stirr. All rights reserved. No use, reproduction or duplication including electronic is allowed without written consent.

The post Macro Image Comparison: Nikon D800 vs Nikon 1 V2 appeared first on Photography Life.

Vello Auto Extension Tube Set for Nikon Review

$
0
0

Many years ago I bought a Nikon 55mm macro lens. This was an older, manual focus lens. It came with an older extension tube that did not communicate with the camera, meaning that any lens that was attached to it lost all communication with the camera, meaning it also became a manual focus lens. Worse yet, newer Nikon AF-S lenses that do not have an aperture ring weren’t usable at any aperture besides completely stopped down.

I really liked the idea of having an extension tube for more regular use, so I was always interested in trying extension tubes that would communicate with my camera and that I could use with all of my lenses. When I came across this set, they seemed like exactly what I was looking for. Will they find a permanent home in my camera bag or will they have a place in storage gathering dust next to my old extension tube?

Vello Auto Extension Tube for Nikon

1) Product Specifications

Includes
– 3 tubes: 12mm, 20mm, 36mm
– 2 caps

Details
– Shortens minimum focusing distance of lens for macro photography
– Extension tubes of 12mm, 20mm, and 36mm lengths can be used individually or in any combination of the three for greater magnification
– Full autofocus and exposure compatibility
– Lightweight design with metal mounts
– Alignment markers make placement on lenses and cameras easy
– Fits Nikon DSLR cameras and all F-mount lenses

2) Field Use

Let me start out by saying this: using these extension tubes is as easy as putting a lens on your camera. And really, that’s all there is to it. Simply put whichever tube you’d like to use on your camera body, attach your lens as normal and you’re ready to shoot. All of your lens functions (aperture control and autofocus) are available, as well as in-camera metering.

Vello Auto Extension Tube for Nikon

So, what does an extension tube do and why would you want to use one? An extension tube is essentially a hollow tube that moves the lens farther from the camera’s sensor, thus changing the focusing distance of the lens and allowing for closer focusing than without the extension tube. Theoretically, extension tubes can turn any lens into a macro lens with 1:1 reproduction capabilities.

There are a few benefits to using an extension tube in place of a macro lens. First, it’s a lot cheaper than a macro lens. Second, it’s a lot smaller and lighter than a macro lens. Third, you can use it with any lens you currently own without a decrease in optical performance (like you might experience with a close up filter).

Vello Auto Extension Tube for Nikon

As for the actual use of these tubes, my experience was overall positive. I found that my lenses tended to hunt a bit more than usual. I also found that shooting at f/1.4 with an extension tube doesn’t produce the best results. The depth of field is just too shallow, so plan on shooting at higher apertures. I was very happy with the different focusing distances I was able to achieve with varying combinations of tubes.

Vello Auto Extension Tube for Nikon

I was initially a little concerned when I put the tube/lens combo on my camera body. It doesn’t fit perfectly tight like just a lens does, so there’s a bit of play between the tube and the body. It’s not enough to cause a light leak and fortunately doesn’t affect focus, but does make the whole setup feel a little cheap. Also, the rear cap does not fit tightly and falls off. I even switched out the supplied cap with a Nikon cap and had the same results. I’m assuming this has something to do with why the tubes don’t fit tightly to the camera body.

3) Samples

The following image samples were taken to demonstrate the varying degrees of minimum focusing distance made possible by using extension tubes. All images are uncropped. I also left any vignetting that occurred. All were shot at f/4 with the Nikon 85mm f/1.4G AF-S lens.

Vello Auto Extension Tube for Nikon85mm lens, no extension tube

Vello Auto Extension Tube for Nikon85mm lens, 12mm extension tube

Vello Auto Extension Tube for Nikon85mm lens, 20mm extension tube

Vello Auto Extension Tube for Nikon85mm lens, 36mm extension tube

Vello Auto Extension Tube for Nikon85mm lens, 36mm extension tube + 12mm extension tube

Vello Auto Extension Tube for Nikon85mm lens, 36mm extension tube + 20mm extension tube

Vello Auto Extension Tube for Nikon85mm lens, 36mm extension tube + 20mm extension tube + 12mm extension tube

4) Summary

If you have a need for close up photos but don’t need the optical precision of a dedicated macro lens, a set of extension tubes is hard to beat. They’re small, inexpensive, easy to use and are flexible in how you use them. They can be used in any combination with any lens, giving a huge variety of applications. This set now has a permanent home in my camera bag.

5) Pricing and Where to Buy

The Vello Auto Extension Tube Set for Nikon is priced at $79.95 as of 6/21/2014 and is available at B&H Photo Video. They also make sets for Canon and Sony.

The post Vello Auto Extension Tube Set for Nikon Review appeared first on Photography Life.

Photographing Butterflies With the 1 Nikon CX 70-300

$
0
0

As part of my field work for my upcoming hands-on review of the 1 Nikon CX 70-300 f/4.5-5.6 telephoto zoom lens I went to the Niagara Butterfly Conservatory to take a few images. I spent a few very enjoyable hours at the conservatory taking photos of the various butterfly species and ended up with many usable images.

butterflies with CX 70-300 image 1

NIKON 1 V2 + 70.0-300.0 mm f/4.5-5.6 @ ISO 3200, 1/40, f/5.6

butterflies with CX 70-300 image 2

NIKON 1 V2 + 70.0-300.0 mm f/4.5-5.6 @ ISO 1600, 1/60, f/5.6

I was intrigued to see how well my Vello Extension Tubes for Nikon 1 would work with the CX 70-300, so I popped the 10mm and 16mm tubes in my pocket. For those of you that have read the product review that I did on those extension tubes, you’ll remember that I used the 1 Nikon 30-110mm f/3.8-5.6 to take all the images in the review.

butterflies with CX 70-300 image 3

NIKON 1 V2 + 70.0-300.0 mm f/4.5-5.6 @ ISO 1600, 1/30, f/5.6

butterflies with CX 70-300 image 4

NIKON 1 V2 + 70.0-300.0 mm f/4.5-5.6 @ ISO 1600, 1/200, f/5.6

I took a few “standard” butterfly images and found that the 1 Nikon CX 70-300 was very easy to use and focused quickly and accurately. The minimum focusing distance of the lens is between 3.3 feet (1m) and 5.2 feet (1.6m). The aisles in the butterfly conservatory can be quite narrow so the relatively short minimum focusing distance of the 1 Nikon CX 70-300 was extremely helpful.

butterflies with CX 70-300 image 5

NIKON 1 V2 + 70.0-300.0 mm f/4.5-5.6 @ ISO 3200, 1/250, f/5.6

butterflies with CX 70-300 image 6

NIKON 1 V2 + 70.0-300.0 mm f/4.5-5.6 @ ISO 3200, 1/125, f/5.6

After taking the said few “standard” images, I decided to push my Nikon 1 V2 with the CX 70-300 to see what it could do with the Vello extension tubes attached. I combined the 10mm and 16mm tubes for maximum effect and assembled everything.

butterflies with CX 70-300 image 7

NIKON 1 V2 + 70.0-300.0 mm f/4.5-5.6 @ ISO 1600, 1/160, f/5.3

butterflies with CX 70-300 image 8

NIKON 1 V2 + 70.0-300.0 mm f/4.5-5.6 @ ISO 1600, 1/60, f/5.6

I must admit that the set-up felt very loose and wobbly but all of the electrical connections worked flawlessly and I didn’t have any focusing or exposure issues at all. I would recommend giving this assembly good support while shooting and in-between shots.

butterflies with CX 70-300 image 9

NIKON 1 V2 + 70.0-300.0 mm f/4.5-5.6 @ ISO 1600, 1/160, f/5.6

butterflies with CX 70-300 image 11

NIKON 1 V2 + 70.0-300.0 mm f/4.5-5.6 @ ISO 6400, 1/100, f/5.3

Those of you that have used extension tubes in the past will know that they do not affect lens sharpness at all since they do not have any glass elements. However, there is some loss of light depending on how much extension is used. I did a bit of testing to answer a reader’s question to my Vello review and I estimate that when the Vello tubes are combined, there is a 2 stop loss of light. This caused an interesting challenge at the butterfly conservatory since it was a partially overcast day and the lighting in the building varies from mainly shade to small areas of sunlight. As a result, I had to shoot all of the images for this article between ISO 1600 and ISO 6400.

butterflies with CX 70-300 image 12

NIKON 1 V2 + 70.0-300.0 mm f/4.5-5.6 @ ISO 1600, 1/200, f/5.6

butterflies with CX 70-300 image 14

NIKON 1 V2 + 70.0-300.0 mm f/4.5-5.6 @ ISO 6400, 1/100, f/5.3

All of the images were taken hand-held in available light, and none of them have been cropped at all. Each is the original full frame capture. I felt it was important to show readers how close a photographer can get to their subject when using the 1 Nikon CX 70-300 lens coupled with the 10mm and 16mm Vello extension tubes. You’ll notice that some of the images were taken at fairly slow shutter speeds, a testament to how well the VR works on this lens.

butterflies with CX 70-300 image 15

NIKON 1 V2 + 70.0-300.0 mm f/4.5-5.6 @ ISO 6400, 1/250, f/5.3

butterflies with CX 70-300 image 16

NIKON 1 V2 + 70.0-300.0 mm f/4.5-5.6 @ ISO 1600, 1/400, f/5.6

I used my standard post-processing workflow for all of the images in this article. RAW processing was done in DxO OpticsPro 9 using PRIME noise reduction, then a DNG file is exported into CS6 for some minor adjustments, then into Nik Suite for some final tweaks if needed.

butterflies with CX 70-300 image 10

NIKON 1 V2 + 70.0-300.0 mm f/4.5-5.6 @ ISO 1600, 1/60, f/5.6

butterflies with CX 70-300 image 13

NIKON 1 V2 + 70.0-300.0 mm f/4.5-5.6 @ ISO 6400, 1/160, f/5.3

To view more butterfly images taken with the 1 Nikon CX 70-300, click on the YouTube link.

Based on the results of this particular test with the 1 Nikon CX 70-300 lens on my Nikon 1 V2, I would not hesitate at all to shoot this lens up to ISO 6400 when using the Vello extension tubes.

Article and all images Copyright 2014, Thomas Stirr. All rights reserved. No use, reproduction or duplication including electronic is allowed without written consent.

The post Photographing Butterflies With the 1 Nikon CX 70-300 appeared first on Photography Life.

Weekly Critique Section #1

$
0
0

About a week ago, my inbox started filling up with new forum topic notifications. A day later, Nasim contacted me stating the exact same thing with a hint of fear in his voice – that, our dear readers, was how we experienced your reaction to the introduction of a new mini-project here on Photography Life. That slight shock me and my friend felt after seeing how enthusiastically the idea was received is of the good sort. All the work that’s been submitted is a compliment to us, and also an emphasis on just how much of a commitment Weekly Critique really is. What have we gotten ourselves into!

It was no easy task, choosing the images for this week’s article. As I said, though, these decisions were very subjective and in no way showcase what we believe to be “good” or “bad” work. With that in mind, let’s take a closer look at photographs submitted by Rick Keller, Levi Obarr and Betty.

Standard Disclaimer: “everyone’s a critic”, right? And it is true – to criticize is much simpler than to accept critique, or to submit work for someone to critique. Now, to criticize constructively – that is far from being easy. As you read our thoughts, please keep the following in mind – we are not experts or masters at this. What we do is merely share our opinion and thoughts, perhaps a few suggestions, and everything said is said for your benefit. Weekly Critique is not there to discredit you or your work, and not to separate “good” photography from “bad”. Likewise, we are not here to throw compliments left and right. Instead, we hope to share something of value with you and help you grow even if just a little bit. So with every ounce of good intentions we can muster we hope you receive our words the way we intend them to be received.

Abstract. Rick Keller

Abstract by ©Rick Keller

Abstract by ©Rick Keller
Ikeda Anba 4×5”, Fujinon-A 240mm f/9, Ilford Delta 100

Nasim: I love this image. When I first saw it, I thought it was a computer-generated graph of some sort – you know, the kind that you could fire up when music was playing in Winamp in its days of glory. It looks surreal and strange, something you surely don’t see every day, which makes this photograph very unique for me. Interesting lines and textures draw your eye in a chaotic manner, forcing you to seek something identifiable in the image. I think Rick did a great job with this abstraction. I also really enjoyed the story of photo and how Rick achieved the result shooting film – one can see that the photo was not just a snapshot, but a carefully planned and well-executed shot. Rick followed up with a few more images in the critique section, which were as inspiring to look at.

Romanas: Different photographs convey different things. Some are there to tell a story, or to help the viewer create one – remember Ted Kozak? Heard of Henri Cartier-Bresson? Others are there for peace of mind, pure beauty and calm – the ever-mentioned Ansel Adams’ landscapes seem to be such to me, or those taken by our very own Nasim Mansurov and John Sherman, as different as they are. But then, as I’ve always thought, art is not beauty. And so some work is there to convey fear, or disgust, or… nothing. You, as a viewer, don’t always have to think or analyze. Sometimes simply immersing, observing, losing yourself, feeling – or not feeling anything – is enough. This is such a photograph. It’s brilliant. If the word “motion” or “dynamic” within the dictionary contained an illustration of the meaning, this could very well be it.

As chaotic as the photograph appears – though the center draws the most attention, it’s hard to keep the gaze on one particular area, is it not? – I can’t help but admire the simplicity. The composition – and, yes, there is always such a thing – is well balanced. So much so, in fact, that I did not even think to think about it at first. If that makes any sense at all. There are no foregrounds or backgrounds, yet the direction of movement is very clear. It’s quite surreal and, after observing it for a longer period, I started to feel a little nervous. It takes effort to separate the otherwise unpleasant feeling from how you like or dislike the photograph, and realize the fact a mere photograph (if you one can put the two words together) caused it. If it’s strong enough to cause a state, a feeling, it is a strong photograph regardless of what the state and feeling is actually like.

This photograph by Rick Keller is the very definition of “chaos” and “motion”. It may not be unique in such a respect, and I would not dare call it the best of its “kind” I’ve seen, but it is certainly strong enough for me to say “wow” upon glancing at it for the first time, and then a few times after.

Wild Persimmon. Levi Obarr

Wild Persimmon by ©Levi Obarr

Wild Persimmon by ©Levi Obarr
2.8mm, ISO 100, f/1.4

Nasim: Being a tech junkie, let me first approach this image from the technical side. The photo appears to be a pretty heavy crop, which was potentially resized and improperly sharpened (edges show some halos). I certainly would love to see more details in the shot, particularly the bottom part. Focusing at close distances can be difficult, but such techniques as focus stacking could be used to achieve much better sharpness without losing too much of the blur in the background. I would also slightly retouch the photo and get rid of the white spots on the persimmon, so that they are not very distracting.

From the non-technical standpoint, I like the simplicity of the photo. The idea behind the photograph was to show a wild persimmon, which Levi was able to achieve. There is a good isolation of the subject, but I feel like the tree branches are distracting. The hot spots on the persimmon look slightly harsh, but the line that divides them make me wonder if Levi did that on purpose. Still, it is a bit too “hot” for my taste. Perhaps a slightly different angle that did not cross the main subject would have looked better…

Overall, the photo does not really connect with me. If it was shot after rain at a different angle, had some drops falling from it, then it would have been a bit more engaging, would have had a better story in my opinion.

Romanas: A year or two ago, I remember discussing this one photograph with Nasim. Our taste in photography is quite different, see. For Nasim, that scene was, in most aspects, rather outlandish – seemingly a simple photograph of… laundry ruffling in the wind. And my friend saw just that – laundry hanging outdoors. Nothing special, right? Right. I saw something quite different, however. That photograph, to me, was an image taken straight out of my childhood. Or dreams. Or subconsciousness. Perhaps memory – I don’t know. All I know is that it spoke to me instantly the moment I saw it and renewed feelings I’ve long since felt. There was a sort of melancholy to it all, I guess. Poetry. The graceful motion of the fabric, the gorgeous light and subtle tones – all of it resonates with me. Even the aspect ratio. A very personal, very subjective affection for the image, that. More than two years have passed since I first saw it, and the sentiments, the state it pulls me into, the feeling of absolute, indescribable calm is no less encompassing. It did not speak to my friend quite so strongly, but was a masterpiece in my eyes.

In case you are curious, this is the photograph I am talking about (it’s called “Winds” and was taken by Aiste Simonaityte). Why am I saying all this and what similarities have I found between that photograph and Levi’s “Wild Persimmon”? And again, this is a very personal, subjective observation that might never occur in someone else’s mind: both images start of with a seemingly simple object which, on its own, is not that interesting. Laundry and fruit. However, from here, Levi’s image takes a slight turn. Where there is the light, and the wind, and the environment in the image that spoke to me with such force, in the author’s photograph, all I see is the fruit. It’s yellow-ish, and it’s oval. Reminds me of tomatoes a little bit in its shape. It is also still growing on a tree. Other than that… It does not have any interesting patterns to draw attention, and there is hardly any “mood” created by the light. In other words, this is an illustration. A very informative one – it shows me exactly what a persimmon is. But it does not resonate with me, does not trigger anything. I don’t see a story here, I feel nothing, too, nor think about anything but the fruit I am looking at. Something must catch my gaze, and it does not. So what I am missing in an otherwise informative, well-captured image, is the author himself. The photographer’s input, his decisions, choices, creativity. I am missing context, memory and association triggers. Taking a few steps back might have solved the issue – I’d focus not on one particular fruit, but on a fragment of the whole tree, and the photo would seize to be an illustration. A more interesting, beautiful light would certainly add to that, too – wrap the whole photograph in a very distinctive mood.

But here is the thing. I can easily imagine this photograph or something similar having as powerful an effect on Nasim as “Winds” had on me. In other words, while it did not speak to me, that does not make it a bad photograph, much like the laundry image I mentioned is not a bad photograph because someone does not like it as much as I do. Also, not bringing up a strong reaction is in no way a bad thing. Sometimes basic information is all we need. Look at the photograph – is it not calm? Simple? Still, if I were to give one advice to the author, I’d say this – put yourself into your work, no matter what you do. Persimmons are beautiful, much like flowers and sunsets are. But it is our decisions that make the photographs beautiful, not the objects or scenes shown. That is what I am looking for in photography. Look past the object and see yourself there. If you do, that’s great and pay no attention to anyone stating otherwise. But you must see yourself in your work. Otherwise, it’s not really your work, rather – just work.

Red Lechwe Leaping. Betty

Red Lechwe Leaping by ©Betty

Red Lechwe Leaping by ©Betty
D300, 200-400mm f/4 VRII @ 400mm, f/4, 1/640sec, ISO 280

Nasim: Technically, this kind of a shot is really hard to achieve. You have a super fast animal that is extremely tough to focus on, yet alone capture in such detail. Without a doubt, Betty did a great job there. Makes me wonder why the red lechwe was running – perhaps there was a lion chasing it? Perhaps it got spooked and ran for the water where there is less threat? I love the fact that this photo shows the beauty of the animal and the elegance of the female lechwe – look at her neck. It is so stretched forward. She is clearly trying to push her head to safety, a defense mechanism that most animals employ in a threat situation.

I also love the isolation of the lechwe, there is nothing distracting in the background, so my eyes are only focused on her. But I feel like the crop is a bit too tight – there is little breathing space in this shot. I would love to see a little more above her head and a little more ahead of her. Not sure if the original shot is big enough to accommodate this change, but I feel like the photo traps the animal a little bit. Overall, it is a great and beautifully executed shot and the extra breathing space would have made the photo even better.

Romanas: Not being exactly skilled at close-up, fill-the-frame sort of composition – be it portraits or just about anything else – I always admire the work of people who just seem to get it right. Another good example is this photograph by Rick Keller. Upon looking at this photograph, at first I had the strong urge to extend the environment, add more space at the top of the frame (the antelope’s flight sort of dictates that) and perhaps a little on the right, too. But looking more closely, I came to the conclusion that the composition is spot on, so long as you don’t try to figure out the context of the image too much and focus on what Betty, willingly or not, is showing. I am struck by the beauty and grace of the animal. Such a tight, almost claustrophobic framing forces my eyes to follow the elegant shades and shapes of its fur, notice the tension in its muscles, but also apparent ease with which it leaps so high and far. And I keep admiring all of this without thinking much whether the lechwe was running from something, and what lay ahead of her. It just doesn’t matter. The beauty of the animal matters, and that is the only thing I want to focus on even if somewhere on the edge of my consciousness I would like to see a more “airy” approach to framing of that exact same moment. But it would be a different image altogether.

If I do have some criticism is the colour, I find it a little too vibrant for my taste. Almost dishonest, somehow. I also can’t help but wish to see this same photograph in black and white. Perhaps it would emphasize the grace of the animal even more?

How to Submit Your Work

Here are several steps for those of you who would like to receive some constructive criticism either from our readers, or our team:

  • Export/upload your photograph at a size where the long edge is at least 960 px. Larger size will make viewing a bit more comfortable, so we recommend long edge to be at 1280 px, 1600 px or 2048 px. Quality setting of 75-80 is plentiful and will make loading images a quicker process. This is not a requirement as such, merely a suggestion, but it would make our part easier.
  • Include EXIF information with the image as it may be necessary for the critique.
  • If you feel comfortable with it, best not to add watermarks. Copyright information for each image will be included in the caption. If you would like to add a watermark, do it in a simple, small font somewhere along the edge of the photograph (take a look at Luc’s photograph above) – a nuance, but watermarks are a distraction and can often act as a weighty element of composition.
  • Name image files properly – include your full name (necessary for copyright information) and the title, for example: Angelina Nga Nguyen_Sunrise at Dolly Sods.JPEG
  • Create a topic and upload your work for critique providing some background information/story about the image and what you think of it in our forums. You will receive critique from fellow readers.
  • If you’d rather our team did not discuss your work in a weekly article, simply mention it while submitting.
  • Share your thoughts about the work of your fellow readers!

And now, discuss!

The post Weekly Critique Section #1 appeared first on Photography Life.

Bolt VM-110 LED Macro Ring Light Review

$
0
0

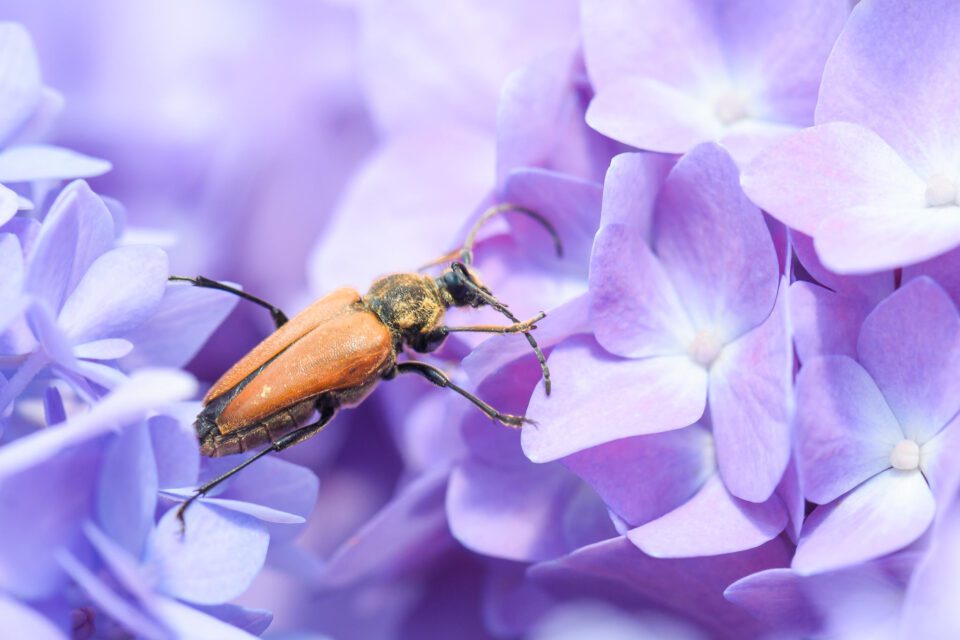
It’s been bugging me that I only have a handful of decent insect photos, despite owning a macro lens primarily for that purpose. When they weren’t flying or running away from me, they were biting me, and when I tried the pop-them-in-the-fridge-to-cool-them-down trick – well, let’s just say Mr. Tarantula is still napping. I felt awful about that and vowed never to ice down a critter again unless it was a penguin with heat stroke. Still I’ve been seeing tons of great bug photos lately and it rekindled my interest. If I could just dial in the lighting, maybe I could start nailing some great macro wildlife shots.

Bolt VM-110 LED Macro Ring Light

Macro lighting can be tough because you and your camera are so close to your subject it’s easy to block out your light source. Ring flashes get around this problem by mounting on the front of the lens.

The Bolt VM-110 LED Macro Ring Light is designed to produce even lighting on close-up subject matter. At $79.00 it seems like it might be a good product for those getting into macro.

Let’s check out the features, but first a couple of quick disclosures:

1) my only experience with ring lights is having my choppers photographed by my dental hygienist.

Verm-Slack-teeth-Eagletails-8937

NIKON D4S + 105mm f/2.8 @ 105mm, ISO 1000, 1/30, f/16.0

2) I got to keep the review item after I tested it.

Features

First off, although the VM-110 features a “flash mode” this is not a ring flash and will not perform like one. It’s basically a ring-shaped flashlight that can attach to the front of your lens. It runs off of four AA batteries (not included). The flash mode is more a feature to conserve battery life and not constantly blind your subjects.

It has four modes: Light, Flash, L and R. The Light Mode provides continuous lighting so what you see is what you get. The Flash Mode turns of the light and produces a ½ sec burst of light at the moment you trip the shutter. L and R modes flash from only the left or right half of the ring respectively.

You can adjust the power from -1.5 to +1.5 in unspecified units (This would seem to suggest a three-stop range but my tests came up with about 0.9 stops from lowest to highest power setting).

It comes with four diffuser rings: clear, frosted, blue and amber. It can also be used without a diffuser.

It has adapter rings for 49, 52, 55, 58, 62, 67, 72, and 77mm lens threads.

It mounts to the hot shoe and also comes with a little stand for off-camera use.

Performance

When I first tried the VM-110 it immediately became obvious that this is a poor choice for shooting bugs or any moving subjects. In a word, this light is weak. The specs say it has a Guide Number of 15’ at ISO 100 and using a 50mm lens. Hmmm, GN = f-number x distance, so at one foot distance I could shoot at f/16 with the VM-110 (actually f/15, but to make the math easier I’ve rounded to nearest familiar f/stop). Most macro work is done at f/16, f/22 or smaller to get even a couple millimeters depth of focus. The catch is the flash duration of the VM-110 is a leisurely ½ second, hence why the VM-110 is called a ring light, not a ring flash. Your shutter speed needs to be ½ sec or longer for this ring light to take advantage of the specified GN. (Most electronic flashes have flash durations of 1/1000 sec or less, much quicker than the camera’s sync speed, so guide number calculations are used to set a given f-stop at a given distance and shutter speed does not enter the equation).

Obviously you won’t be handholding a macro lens at ½ sec and even if you’re on a tripod, the lightest breeze will move a subject or the subject might crawl away. 1/125 sec would be the slowest I’d try to handhold my 105mm macro lens, even with the VR on, as at high macro magnifications any camera shake is multiplied. So using ½ sec at f/16 and ISO 100, how far would I have to push the ISO to get to 1/125 sec at f/16? Yep, ISO 6400.   In practice I found the VM-110 beat this, but still I had to shoot at ISO 2500 to get proper exposure at one foot distance and 1/125 and f/16. This was with the clear light diffuser on and a neutral power compensation. Bump the compensation up to full power (+1.5) and I could get it down to ISO 2000. Removing the diffuser to show just bare bulb I could further reduce my ISO to 1250. Unless you are using a very low noise camera like a Nikon D4s, I can’t recommend using this as a sole light source for any macro work that is handheld or of moving subjects, but it could provide some fill light to soften harsh shadows.

Okay, so the VM-110 lacks power. Furthermore, its all-plastic build keeps the weight and cost down but makes it feel a bit like a toy. As long as you don’t beat it up I wouldn’t worry about the plastic except for the adapter rings. These are plastic too, with the potential to cross-thread the rings or have them jam tight and be hard to remove – treat these very gingerly if you want them to last and don’t over-tighten them.

Instead of bashing this product for not being good for bugs, I set out to find some fun static subjects to shoot. I heard there’s decent money to be had in product photography so I grabbed my tripod and let the magic happen.

Verm-whopee-Bolt-ring-light-6465

NIKON D4S + 105mm f/2.8 @ 105mm, ISO 2000, 1/4, f/11.0

Note the nice even illumination. The VM-110 delivers a very soft light with the frosted diffuser on.

Verm-peacock-feather-Bolt-ring-light-6338

NIKON D4S + 60mm f/2.8 @ 60mm, ISO 100, 8/10, f/32.0

Ah, the classic peacock feather detail shot. This is shot at 1:1 magnification with a 60mm macro lens with a very short working distance. For a weak light such as this the shorter working distance is a bonus as the closer the ring light to the subject, the more you can lower your ISO or shorten your shutter speed.

Verm-peacock-feather-Bolt-ring-light-6349

NIKON D4S + 105mm f/2.8 @ 105mm, ISO 100, 2/1, f/32.0

With the longer working distance of the 105mm, there’s about a stop less light to work with. Not a big deal on a tripod, but could be if handholding.

The peacock feathers were shot with the clear diffuser on. Now a comparison of the amber and blue diffusers. Bolt does not provide specific K temps for it’s various diffusers, instead just saying it can vary from 3000 – 15000K. For comparison, I set all these at Lightroom’s default flash setting of 5500K then balanced out the exposures in post.

Verm-frosted-Bolt-ring-light-6271

NIKON D4S + 60mm f/2.8 @ 60mm, ISO 1000, 1/125, f/8.0

This is how it looks with the frosted diffuser.

Verm-blue-diff-Bolt-ring-light-6273

NIKON D4S + 60mm f/2.8 @ 60mm, ISO 1600, 1/125, f/8.0

With the blue.

Verm-amber-diff-Bolt-ring-light-6272

NIKON D4S + 60mm f/2.8 @ 60mm, ISO 800, 1/125, f/8.0

With the amber.

The colored diffusers cut light output a lot so I didn’t find much use for them (I could just shift the WB in Lightroom to get a similar result with out the light loss) other than adding a splash of colored light to something lit with other sources.

Verm-camera-modulara-Bolt-ring-light-6319

NIKON D4S + 60mm f/2.8 @ 60mm, ISO 200, 1/4, f/22.0

I snuck this pic of what I think is the camera modulara prototype sitting on a light table at Mansurov Enterprises. By using the blue diffuser I could give it a more interesting techy look.

Verm-CM-plain-Bolt-ring-light-6325

NIKON D4S + 60mm f/2.8 @ 60mm, ISO 200, 1/3, f/22.0

Here’s the same shot, but with the frosted diffuser on.

Bottom line: I would rarely use anything but the frosted or clear diffusers (or none at all) and I would be sure to shoot in RAW as the WB changes a lot between the clear and frosted diffusers.

According to Bolt, the L and R modes can be used for “more dramatic lighting”. If darker = more dramatic, then I guess this is true. These modes turn off half the LEDs (either the L or R side of the ring) and of course cut your light output in half, turning a weak light source into a very weak light source.

Verm-L-mode-Bolt-ring-light-6457

NIKON D4S + 105mm f/2.8 @ 105mm, ISO 500, 1/8, f/11.0

Here’s a shot in L-mode.

Verm-R-mode-Bolt-ring-light-6456

NIKON D4S + 105mm f/2.8 @ 105mm, ISO 500, 1/8, f/11.0

Here’s a shot in R-mode.

I don’t find either all that dramatic.

Verm-off-camera-Bolt-ring-light-6462

NIKON D4S + 105mm f/2.8 @ 105mm, ISO 800, 1/13, f/11.0

Far better I think to remove the light from the lens mount and use it off camera at full power (flash or light mode) and then just point that from one side of the subject, or in this case from above. Now that’s the most dramatic rubber duck shot I’ve taken in weeks.

Though the VM-110 mounts to the hot shoe of your camera, it is not TTL capable. The only communication with the camera is the ability for the shutter to trip the ½ sec flash mode. You need to manually set your exposures to work with this light in flash mode. If you try to shoot in A,S or P modes your camera will adjust exposure based on the conditions before the flash goes off and the flash will create overexposure. Used in the constant light source mode, you can shoot in A,S or P modes at as high a frame rate as you want, but you’ll draw down the ring light batteries quicker.

The manual says the VM-110 can even be a great product for lighting portraits at close range.

Verm-Ben-Bolt-ring-light-6433

NIKON D4S + 105mm f/2.8 @ 105mm, ISO 100, 1/15, f/8.0

Hey, Benji looking good! But seriously, the ring lit portrait can be a cool trendy look with punchy highlights and dark shadowy rims on the subject and even a background halo (assuming no other light source). So I grabbed my favorite model to try it out. Quickly I learned why ring lights suck for portraits – having the flash mounted on the lens really blinds your model.

Verm-mad-model-Bolt-ring-light-6530

NIKON D4S + 50mm f/1.8 @ 50mm, ISO 1600, 1/100, f/5.6

Switching from 50mm to 60mm lens, taking a step back and adding some ambient light helped. The “Three Monkeys” series below was done with various diffusers. I tweaked the brightness in post so they’d roughly match, but left the WB at 5500K.

Verm-no-diff-Bolt-ring-light-6183

NIKON D4S + 60mm f/2.8 @ 60mm, ISO 1250, 1/125, f/5.6

With no diffuser.

Verm-clear-Bolt-ring-light-6200

NIKON D4S + 60mm f/2.8 @ 60mm, ISO 1600, 1/125, f/5.6

With clear diffuser.

Verm-frosted-Bolt-ring-light-6218

NIKON D4S + 60mm f/2.8 @ 60mm, ISO 2500, 1/125, f/5.6

With frosted diffuser.

Uggh, the skin tones go from light jaundice (no diffuser) to full liver failure (frosted diffuser). As well the frosted diffuser is horribly flat and if you check the metadata it’s ISOh-no territory. I had to go back in and tweak both temperature and tint (using Lightroom’s WB picker tool) to get something resembling healthy skin.

Verm-no-diff-Bolt-ring-light-6183-2

NIKON D4S + 60mm f/2.8 @ 60mm, ISO 1250, 1/125, f/5.6

Verm-clear-Bolt-ring-light-6200-2

NIKON D4S + 60mm f/2.8 @ 60mm, ISO 1600, 1/125, f/5.6

Verm-frosted-Bolt-ring-light-6218-2

NIKON D4S + 60mm f/2.8 @ 60mm, ISO 2500, 1/125, f/5.6

Even then, the frosted shot would need a lot more contrast tweaking in post to be usable.  If you choose to use this ring light to illuminate humans, I suggest creating some LR presets for WB and sticking with the clear diffuser.

Another portrait trick you might recognize from the fashion mags is the ring-shaped catchlight in the model’s eyes. These however are the result of using very large-diameter ring lights. A lens-hugging ring light like the VM-110 will only give such a catchlight in extreme close-up.

Verm-catchlight-Bolt-ring-light-6131

NIKON D4S + 105mm f/2.8 @ 105mm, ISO 200, 1/125, f/5.0

When used at tight head shot distance the catchlight reduces to a point.

Verm-pretty-model-Bolt-ring-light-6130

NIKON D4S + 105mm f/2.8 @ 105mm, ISO 1250, 1/125, f/5.0

As you can see, ring lights aren’t the most flattering for portraiture.  Good thing I have access to supermodels who look fabulous without makeup.

As a constant light source, the VM-110 might be handy for close-up video work, but I haven’t tested this yet.

With the 50mm, 60mm and 105mm lenses I had no vignetting issues. However they all have small barrel diameters. I checked the VM-110 out on some lenses with 77mm filter threads and discovered the following. With a 24-120mm on a full frame sensor I had vignetting through the entire range, but of course more severe at the wider focal lengths. With an 18-300mm on a DX-sensor, there was vignetting at the wide end, but this disappeared after 38mm. Good news there, now if I can just get that darned plastic adapter ring off (yeah I mentioned this before, but these really need to be made of metal).

Verm-vignette-Bolt-ring-light-4204

NIKON D7000 + 18-300mm f/3.5-5.6 @ 18mm, ISO 800, 1/100, f/9.0

Hmmm, perhaps I could use this extreme vignette for fake periscope videos.  The white ring is the light itself, the black outer ring the plastic adapter ring.

Verm-no-vignette-Bolt-ring-light-4205

NIKON D7000 + 18-300mm f/3.5-5.6 @ 38mm, ISO 800, 1/200, f/9.0

Summary

Despite it’s numerous shortcomings I had fun playing with the Bolt VM-110. On the plus side it’s inexpensive, lightweight, gives even illumination, and as a constant light source, WYSIWYG. For shooting static close-up subjects from a tripod it works fine. Its biggest downsides are how weak it is, the funky white balance issues, and the long “flash” duration. It’s a very poor choice for handholding and/or moving subjects. Because it lacks TTL, you should be comfortable with manual metering techniques to get the most out of this product.

Where to Buy

You can purchase the Bolt VM-110 LED Macro Ring Light Review from B&H for $79.

The post Bolt VM-110 LED Macro Ring Light Review appeared first on Photography Life.


Macro Photography Tutorial

$
0
0

Macro photography is one of the most popular forms of photography, and with good reason. It is easily accessible, and it is a very broad genre of photography. Studio pros can enjoy taking macro shots of leaves, flowers, and sluggish insects, maintaining total control over lighting. Nature lovers can spend hours outside, searching for hidden treasures among flowers and leaves. Plus, in non-photographic locations (like most people’s backyards), macro photography makes it possible to take great images of nature without traveling at all.

Step

NIKON D7000 + 105mm f/2.8 @ 105mm, ISO 800, 1/250, f/8.0

Along with all the benefits of macro photography, though, there are some technical hurdles that you must cross. Physics comes into play in macro photography in ways that are not as relevant to other genres, which is why I wrote this guide – I hope to clear up the most intimidating aspects of macro photography for beginners, and perhaps suggest some tips for seasoned macro photographers along the way.

The Blue Dragon

NIKON D7000 + 105mm f/2.8 @ 105mm, ISO 450, 1/400, f/4.0

1) Magnification

Macro photography has to do with the size that your subject is projected onto your camera’s sensor. If you have a one-inch subject, its projection at “life-size” would be one inch on the camera’s sensor. An object which fills one inch of the sensor will fill most of the resulting photo, since the sensors in typical DSLRs are no more than 1.5 inches long.

When an object is projected at life-size onto the sensor, it is at “1:1 magnification”. If an object is projected at half of life-size (say, that one-inch object takes up just 1/2 inch of the sensor), it is at 1:2 magnification. With 1:10 magnification or smaller, you aren’t really shooting a macro photo anymore.

Nine Berries

NIKON D7000 + 105mm f/2.8 @ 105mm, ISO 100, 13/10, f/5.6

2) Working Distance

Working distance is easy: it’s the distance between your sensor and your subject at the closest possible focus distance of your lens. The longer the working distance, the easier it is to stay away from your subject (and if that subject is skittish or dangerous, a large working distance is fairly useful).

A working distance of ten inches means that, with a camera/lens combo of eight inches long, the front of your lens will be two inches from the subject at its closest focusing distance.

The best macro lenses, as you might expect, have large working distances — a foot or more. The working distance increases as the focal length of the lens increases. The Nikon 200mm f/4 and the Canon 180mm f/3.5 are two examples of macro lenses with large working distances.

Also, of course, your working distance increases as your magnification decreases. At 1:4 magnification, for example, you don’t need to be nearly as close to your subject as you would if you want to photograph it at 1:1 magnification.

Brown Toad and Leaf

NIKON D7000 + 105mm f/2.8 @ 105mm, ISO 1250, 1/160, f/16.0

3) DSLRs vs Mirrorless

For macro photography, either DSLRs or mirrorless cameras would work great. If you are looking at native mount options, DSLRs are going to be ideal due to the large choice of available macro lenses (particularly longer focal length macro lenses) and accessories. If you are open to using adapters, mirrorless cameras can be used with pretty much any DSLR lens as well, although Nikon’s “G” type lenses without aperture rings are often quite painful to use with adapters, as you cannot set accurate aperture values. Having live view on the LCD is very helpful, since truly instantaneous feedback lets you know exactly how you have the image framed — tiny hand movements in macro photography can lead to massive shifts in composition.

4) Full-Frame vs Crop-Sensor

If your goal is to create photos with the highest magnification possible, full-frame cameras are usually overkill for macro photography. Even the Nikon D810 with 36 megapixels cannot match the magnification of the 24 megapixel Nikon D7200, simply because the pixels on the D7200 are smaller.

With macro photography, the highest pixel density (most pixels per square millimeter of the sensor) is what determines the maximum magnification of the subject. The large-sensor D810 has fewer pixels per millimeter than the smaller-sensor D7200, despite having more total pixels. In many genres of photography, larger pixels are preferable. With macro photography, though, the smaller pixels lead to more magnification, even at the expense of sensor size.

That being said, large-sensor cameras certainly have other advantages. Their larger viewfinders help with focusing, and they generally have more controls, particularly on higher-end models. More importantly, if you take photos which aren’t at maximum magnification, full-frame cameras have a distinct image quality advantage. For example, you probably wouldn’t want to take a photo of a crab as close as you can focus, because the final photo would not have the entire crab in it! In this situation, the larger sensor and higher pixel count of, say, the D810 would give you a real advantage over the smaller-sensor D7200, even though the D7200 has more pixels per millimeter.

So, a full-frame DSLR is still generally better for macro photos than a cropped-sensor camera, but the advantage isn’t as large as in other genres of photography.

In the Dunes

NIKON D7000 + 24mm f/1.4 @ 24mm, ISO 250, 1/200, f/7.1

5) Canon vs Nikon

For almost all genres of photography, Canon and Nikon (and others) are so close in quality that arguments about which is “better” are, at best, extremely picky. Sure, there are differences, but it is rare that any system has a flaw that is fatal for the typical user. Macro photography is a bit different.

I don’t want to ignite a flame war, but Canon DSLRs simply are not as well-suited to macro photography as those from Nikon. This is nothing against Canon’s amazing cameras and fantastic macro lenses, which are certainly as good as those from other brands. Instead, there is a very simple reason why Canon is not ideal for macro photography: aperture calculations.

As you focus closer, something interesting begins to happen with a lens’s aperture. Even if the physical aperture inside the lens stays a constant size (say, ten millimeters across), the aperture starts to “act” smaller as you focus closer and closer. This is never something that you would notice in normal photography, since its effects do not become visible until you focus near life-size. However, at 1:1 magnification, a lens’s aperture could be the same physical size as f/11, yet it appears in every way (diffraction, depth of field, and light loss included) to be at f/22. So, then, what aperture would you want your camera to read? The actual, physical size of the aperture (f/11), or the aperture which is correct in every other way (f/22)?

By far, it is better to know the aperture that is correct in practice — f/22 in this example. Otherwise, your settings (for example, f/11, ISO 100, and 1/100 shutter speed) would result in different exposures depending upon how close you focus! Nikon does this the proper way, by reading the “essentially correct” aperture of f/22. On the flip side, Canon’s cameras read the physical size of the aperture (f/11) rather than the practical aperture, and thus are far harder to use for macro photography. It is possible to work around this issue on a Canon camera, but it takes more time and can be confusing (especially if you are changing the magnification as you shoot). The rough formula to calculate the proper aperture on a Canon camera is as follows:

Practical aperture setting = Physical aperture setting x (1 + fractional magnification).

The “fractional magnification” of, say, 1:2 is one-half. So, with a Canon camera that reads f/11 at 1:2 magnification, your practical aperture is 11 x (1.5), or roughly f/16. Fairly easy, just something that takes too much time if you’re changing magnification constantly.

Six

NIKON D7000 + 105mm f/2.8 @ 105mm, ISO 800, 1/250, f/14.0

6) Conclusion

There are, of course, a great deal of technical terms related to macro photography, but the most crucial is the concept of magnification. Once you understand the differences between, say, life-sized images and 1:4 images, you already know the most crucial macro-specific terminology that you’ll come across. And, although Nikon DSLRs with high pixel densities are technically the “best” for macro photography, you certainly can take great macro photos with any camera, even compacts. Macro photography is extremely accessible, which is what makes it so popular among both beginners and professionals.

The post Macro Photography Tutorial appeared first on Photography Life.

DX to FX – upgrading from D7000 to D800E

$
0
0

I’ll admit it — I was a bit late to the party. While everyone else has been enjoying the brand new D750 and D810, I have been happily stuck with my aging D7000.

Being a student, I am on a student budget. This means that I buy used technology, and I buy old technology. I have nothing against this, though, since older DSLRs are truly dependable machines, and they still are capable of producing wonderful images. Over the course of two years, I have taken 50,000 photos with my D7000, and it doesn’t look a click over 10,000.

Shell

NIKON D800E + 24mm f/1.4 @ 24mm, ISO 100, 16/10, f/16.0

When the D800e was released in 2012, I realized that it was the perfect camera for my needs. I print large and fairly often, and I tend to focus on landscapes and macro photography. The only problem with the D800e was the cost.

The D810 release was perfect for me, since it caused the prices of the D800 and D800e to plummet. Although a D810 would be nice for what I do, mainly because of ISO 64 and the improved live view, it wasn’t worth more than $1000 extra (the difference between the D800e and D810 on the used market).

I bought my D800e at less than half of its original price, and it arrived a couple weeks ago. I shot the obligatory focus tests and cat photos, and then I spent last week photographing some scenes during a trip to the beach.

Dew Drops

NIKON D800E + 105mm f/2.8 @ 105mm, ISO 100, 1/640, f/3.5

I’ve only really been shooting with the D800e for a week, so I am not qualified to judge it much at this point, but I like it quite a bit. The focusing system is nice — I use manual focus when I’m shooting from a tripod, but I do use autofocus for my lower-magnification macro photos. What I like best about the D800e’s autofocus system is that the focus points are smaller in the viewfinder compared to those on the D7000. The smaller points make it possible to target my focus on, say, a dragonfly’s eye, rather than on its entire head.

Plus, the focusing system is more accurate than the one in my D7000. For the first time, I was able to autofocus on dragonflies in mid-flight. I don’t believe that I could have gotten any of the photos below with my old setup:

Dragon at Sunset 1

NIKON D800E + 105mm f/2.8 @ 105mm, ISO 400, 1/800, f/2.8

Dragon at Sunset 2

NIKON D800E + 105mm f/2.8 @ 105mm, ISO 1400, 1/800, f/2.8

Dragon at Sunset 3

NIKON D800E + 105mm f/2.8 @ 105mm, ISO 2200, 1/800, f/2.8

I also like that 20×30 inch prints from the D800e don’t look “crunchy” like those from the D7000, and they show far fewer sharpening or noise reduction artifacts at a given print size. I haven’t noticed any real differences in color reproduction, although I do find it noticeably easier to salvage highlights on files from the D800e. Granted, my observations are not particularly scientific.

In total, I use three lenses: a 24mm, a 50mm, and a 105mm. I like that my 50mm lens is now a 50mm lens, and that my 105mm lens is now a 105mm lens. Both of these focal lengths are far more useable, in my opinion, than their 75mm and 150mm equivalent focal lengths on the D7000. This is especially true for landscapes, where I had found both of these lenses were sometimes too tight for the scenes that I wanted to use them (though workarounds existed).

I am ambivalent about my 24mm lens no longer acting as a 35mm equivalent. Although I enjoy finally having a true wide-angle, I had grown attached to the angle of view that I got with the 24mm lens on my D7000.  I could always crop a D800e photo 1.5x and have roughly the same number of pixels as the D7000, but that requires a different mindset during capture. I took the vast majority of my best photos with the D7000/24mm lens combination, and I am going to miss it. Call me nostalgic.

The Plant with the Lizard

NIKON D800E + 105mm f/2.8 @ 105mm, ISO 100, 1/640, f/3.2

There are only two things that I prefer significantly on the D7000: the custom settings and the live-view switch. It was invaluable to have U1 and U2 banks that saved all my settings on the D7000, including those for exposure. I used U1 for my macro photography settings at 1:1 magnification, and I saved U2 as my standard handheld settings. For tripod work, I switched to manual or aperture-priority mode on the mode dial. Now, the memory banks built into the D800e are all but useless to me, since they don’t save exposure information.

Also, although a smaller issue, I don’t like the live-view button on the D800e. It is farther from my hand, so it takes more time to switch between the viewfinder and the LCD screen. It was a subconscious action on the D7000, whereas the D800e requires me to take my hand off the shutter release to reach the live-view button.  Big issue?  No, but it’s there.

Ultimately, compared to the D7000, I feel confident that the D800e will make it easier to take the pictures I want. I love the detail that I get in the D800e’s prints, and I have found it far easier to focus on my subject in lower-magnification macro photography. It may not be the perfect camera, but, for my needs, it is close. I am excited to think of the photos that lie in my future.

Tree and Mist

NIKON D800E + 105mm f/2.8 @ 105mm, ISO 100, 1/80, f/11.0

The post DX to FX – upgrading from D7000 to D800E appeared first on Photography Life.

High Magnification Macro Photography on a Budget

$
0
0

Hey folks, my name is Siddhant Sahu, I am a 16 years old aspiring photographer from India. I have been shooting macro photographs for about a year now and I would try to encapsulate all I have learnt along my way in this short article. I believe that macro photography has the power of entering in a whole new world of tiny creatures. In fact with only modest piece of equipment you can shoot high magnification macro photographs. It’s good to mark the behavior of insects and how close you can approach some of them, but then again these are wild animals and there is no way to predict how exactly they will behave, each subject can be different, each background can be different. But with digital photography there is no penalty to shoot thousands and thousands of photos, and eventually someday among those thousands photos one particular would be usable enough. Anyone is capable of doing this, you don’t need the greatest lens or the newest camera out there. Macro photography is physically exhausting, challenging and requires a lot of patience and time consuming but you can get amazing results with fair piece of equipment.

Macro Photography (3)

The Gear I Use

Macro Photography Setup (1)

  1. Nikon D5200
  2. Nikon 18-55mm f/3.5-5.6G DX kit lens
  3. Yongnuo YN560 II Speedlight
  4. Yongnuo RF-603N Flash Triggers
  5. Homemade flash diffuser
  6. Nikon 52mm Filter Reverse Ring

First, we need to attach the reversal ring onto the filter thread of the lens and then after that attach it to the camera body itself. Since we are fixing the lens reversed, we lose electronic connection from the body, so we need to adjust our aperture and focus it manually. You have to manually adjust the aperture with your fingers while shooting. As the lens is reverse-mounted, depth of field is also going to get shallower – the wider you are, the shallower the depth of field. With such a setup at the widest aperture, depth of field is literally less than a millimeter! There are different ways to keep the aperture lever in place on Nikon lenses, but my personal method employs using a piece of paper to keep the aperture narrower, as shown below:

Macro Photography Setup (2)

Not the best looking setup, but it works!

Next is connecting the flash trigger to your speedlight and a transmitter on the camera hot shoe. A homemade flash diffuser from any type of translucent material works great and that’s what I use, but you can find plenty of ready diffusers that achieve the same result. There are many guides on making DIY flash diffusers that you can find online. Flash definitely helps in freezing motion in macro photography and is an important aspect to consider. The next step is to decide on whether you want to hand-hold your camera and the flash like I do, or mount those on a bracket and tripod to get more stability. I would recommend the latter, since you can control your setup better.

Macro Photography (2)

Focal Length in Macro

Due to the fact that the lens in reversed, focal length is also going to be working in reversed manner. This means that shorter focal length on the lens will give you more magnification than longer focal length. For flower shots, a 55mm reversed focal length can be used, whereas if you need higher magnification, you should consider using shorter focal lengths – around 24mm for insects, spiders, flies, bugs and all. When you look through the viewfinder at these focal lengths or use live view on the camera, such high magnifications will look really cool and exciting! Also, the shorter the focal length, the closer you need to physically get to your subject!

Macro Photography (4)

Camera Settings

Your camera settings will differ depending on what you are doing, but there are some points to keep in mind. With your aperture already moderately stopped down for more depth of field, shutter speed should be around 1/120 – 1/60 of a second to minimize camera shake and should be less than your flash sync speed (1/200s), or part of your image will be dark. Because we are shooting macro, every bit of movement would get highly magnified, so pay attention to camera shake, wind and other factors that could introduce blur to your images. It might be a good idea to adjust your ISO to keep your shutter speed fast enough and try to be as stable as you can, specially if you are hand-holding your camera. For the speedlight, I use power of 1/128, 1/64 or 1/32, not more than that, just to add a little more light, freeze the motion and to prevent images from looking too “flashy”. Now you are pretty much done – go find some bugs or flies in your garden and the possibilities are endless! Oh and lastly, shoot early in the morning, while the bugs are still half asleep and the light is soft and beautiful.

Macro Photography (5)

Post Processing

Post processing is very important for any kind of photography, so don’t just stop your process after capturing images. Although you wouldn’t be dealing with heavy editing in macro photography, there are still some steps you should take to ensure that your images look good. You can start by importing your photos to Photoshop, Lightroom or any other post-processing software and following these simple steps:

Macro Photography (1)

  • Adjust Exposure: I tend to shoot macro photos a bit underexposed by around 1 or 2 stops just to be able to yield higher shutter speeds. Remember, freezing motion in more important than getting optimal exposure, since you can recover quite a bit when shooting RAW. If light conditions are good, don’t underexpose – instead, try to “shoot to the right” of the histogram to get optimal exposure in order to yield noise-free images. But if your shutter speed suffers badly, don’t feel bad about exposing to the left to keep up with the shutter speed.
  • Contrast: Just grab the curves adjustment and create a slightly S shaped graph in RGB, or just increase the whites and the darks values.
  • Cropping: Crop your image to your liking for better composition, but be weary of cropping too much, or you will lose a lot of resolution.
  • Sharpening: I save full size images without applying aggressive sharpening and only sharpen images when uploading smaller versions to Facebook, Google+, my website or any other web use. See this excellent article by Nasim on proper way to resize images in Lightroom, then see the second article on proper sharpening techniques in Lightroom

That’s essentially it! Hope this guide helps you with getting some amazing shots without spending a lot of money.

Musca-Domestica


This guest post was contributed by Siddhant Sahu. You can visit Siddhant’s gallery on 500px to see more examples of his work.

The post High Magnification Macro Photography on a Budget appeared first on Photography Life.

A Ribitting Morning

$
0
0

The Royal Botanical Gardens in Burlington Ontario (Canada) recently hosted a display of frogs from around the world. Frogs: A Chorus of Colours was an interesting, educational exhibit as well as an opportunity to capture some images.

ribbitting colours image 1

NIKON D800 + NIKKOR 105mm f/2.8 @ 105mm, ISO 2000, 1/50, f/11.0

These kinds of events always present challenges for photographers. The display cases are often soiled as it is hard for any venue to keep the glass surfaces clean. This is especially true when elementary school tours attend the exhibit. Lighting can be uneven at best, and the overhead lights and exterior windows often create reflections on the glass surfaces. And, the critters that we are trying to photograph can position themselves in awkward areas of their display cases, making attractive captures difficult.

ribbitting colours image 2

NIKON 1 V2 + 1 NIKON 30-110mm f/3.8-5.6 @ 77.1mm, ISO 1600, 1/125, f/5.6

I wanted to take a minimal amount of gear, while still giving myself a lot of shooting flexibility. I settled on my D800 and two Nikon 1 V2 bodies. I then packed my Nikkor 105mm micro f/2.8, an 85mm f/1.8G, my FT-1 adapter, a couple of 1 Nikon lenses (30-110mm f/3.8-5.6 VR, CX 70-300mm f/4.5-5.6 VR), and my Vello Extension Tubes for Nikon 1. Everything fit quite nicely in my Tenba Discovery Shoulder Bag. I didn’t bother bringing a tripod with me. I forgot to bring my polarizing filter and step-up rings which made shooting at the venue a bit more difficult because of the many reflections.

ribbitting colours image 3

NIKON D800 + NIKKOR 105mm f/2.8 @ 105mm, ISO 5000, 1/40, f/16.0

Once I arrived at the venue I decided to start shooting with my D800 and Nikkor 105mm micro f/2.8, taking special care to take an image of the information sign at each display so I could remember the name of each frog species on display.

ribbitting colours image 4

NIKON 1 V2 + 1 NIKON 70-300mm f/4.5-5.6 @ 126.4mm, ISO 800, 1/50, f/5.0

After completing my first round through the displays I then mounted my 85mm f/1.8G on one of my Nikon 1 V2 bodies with the FT-1 adapter. I soon discovered that this lens did not focus closely enough to be of any real use, so it quickly got returned to my camera bag. I then gave the Nikkor 105mm a try on one of my V2’s and found this combination was quite helpful in getting various specimens to fill the frame so I could minimize cropping in post.

ribbitting colours image 5

NIKON 1 V2 + 1 NIKON 30-110mm f/3.8-5.6 @ 80.1mm, ISO 1600, 1/13, f/5.6

On my third trip through the exhibits I used my V2’s and 1 Nikon lenses along with the Vello Extension Tubes and I was able to capture a number of useable images with these combinations. I did my best to keep my shutter speeds at reasonable levels but I ended up taking a few images at under 1/30th.

ribbitting colours image 6

NIKON 1 V2 + 1 NIKON 30-110mm f/3.8-5.6 @ 77.1mm, ISO 1600, 1/160, f/5.6

For the last hour of my four hour visit I just wandered around the various displays, checking on some specific species to see if any of the frogs had physically moved to allow me to get some better images.

ribbitting colours image 7

NIKON 1 V2 + NIKKOR 105mm f/2.8 @ 105mm, ISO 1600, 1/100, f/6.3

In order to minimize glare I shot right up against the glass of the display cases whenever possible. I purposely wore a black cotton cargo jacket to help cut down my own reflections in the display cases. A few times I took my jacket off to create some shade or remove glare on the exhibits.

ribbitting colours image 8a

NIKON 1 V2 + 1 NIKON 70-300mm f/4.5-5.6 @ 82.9mm, ISO 3200, 1/160, f/5.6

I also looked for specific positioning of the frogs and tried to capture a range of views, as well as mixing in whole body images with various close-ups.

ribbitting colours image 9

NIKON D800 + NIKKOR 105mm f/2.8 @ 105mm, ISO 2500, 1/60, f/9.0

To help reduce distortion from the glass panels in the display cases I tried to shoot directing through the glass rather than on an angle. It was also beneficial to change my shooting angle and in many instances I got some interesting images by getting down close to the floor.

ribbitting colours image 10

NIKON 1 V2 + 1 NIKON 70-300mm f/4.5-5.6 @ 149.4mm, ISO 1600, 1/20, f/5.6

Overall I found that my D800 along with my Nikon 1 gear were ideal shooting companions and I got a reasonable number of useable images with each set-up.

ribbitting colours image 11

NIKON 1 V2 + 1 NIKON 30-110mm f/3.8-5.6 @ 100.9mm, ISO 1600, 1/30, f/5.6

The various species of frog each seemed to have its own personality. Some like the African Bull Frog looked like an old man with a stern, grumpy demeanor. Others like the Amazon Milk Frog had a cherub-like appearance with a perpetual smile, while the Waxy Monkey Frogs exuded a serene and contemplative air.

ribbitting colours image 12

NIKON D800 + NIKKOR 105mm f/2.8 @ 105mm, ISO 2500, 1/125, f/9.0

To view more frog images captured at the Royal Botanical Gardens click on the YouTube link below.

Special Note to Readers: When using my Vello Extension Tubes for Nikon 1 to capture some images for this article I noticed that some of the flange surfaces had cracked and broken off causing a very weak connection to my V2 camera bodies. I strongly suggest that any readers that have bought these tubes inspect them before each use to ensure they are not damaged and that they fit snuggly.

Article, all images and YouTube video are all Copyright Thomas-Stirr. All rights reserved. No use, duplication or adaptation of any kind Is allowed without written permission.

The post A Ribitting Morning appeared first on Photography Life.

Venus Optics KX800 Macro Flash Review

$
0
0

Macro photographers tend to struggle with two crucial variables when lighting their subjects. First, high-magnification macro photography usually involves apertures between f/16 and f/32. To use an aperture this small, you need a high-powered flash — especially if you want to use a diffuser. The second major issue is that many macro photographers work with just one on-camera flash, meaning that the lighting can appear flat and dull, even when diffused. So, when Venus Optics announced their alien-looking KX800 dual flash, I was excited to see that they had put considerable effort into solving these two major problems.

The KX800 claims to be the brightest dual flash on the market, period. With a guide number of 190 feet (58 meters) at ISO 100, it handily lives up to this claim. The brightness of the KX800 certainly helps with macro photography, making it easier to diffuse the flash and still keep your ISO down to reasonable levels.

The main claim to fame of the KX800 is not its brightness, though — the KX800’s best feature is its ability to position the flash heads so flexibly. The KX800 features two flashes (on the left and right sides) and one LED light (in the middle). Each of these lights is on its own flexible arm, making it possible to position them however you want. As far as I have seen, no other product on the market affords users this much flexibility for lighting a macro photo. Plus, when you consider that the KX800 costs just $279, far less than any other dual macro flashes, it seems like Venus Optics has created a winner.

KX800

1) Specifications

  • Guide Number: 190 feet (58 meters) at ISO 100
  • Flash Time: 1/20000 to 1/200 second
  • Output Settings: Eight power levels (1/1 to 1/128)
  • Recycling time: 2-5 seconds
  • Shots per charge: 100 to 1500, depending upon the power setting
  • Flash color temperature: 5600 K
  • Battery type: Four AA batteries
  • Exposure modes: Manual only; each flash can be controlled independently

2) Construction

The KX800 has three arms: two flashes, and one LED light in the middle. These three flexible arms give you a lot of leeway with your lighting setups, which very few macro flashes can do.

Parts of the design feel a bit flimsy, but this isn’t much different from Nikon’s own (and far more expensive) R1C1 kit. The flash arms themselves feel acceptably made, but the larger mechanism that attaches to the camera feels like it is constructed more cheaply. For example, the red light to show the power setting will bleed over to the other squares, as shown below.

KX800

To attach the flash to the camera hot shoe, you spin a plastic screw on the KX800 until the flash is locked in place. However, this mechanism is not perfect. When the screw is tightened a normal amount, the flash can still be removed from the camera without too much force. However, if you tighten the screw too much, it becomes unreasonably difficult to unscrew again. I wish that the KX800 used a locking switch (like most Nikon flashes), although I’d imagine that such a mechanism would be more expensive.

The last issue is that, on occasion, my KX800 would choose not to fire, even with a full battery. I soon realized that this was because the flash had slipped slightly out of the camera’s hot shoe — something that I couldn’t fix by tightening the plastic screw, since I was worried that I then wouldn’t be able to unscrew it! This problem didn’t happen much, but I had to be aware of the issue whenever I repositioned the flash arms.

On the positive side, the flash arms themselves are constructed quite well, and (importantly) they stay locked in place without drooping. If the flashes slipped from the position I wanted, the entire system would be all but useless for me. Luckily, the KX800’s flash arms are extremely nice — easy to adjust, yet also quite strong.

Ultimately, any design-related issues with the KX800 are not fatal. The build quality is actually quite acceptable, especially considering that the KX800 is such a revolutionary product. It may look a bit alien, and its construction certainly could be improved, but I believe that it is still the most practical macro lighting solution available today.

Cilantro

D800e + 105mm f/2.8 @ 105mm, ISO 100, 1/250, f/16.0

3) Operation

The KX800 is easy to operate, and quite intuitive. To turn on and then change the brightness of each flash, just press the – or + buttons on the side you want to change. To turn off the left or right flashes, press the left or right buttons on the control pad. To turn on and change the brightness of the LED light, press the up and down buttons on the control pad. Finally, the “pilot” button will fire a test shot at low power. I still don’t know what the center button does, although the flash beeps if you hold it down long enough.

I have been extremely happy to see that, even at just 1/32 power (my go-to without a diffuser), the KX800 is bright enough that I can shoot a 1:1 macro photo at ISO 100 and f/16 without underexposure.

Clover Bee

D800e + 105mm f/2.8 @ 105mm, ISO 100, 1/250, f/16.0

Note that the KX800 is a manual-only flash. I was initially a bit worried about the lack of a TTL (automatic) mode, but honestly it has never been an issue in practice. I have yet to see a flash setting that exposes one subject well, yet vastly over/underexposes another. Although a TTL mode would be nice, I am perfectly content without one on the KX800.

In using the KX800, my goal has been to find the most natural-looking ways to position the flash that I can. Although I am sure that better setups exist, I have come up with one in particular that works quite well for me. I set up the flashes (at equal power) as follows: I will put one flash low, in front of, and to the right of my subject. The other flash is the opposite — above, behind, and to the left of the subject. I make sure to line up the flashes so that their light intersects diagonally with the subject. This setup gives a wonderfully three-dimensional feel to the subject, which looks both natural and dramatic.

Dandelion

D800e + 105mm f/2.8 @ 105mm, ISO 100, 1/250, f/20.0

If you want to diffuse your macro flash, you will find the extreme brightness of the KX800 to be very useful. By pointing both (diffused) flashes at your subject from above and in front, you can light your image to look quite natural. Note that you’ll need to design your diffusers so that their weight doesn’t drag down the arms of the KX800.

The KX800 is great for experimenting, and some situations may call for completely different lighting setups. Try, for example, using one flash at a lower power than the other, or pointing the flashes in a way that causes dramatic shadows. You can even experiment with different colors by buying gels to put in front of the flashes.

Note that, because the KX800 can be positioned so flexibly, you may need to pay close attention to objects that are in the path of the flashes. This is especially true given that the flashes won’t increase their brightness automatically if something is in the way, since the KX800 has no TTL mode.

If it is dark when you are photographing macro subjects, focusing (already tough for macro photography) becomes even more of an issue. Although I do not use it much, the LED light on the KX800 is invaluable when I am photographing bugs around sunrise or sunset. I set the LED at a low brightness (to save battery power), then position it directly above the spot where I have set my focus. Even at a moderate brightness level, this LED light is overpowered by the brightness of the flashes themselves, so it has little bearing on the quality of light in the final image.

Finally, the recycle times of the KX800 are wonderful. At the same brightness as my SB-600, the KX-800 recycles about twice as fast. Plus, I get a few hundred shots on the KX800 before it dies, which is impressive considering its output. I’m not sure how Venus Optics managed to make the KX800 so powerful, but I am thoroughly impressed.

Rest

D800e + 105mm f/2.8 @ 105mm, ISO 100, 1/250, f/16.0

4) Conclusion

The KX800 certainly lives up to its reputation as a game-changing flash. No, it is not constructed perfectly, but that is forgivable because it shines in every other way. The KX800 is the brightest, most flexible, and least expensive dual flash on the macro photography market. More than any other flash I have ever used (which includes the SB-600, a ring flash, and the R1C1), the KX800 makes it easy to take macro photos that are well-lit and natural in appearance.

To purchase the KX800 for $279, please visit Venus Optics. (Note that, at the moment, shipping KX800 flashes will be labeled as KR800 instead — this is normal, and your product will still have the stronger arms of the KX800.)

The post Venus Optics KX800 Macro Flash Review appeared first on Photography Life.

Viewing all 46 articles
Browse latest View live